
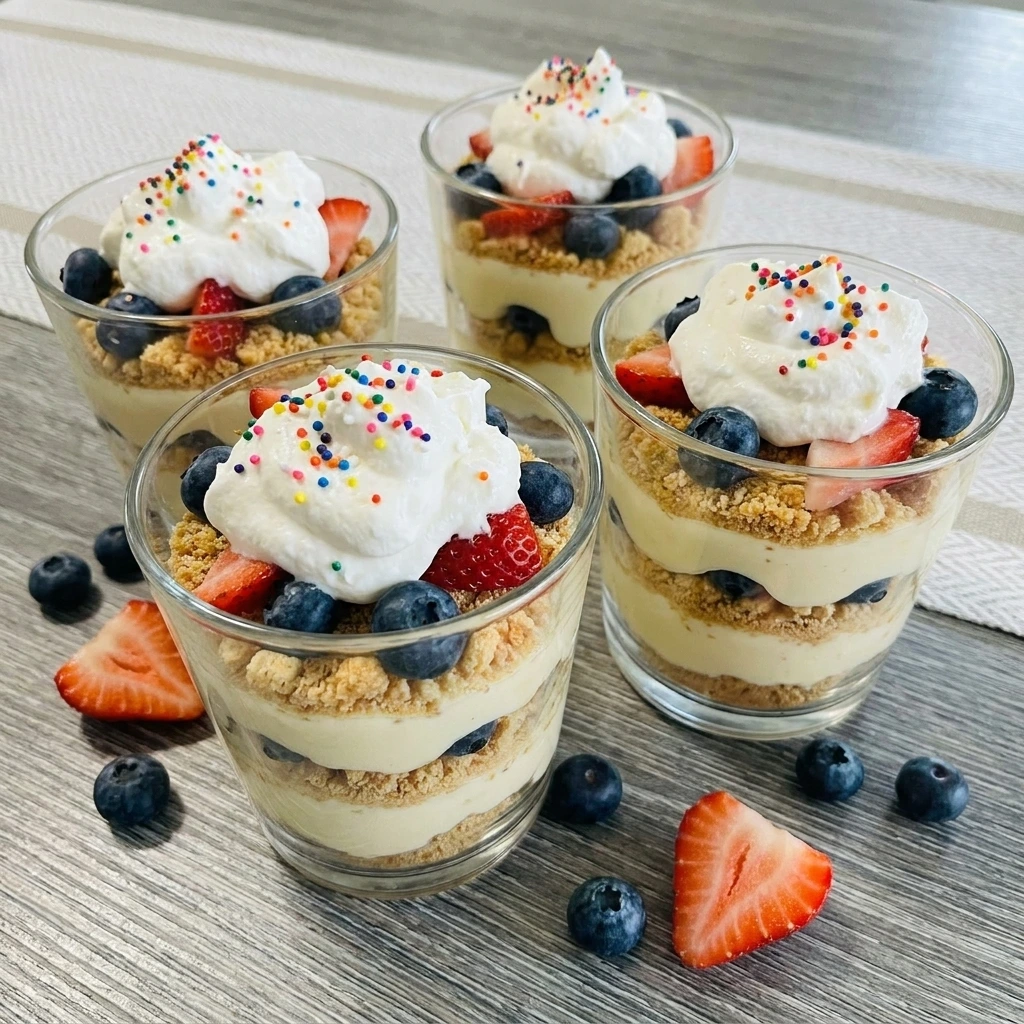
This Vanilla Pudding Dessert Cups recipe is an easy comforting dessert and meanwhile it comes together so quickly with creamy pudding layers and soft whipped topping and crunchy cookie crumbles. We love party desserts because they bring fun colors and sweet layers to the table and therefore everyone grabs one right away.
We love holidays and family gatherings because treats like these Vanilla Pudding Dessert Cups (Party Idea) always disappear first at the dessert table. If you love simple no bake sweets and meanwhile you want another fun dessert idea then try our No Bake Strawberry Crunch Cheesecake Bites for another creamy party favorite.
Comfort desserts and especially ones that are easy and fun to serve are my favorite kinds of recipes and meanwhile these Vanilla Pudding Dessert Cups (Party Idea) make celebrations feel extra special without a lot of work.
Ingredients
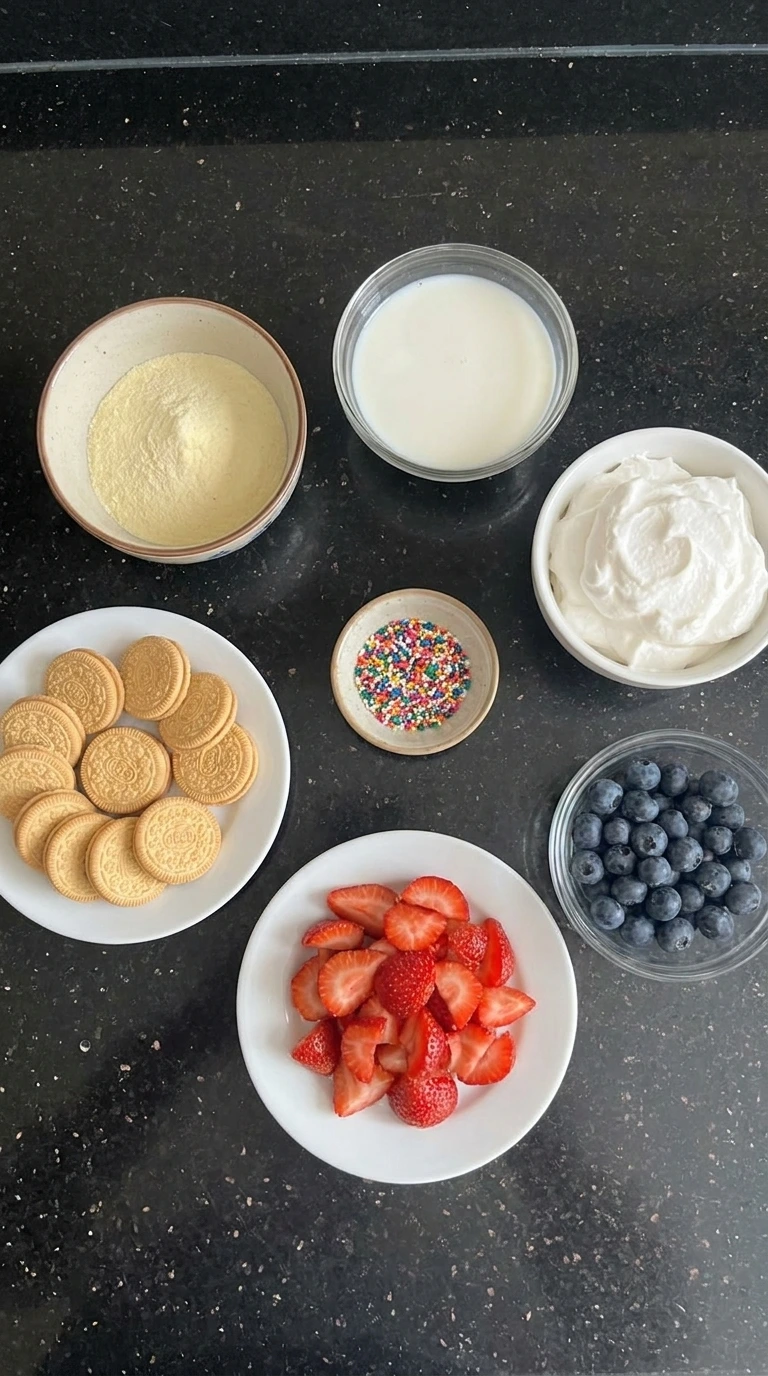
Here is what I use for this recipe and you can adjust nuts or spices based on preference:
- instant vanilla pudding mix: Creates the creamy sweet base and helps the dessert cups set with smooth texture.
- cold milk: Combines with the pudding mix to create a rich and silky filling.
- whipped topping: Adds fluffy texture and light creamy layers throughout the dessert cups.
- vanilla sandwich cookies: Provide crunchy sweet crumbs for layered texture and contrast.
- fresh strawberries: Bring juicy freshness and bright color to the dessert layers.
- fresh blueberries: Add sweet bursts of flavor and colorful decoration.
- sprinkles: Create a festive colorful finish for the top of each cup.
Tools You’ll Need
- mixing bowl: Used for whisking and combining the pudding mixture.
- whisk: Helps blend the pudding mix and milk smoothly.
- spatula: Used for folding whipped topping into the pudding mixture.
- dessert cups: Hold the layered pudding dessert for serving.
Instructions
Step 1: Whisk the vanilla pudding filling
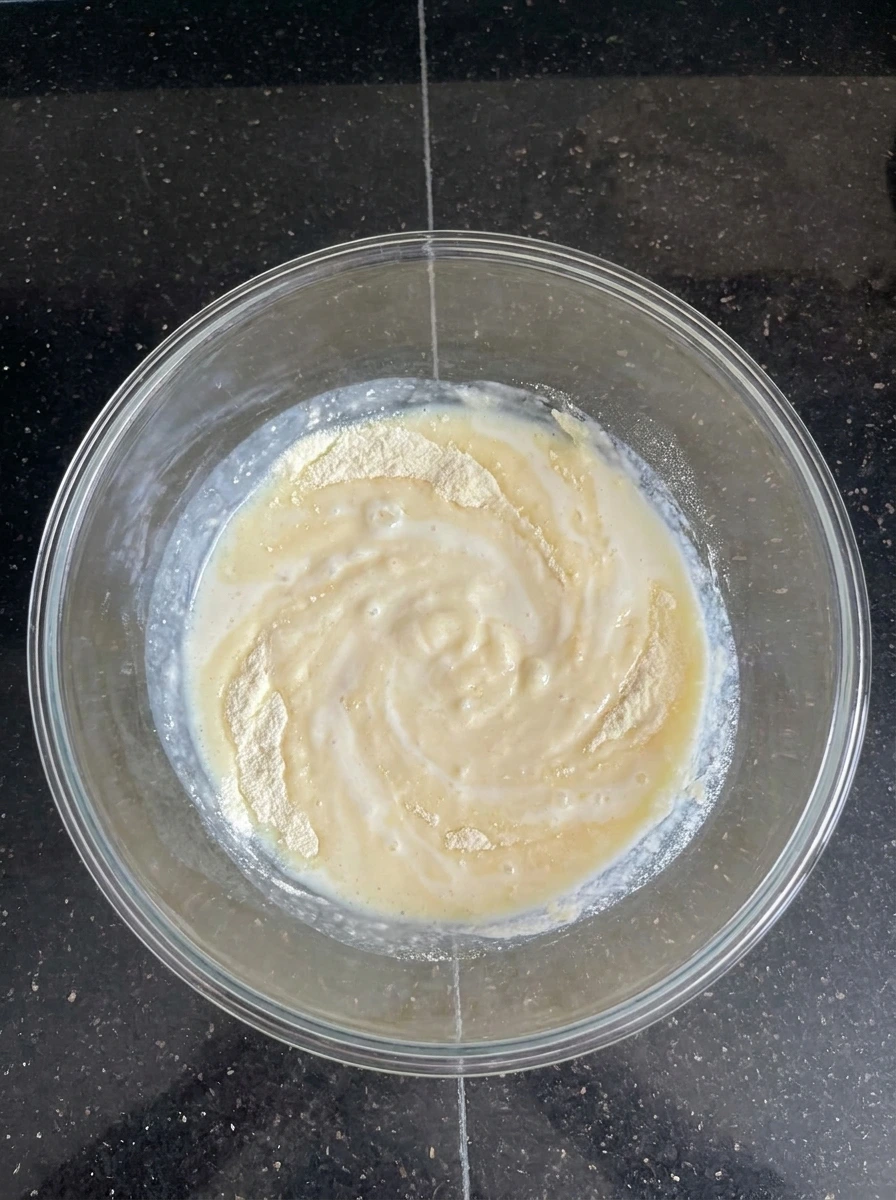
Pour the cold milk over the vanilla pudding mix and meanwhile whisk until the mixture thickens into a creamy pale filling with soft ripples and slight lumps disappearing. The pudding becomes smoother and thicker and therefore the texture changes from thin liquid into a rich creamy mixture that slowly settles into the bowl.
Tip: Whisk quickly for the smoothest texture and meanwhile scrape the sides so the pudding thickens evenly without dry patches.
Step 2: Fold whipped topping into the pudding
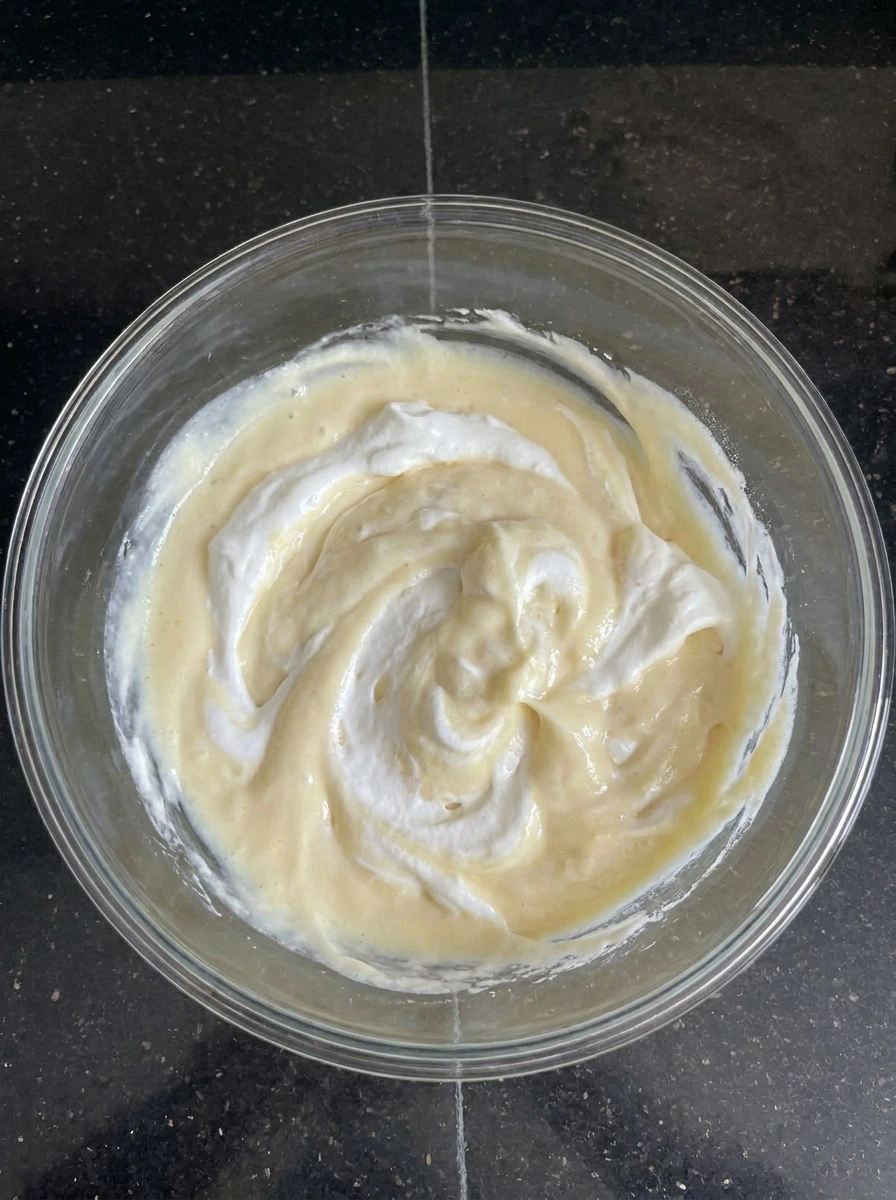
Add the whipped topping into the thick pudding and meanwhile fold gently until fluffy streaks blend into the creamy mixture with soft swirls remaining. The texture changes again because the pudding becomes lighter and airier and therefore the filling looks fluffy with uneven creamy folds throughout.
Tip: Fold slowly instead of stirring hard and meanwhile keep airy swirls for a soft mousse like texture.
Step 3: Layer cookies and pudding into the cups
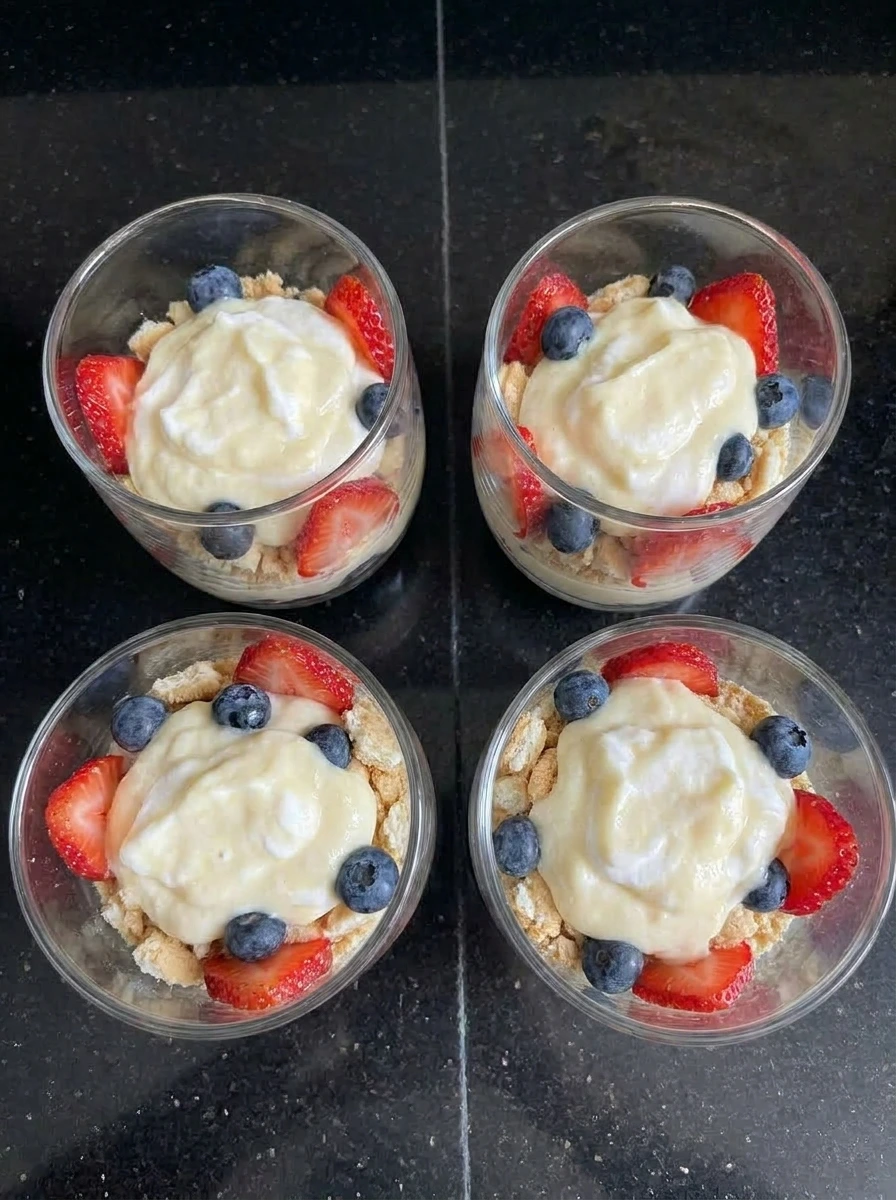
Spoon crushed vanilla cookies into the bottoms of four clear dessert cups and meanwhile add thick pudding filling over the crumbs with uneven layers forming against the sides. Scatter sliced strawberries and blueberries between layers and therefore the cups develop colorful texture with visible cookie crumbs and creamy pudding stacked naturally.
Tip: Press only a few cookie crumbs down and meanwhile leave loose crumbs for a crunchy layered texture.
Step 4: Top the dessert cups and chill
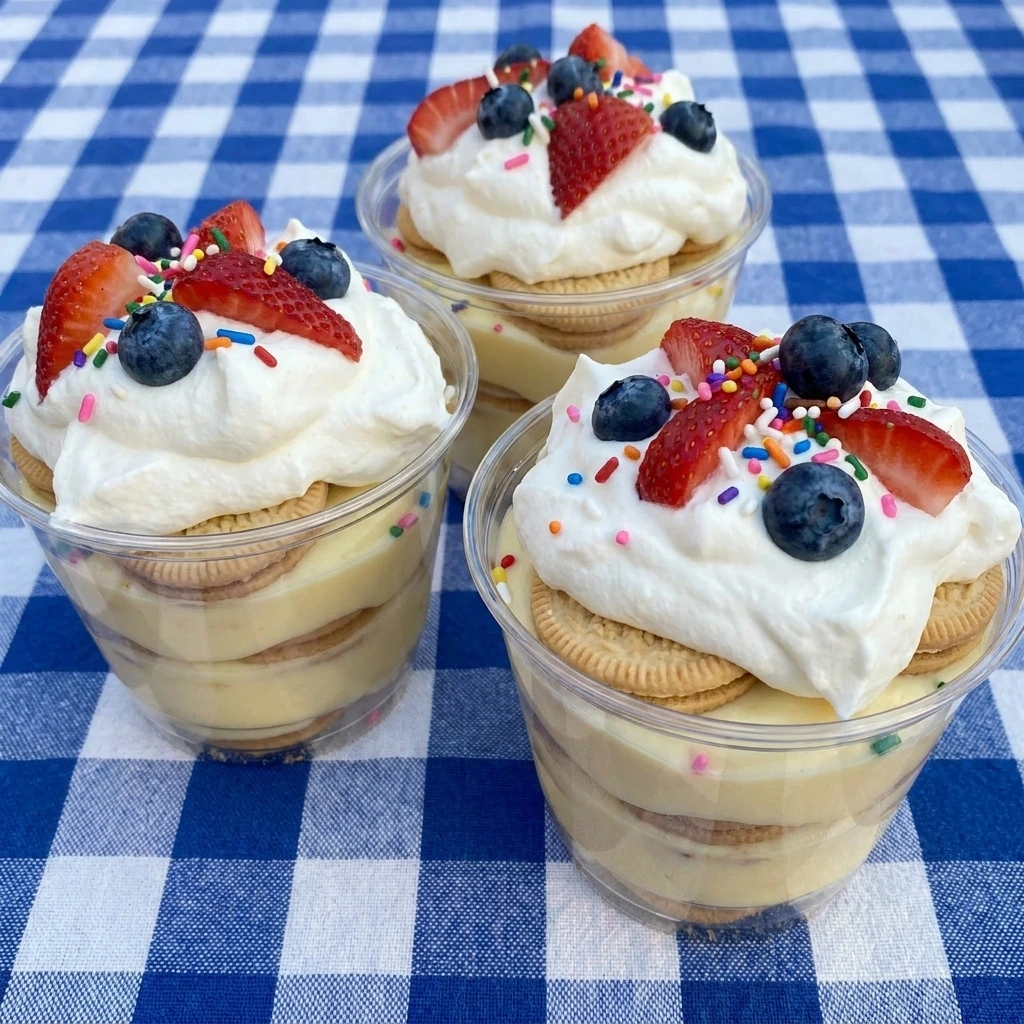
Add extra whipped topping over each dessert cup and meanwhile scatter blueberries and strawberry slices with colorful sprinkles loosely over the tops. The dessert cups now look fully assembled and festive and therefore the creamy layers settle together while the toppings create bright uneven texture and natural homemade decoration after chilling.
Tip: Chill the cups before serving and meanwhile the cookie layers soften slightly while staying pleasantly textured.
Pro Tips
- Crush the cookies unevenly and meanwhile leave some larger pieces for extra crunchy texture inside the creamy pudding layers.
- Use cold milk straight from the refrigerator and meanwhile the pudding thickens faster with a smoother creamy finish.
- Layer the berries loosely instead of perfectly arranging them and meanwhile the cups look more natural and homemade.
- Chill the assembled cups for at least thirty minutes and meanwhile the flavors blend together for the best creamy texture.
Storage Instructions
Store the dessert cups covered in the refrigerator and meanwhile keep them chilled until ready to serve. The pudding stays creamy for about two days and therefore these cups are great for preparing before parties and holidays. Avoid adding extra sprinkles too early because they may bleed color into the whipped topping during storage. Keep the cups loosely covered so condensation does not drip onto the toppings and meanwhile the berry layers stay fresh looking.
Frequently Asked Questions
Yes and meanwhile the cups stay creamy for up to two days when covered and refrigerated before serving.
Freezing is not recommended because the pudding texture may separate and become watery after thawing.
Vanilla sandwich cookies work best because they soften slightly while still keeping a sweet crunchy texture.
Yes and meanwhile raspberries or bananas also pair nicely with the creamy vanilla pudding layers.
See You in the Kitchen
I hope you enjoy all the recipes I share with you and meanwhile this delicious Vanilla Pudding Dessert Cups (Party Idea) recipe is one of my favorite easy treats for celebrations.
I hope you try it and enjoy it and rate it and share it with your friends and family and meanwhile do not forget to try Moose Farts Dessert and Cotton Candy Cheesecake Bombs for even more fun dessert ideas.
Print
Vanilla Pudding Dessert Cups (Party Idea)
- Total Time: 45 minutes
- Yield: 4 servings
Description
Vanilla Pudding Dessert Cups (Party Idea) are the best easy dessert ideas for a quick and simple sweet treat and meanwhile they are creamy and healthy enough for sharing at a party or holiday table. These layered pudding cups come together with fluffy whipped topping and crunchy vanilla cookies and fresh berries and therefore they are perfect for brunch and potluck spreads and busy family celebrations. Everyone loves the smooth texture and fun presentation.
Ingredients
- 2 boxes instant vanilla pudding mix
- 4 cups cold milk
- 2 cups whipped topping
- 16 cookies vanilla sandwich cookies
- 1 cup sliced fresh strawberries
- 1 cup fresh blueberries
- 2 tablespoons sprinkles
Instructions
- Pour the cold milk over the vanilla pudding mix and meanwhile whisk until the mixture thickens into a creamy pale filling with soft ripples and slight lumps disappearing. The pudding becomes smoother and thicker and therefore the texture changes from thin liquid into a rich creamy mixture that slowly settles into the bowl.
- Add the whipped topping into the thick pudding and meanwhile fold gently until fluffy streaks blend into the creamy mixture with soft swirls remaining. The texture changes again because the pudding becomes lighter and airier and therefore the filling looks fluffy with uneven creamy folds throughout.
- Spoon crushed vanilla cookies into the bottoms of four clear dessert cups and meanwhile add thick pudding filling over the crumbs with uneven layers forming against the sides. Scatter sliced strawberries and blueberries between layers and therefore the cups develop colorful texture with visible cookie crumbs and creamy pudding stacked naturally.
- Add extra whipped topping over each dessert cup and meanwhile scatter blueberries and strawberry slices with colorful sprinkles loosely over the tops. The dessert cups now look fully assembled and festive and therefore the creamy layers settle together while the toppings create bright uneven texture and natural homemade decoration after chilling.
Notes
Pro Tips:
- Crush the cookies unevenly and meanwhile leave some larger pieces for extra crunchy texture inside the creamy pudding layers.
- Use cold milk straight from the refrigerator and meanwhile the pudding thickens faster with a smoother creamy finish.
- Layer the berries loosely instead of perfectly arranging them and meanwhile the cups look more natural and homemade.
- Chill the assembled cups for at least thirty minutes and meanwhile the flavors blend together for the best creamy texture.
Storage: Store the dessert cups covered in the refrigerator and meanwhile keep them chilled until ready to serve. The pudding stays creamy for about two days and therefore these cups are great for preparing before parties and holidays. Avoid adding extra sprinkles too early because they may bleed color into the whipped topping during storage. Keep the cups loosely covered so condensation does not drip onto the toppings and meanwhile the berry layers stay fresh looking.
- Prep Time: 15 minutes
- Cook Time: 30 minutes
- Category: Desserts
- Cuisine: American
Nutrition
- Serving Size: 1 dessert cup
- Calories: 320
- Sugar: 28g
- Sodium: 410mg
- Fat: 14g
- Carbohydrates: 44g
- Fiber: 2g
- Protein: 5g
- Cholesterol: 20mg