
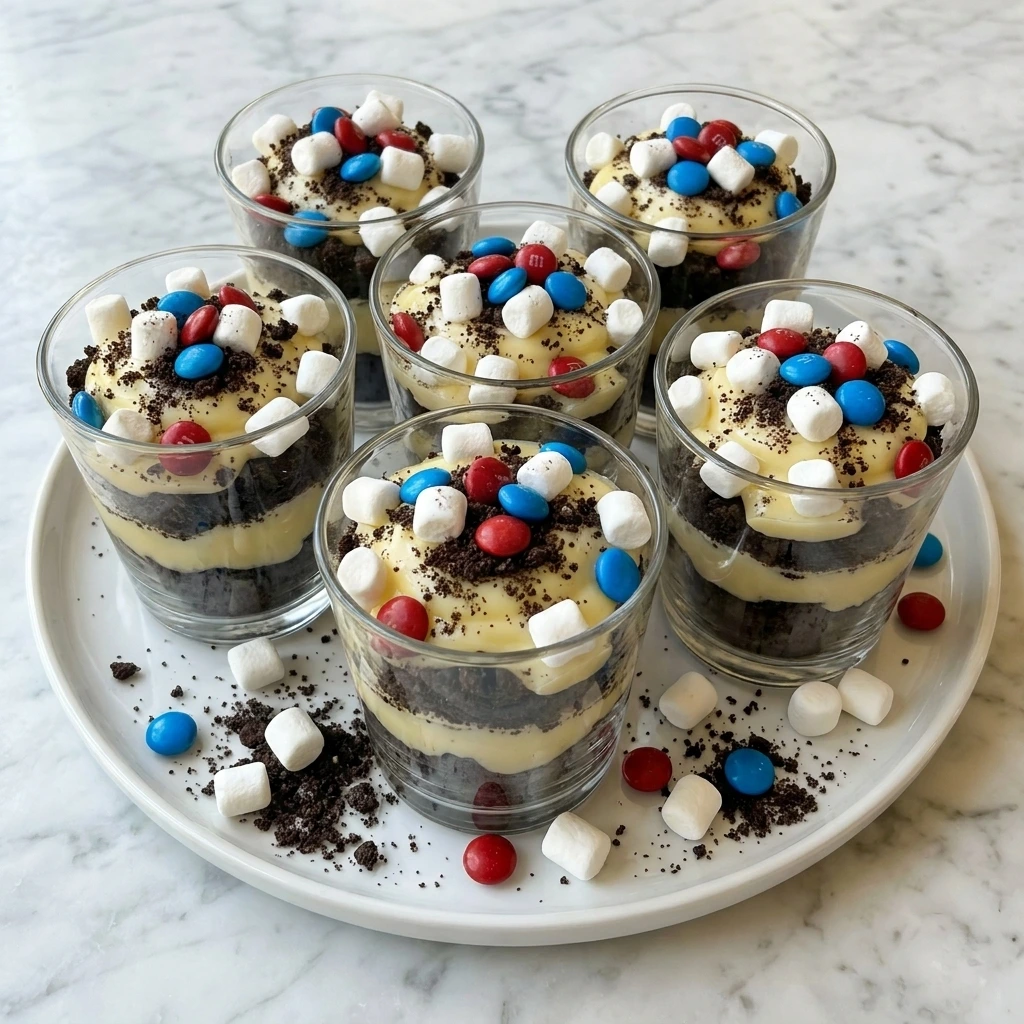
These Red White and Blue Dirt Cups are a fun and easy no bake patriotic treat and meanwhile they require only a few simple ingredients and are perfect for summer holiday dessert tables. In May and June and July all I want to do is make chilled desserts and colorful party treats and meanwhile I cannot get enough pudding cups and cookie bars and cheesecake bites and sweet little layered desserts.
If you love fun no bake desserts and meanwhile you should also try No Bake Strawberry Crunch Cheesecake Bites for another easy summer favorite. But sometimes we just do not have as much time as we want and meanwhile there are cookouts and fireworks and family gatherings and backyard parties happening every weekend.
So these Red White and Blue Dirt Cups are one of our favorite quick desserts to make.
Ingredients
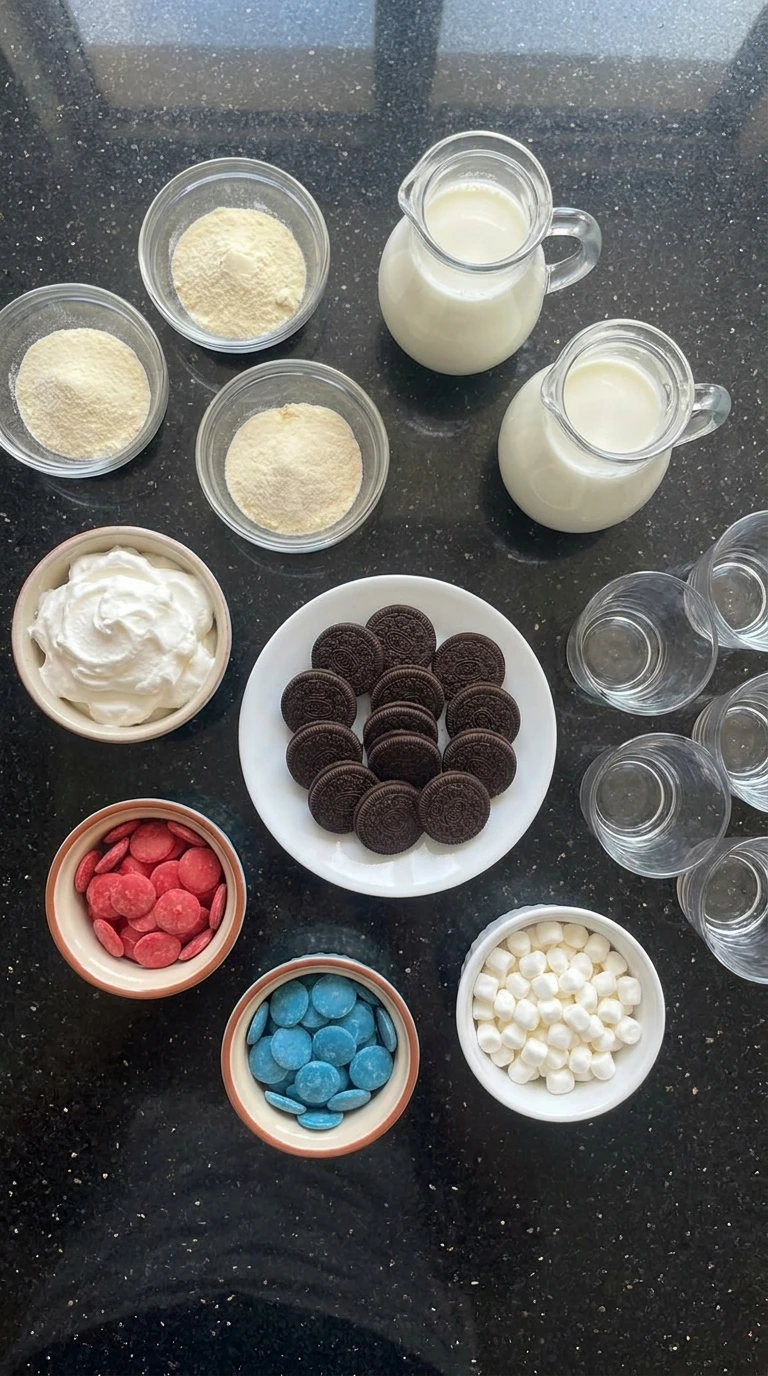
Here is what I use for this recipe and you can adjust nuts or spices based on preference:
- instant vanilla pudding mix: Creates the creamy sweet base and helps the layers stay thick and smooth.
- cold milk: Blends with the pudding mix to create a soft creamy filling.
- whipped topping: Folds into the pudding for a fluffy light texture.
- chocolate sandwich cookies: Crushed into crumbly layers that create the classic dirt cup texture.
- red candy melts: Adds bright red color and sweet crunchy decoration.
- blue candy melts: Adds festive blue color and extra texture.
- mini marshmallows: Creates soft white layers and fluffy contrast.
- clear dessert cups: Showcases the colorful layers and uneven homemade texture.
Tools You’ll Need
- mixing bowl: Used for combining the pudding mixture smoothly.
- whisk: Used for blending the pudding and milk evenly.
- spatula: Used for folding whipped topping into the pudding mixture.
- plastic bag: Used for crushing the chocolate cookies into crumbs.
- clear dessert cups: Used for layering and serving the finished dessert.
Instructions
Step 1: Crush the chocolate cookies
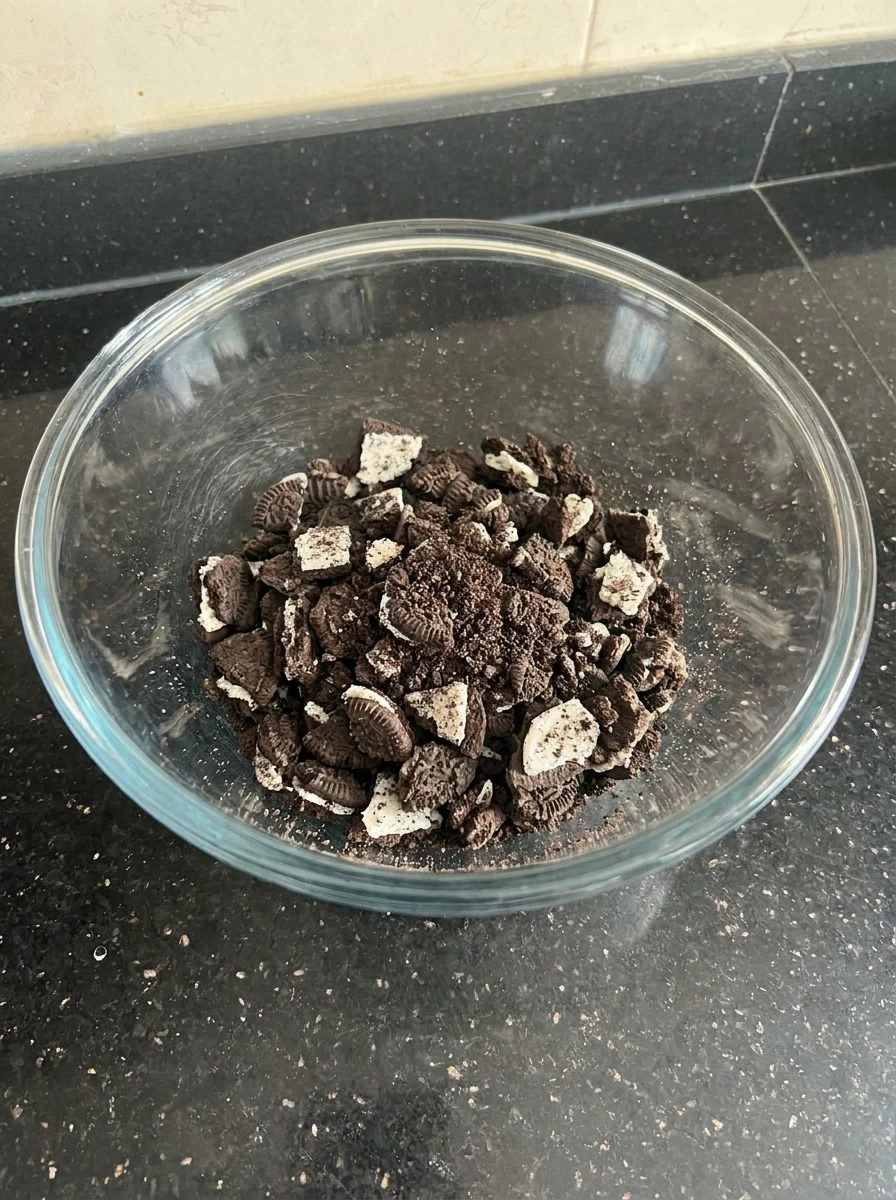
Place the chocolate sandwich cookies into a bag and meanwhile crush them into uneven crumbs with small chunks still visible throughout the mixture. The crumbs should look rough and natural and meanwhile some pieces stay larger while others turn into fine dark crumbs for a homemade dirt texture.
Tip: Leave a few larger cookie pieces for extra crunch and a more natural layered texture.
Step 2: Whisk the pudding filling
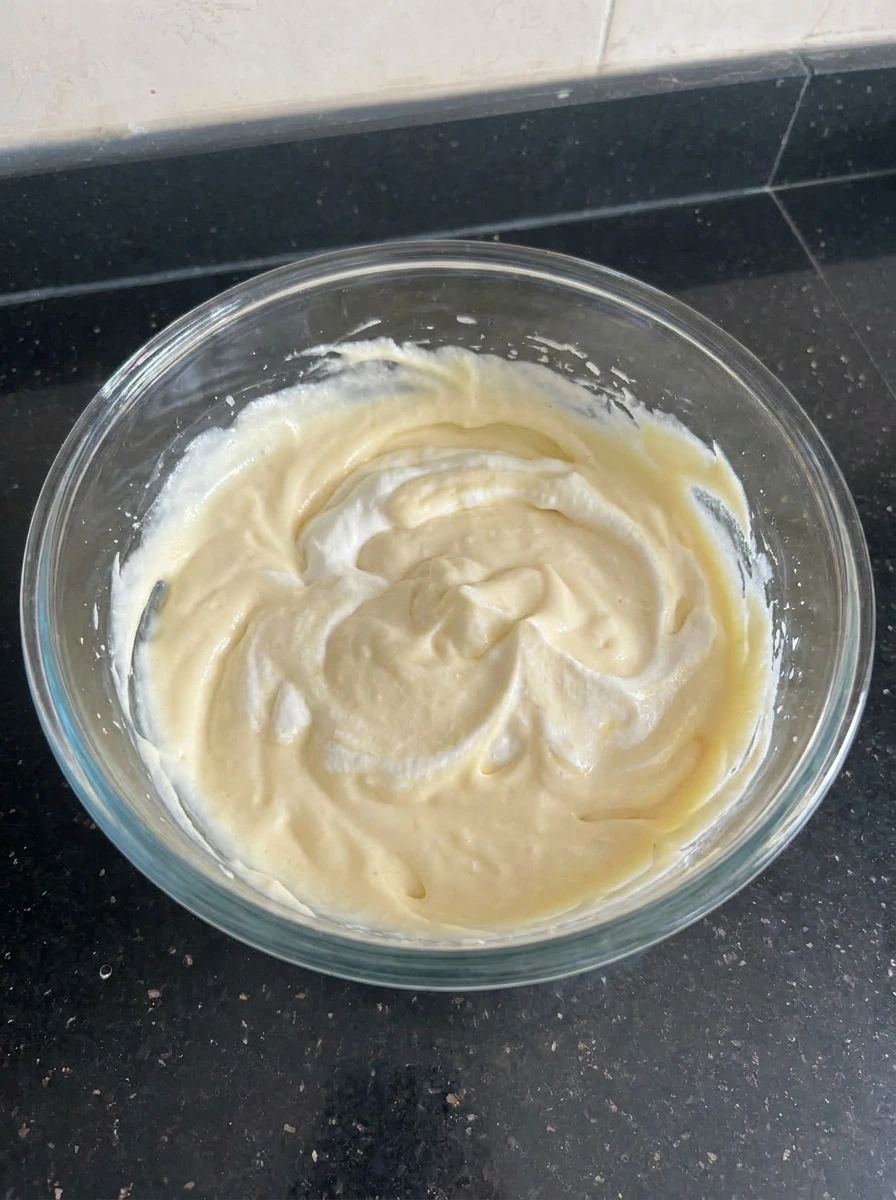
Whisk the vanilla pudding mix with cold milk until the mixture thickens and meanwhile fold in the whipped topping until the filling becomes fluffy and pale. The mixture changes from thin liquid into a creamy cloud like texture and meanwhile soft swirls remain visible throughout the bowl.
Tip: Fold the whipped topping gently so the pudding stays fluffy instead of becoming dense.
Step 3: Layer the dessert cups
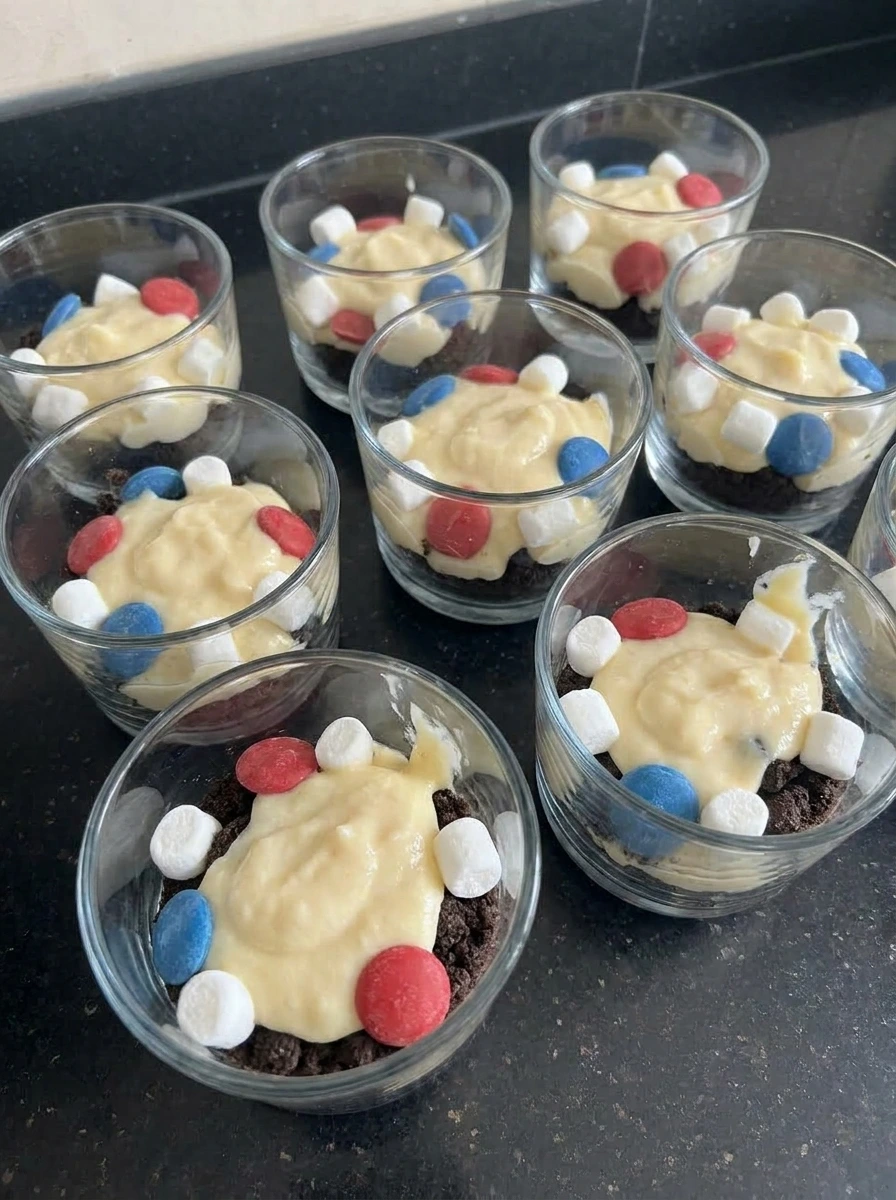
Spoon cookie crumbs into the bottoms of the clear dessert cups and meanwhile add thick layers of pudding filling followed by mini marshmallows and scattered red and blue candy melts. Repeat the layers unevenly so every cup looks slightly different and meanwhile the colorful candies peek through the creamy white pudding.
Tip: Press the first cookie layer lightly so the crumbs stay visible through the sides of the cups.
Step 4: Finish with festive toppings
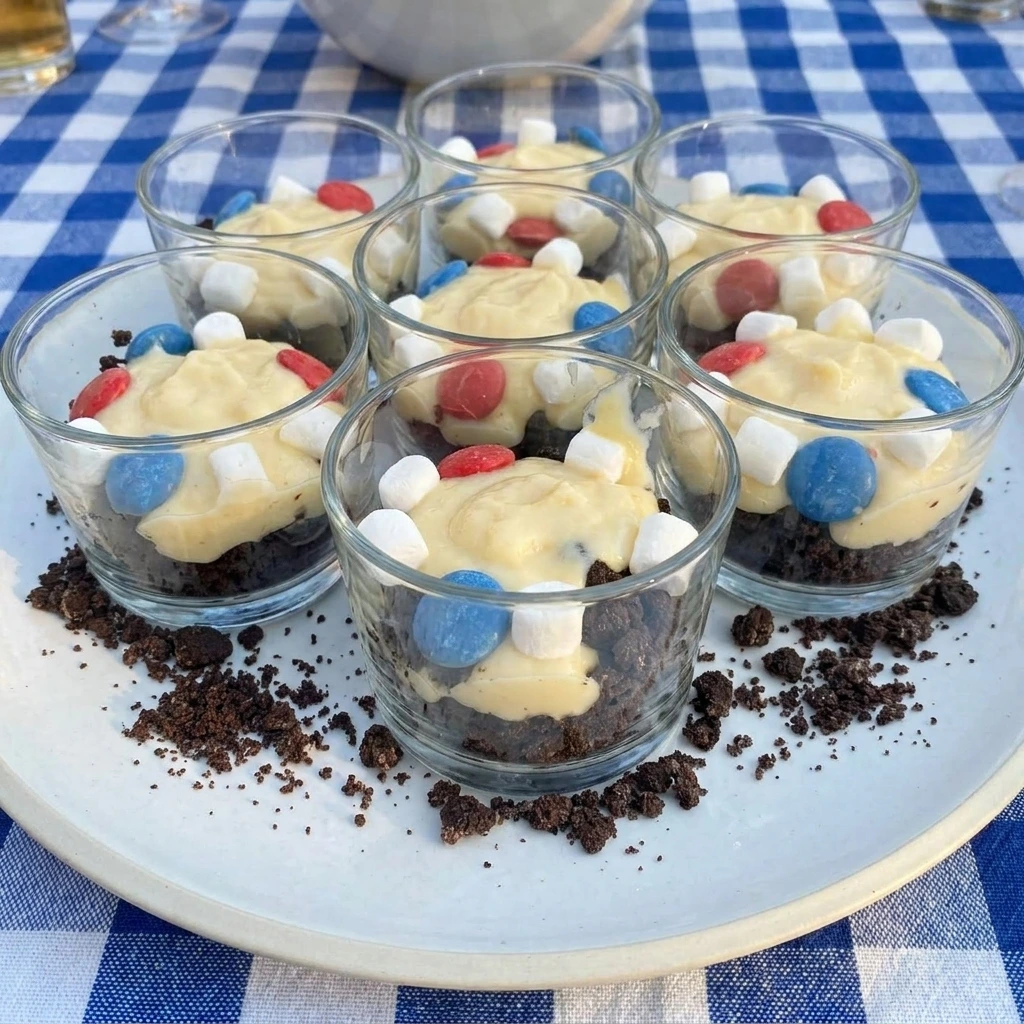
Top each dessert cup with extra cookie crumbs and meanwhile scatter more mini marshmallows and colorful candy pieces across the surface. The finished cups look messy and playful and meanwhile the dark crumbs and bright candies create bold color contrast with the creamy filling.
Tip: Add the final toppings right before serving so the cookie crumbs stay crunchy.
Pro Tips
- Chill the pudding mixture for several minutes before layering and meanwhile the texture becomes thicker and easier to spoon neatly.
- Scatter the candy pieces unevenly between layers and meanwhile every spoonful gets colorful crunch and texture contrast.
- Use clear cups with wide openings and meanwhile the layered colors stay visible and create a more festive homemade presentation.
- Add extra cookie crumbs on top right before serving and meanwhile the crumbs keep their crunchy dirt texture longer.
Storage Instructions
Store the dessert cups covered in the refrigerator and meanwhile keep them chilled until ready to serve. The pudding layers stay creamy for up to three days and meanwhile the cookie crumbs gradually soften into a rich cake like texture. If making these for a holiday party and meanwhile add the final candy toppings shortly before serving to keep the colors bright and crisp. Avoid freezing the dessert cups and meanwhile the creamy filling can separate after thawing. For grab and go party treats and meanwhile keep each cup covered individually with plastic wrap.
Frequently Asked Questions
Yes and meanwhile they stay creamy and delicious when chilled up to twenty four hours before serving.
Chocolate sandwich cookies create the richest dirt texture and meanwhile they soften perfectly in the pudding layers.
Freezing is not recommended and meanwhile the pudding texture can become watery once thawed.
Cover the cups tightly and meanwhile refrigerate them for up to three days for best flavor and texture.
See You in the Kitchen
I hope you try these Red White and Blue Dirt Cups soon and meanwhile they are a simple dessert that looks festive and tastes creamy and crunchy in every bite.
Do not forget to save this recipe for your next holiday gathering and meanwhile if you love fun no bake sweets then also try Moose Farts Dessert and Cotton Candy Cheesecake Bombs for more easy party treats.
Print
Red White and Blue Dirt Cups
- Total Time: 45 minutes
- Yield: 4 servings
Description
These Red White and Blue Dirt Cups are the best easy dessert ideas for summer parties and holiday gatherings and meanwhile they come together with quick and simple layers of pudding cookies and colorful candy toppings. This healthy inspired sweet treat is perfect for brunch and potluck tables and meanwhile the creamy texture and crunchy cookie crumbs make every bite fun and satisfying. They are easy to prep ahead for party trays and simple enough for busy families.
Ingredients
- 2 boxes instant vanilla pudding mix
- 4 cups cold milk
- 2 cups whipped topping
- 24 cookies chocolate sandwich cookies
- 1/2 cup red candy melts
- 1/2 cup blue candy melts
- 1 cup mini marshmallows
- 8 cups clear dessert cups
Instructions
- Place the chocolate sandwich cookies into a bag and meanwhile crush them into uneven crumbs with small chunks still visible throughout the mixture. The crumbs should look rough and natural and meanwhile some pieces stay larger while others turn into fine dark crumbs for a homemade dirt texture.
- Whisk the vanilla pudding mix with cold milk until the mixture thickens and meanwhile fold in the whipped topping until the filling becomes fluffy and pale. The mixture changes from thin liquid into a creamy cloud like texture and meanwhile soft swirls remain visible throughout the bowl.
- Spoon cookie crumbs into the bottoms of the clear dessert cups and meanwhile add thick layers of pudding filling followed by mini marshmallows and scattered red and blue candy melts. Repeat the layers unevenly so every cup looks slightly different and meanwhile the colorful candies peek through the creamy white pudding.
- Top each dessert cup with extra cookie crumbs and meanwhile scatter more mini marshmallows and colorful candy pieces across the surface. The finished cups look messy and playful and meanwhile the dark crumbs and bright candies create bold color contrast with the creamy filling.
Notes
Pro Tips:
- Chill the pudding mixture for several minutes before layering and meanwhile the texture becomes thicker and easier to spoon neatly.
- Scatter the candy pieces unevenly between layers and meanwhile every spoonful gets colorful crunch and texture contrast.
- Use clear cups with wide openings and meanwhile the layered colors stay visible and create a more festive homemade presentation.
- Add extra cookie crumbs on top right before serving and meanwhile the crumbs keep their crunchy dirt texture longer.
Storage: Store the dessert cups covered in the refrigerator and meanwhile keep them chilled until ready to serve. The pudding layers stay creamy for up to three days and meanwhile the cookie crumbs gradually soften into a rich cake like texture. If making these for a holiday party and meanwhile add the final candy toppings shortly before serving to keep the colors bright and crisp. Avoid freezing the dessert cups and meanwhile the creamy filling can separate after thawing. For grab and go party treats and meanwhile keep each cup covered individually with plastic wrap.
- Prep Time: 15 minutes
- Cook Time: 30 minutes
- Category: Desserts
- Cuisine: American
Nutrition
- Serving Size: 1 dessert cup
- Calories: 420
- Sugar: 32g
- Sodium: 380mg
- Fat: 18g
- Carbohydrates: 58g
- Fiber: 2g
- Protein: 5g
- Cholesterol: 15mg