
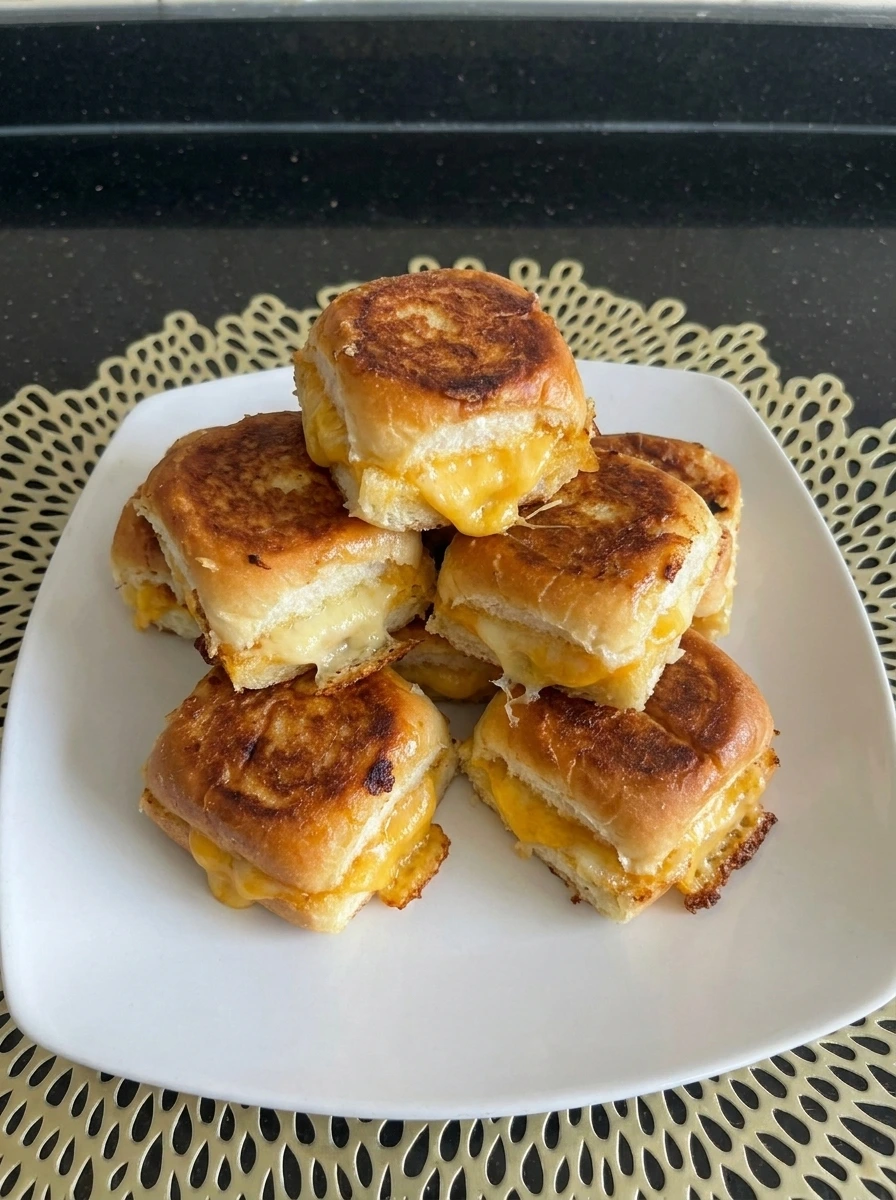
These Mini Grilled Cheese Sliders are a fun and easy baked snack that require only a few ingredients and are perfect for quick gatherings and cozy nights at home.
In busy weeks and especially on weekends I always look for simple comfort foods that feel satisfying and warm and easy to share with friends and family and if you enjoy quick handheld snacks you might also love our Soft Pretzel Bites for another easy idea.
But sometimes we just do not have as much time as we want and we still crave something hot and cheesy and crispy and comforting and that is exactly why these Mini Grilled Cheese Sliders have become one of my favorite quick baked treats.
Ingredients
Here is what I use for this recipe and you can adjust nuts or spices based on preference:
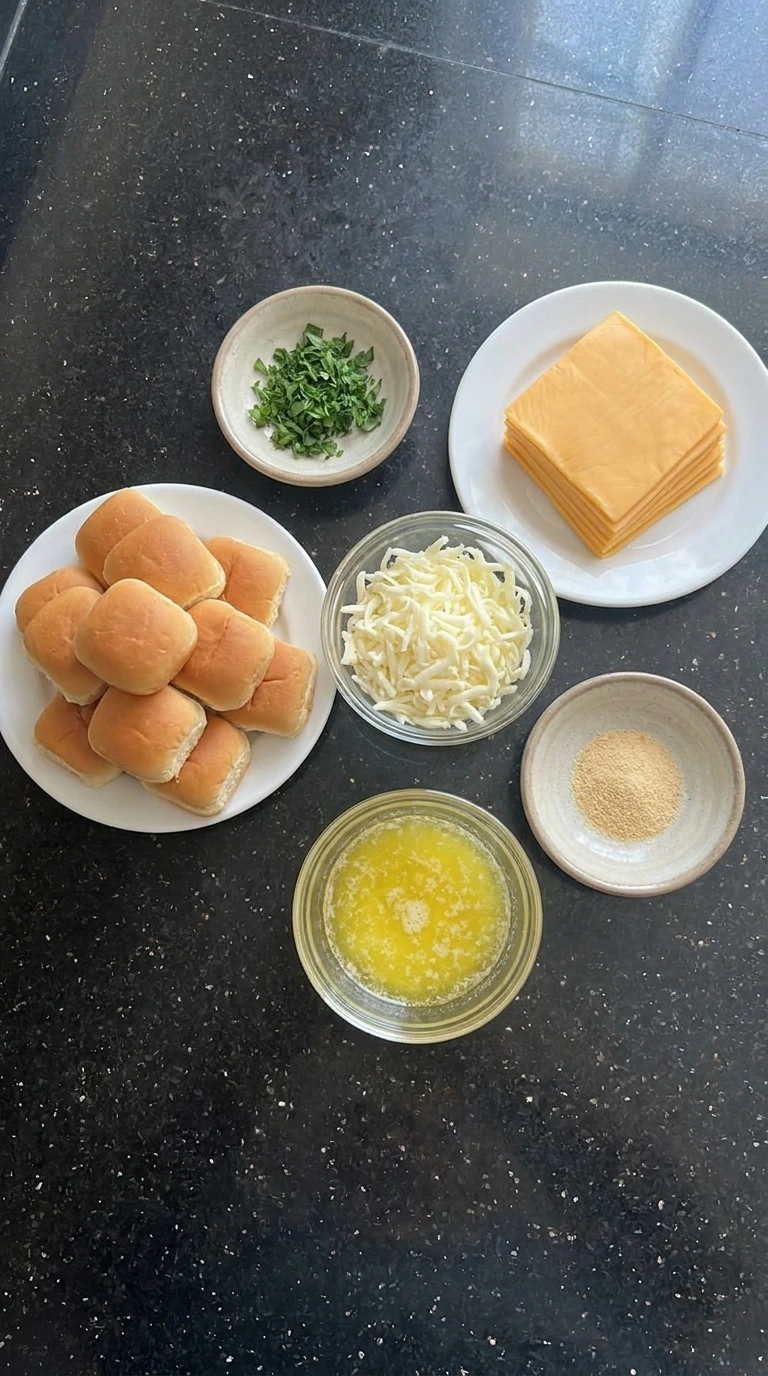
- slider buns: Soft mini buns act as the base structure and hold the melted cheese together while baking.
- cheddar cheese slices: Sharp cheddar melts smoothly and creates rich flavor and gooey texture inside the sliders.
- mozzarella cheese: Adds stretchiness and balances the sharper cheddar for a creamy melt.
- butter: Coats the tops and helps create golden crisp edges during baking.
- garlic powder: Enhances flavor with a warm savory note throughout the sliders.
- parsley: Adds a fresh finish and light color contrast on top.
Tools You’ll Need
- baking dish: Holds sliders together during baking and helps even heat distribution.
- knife: Used for slicing buns and cutting finished sliders.
- brush: Applies butter evenly over slider tops.
Instructions
Step 1: Slice the slider buns
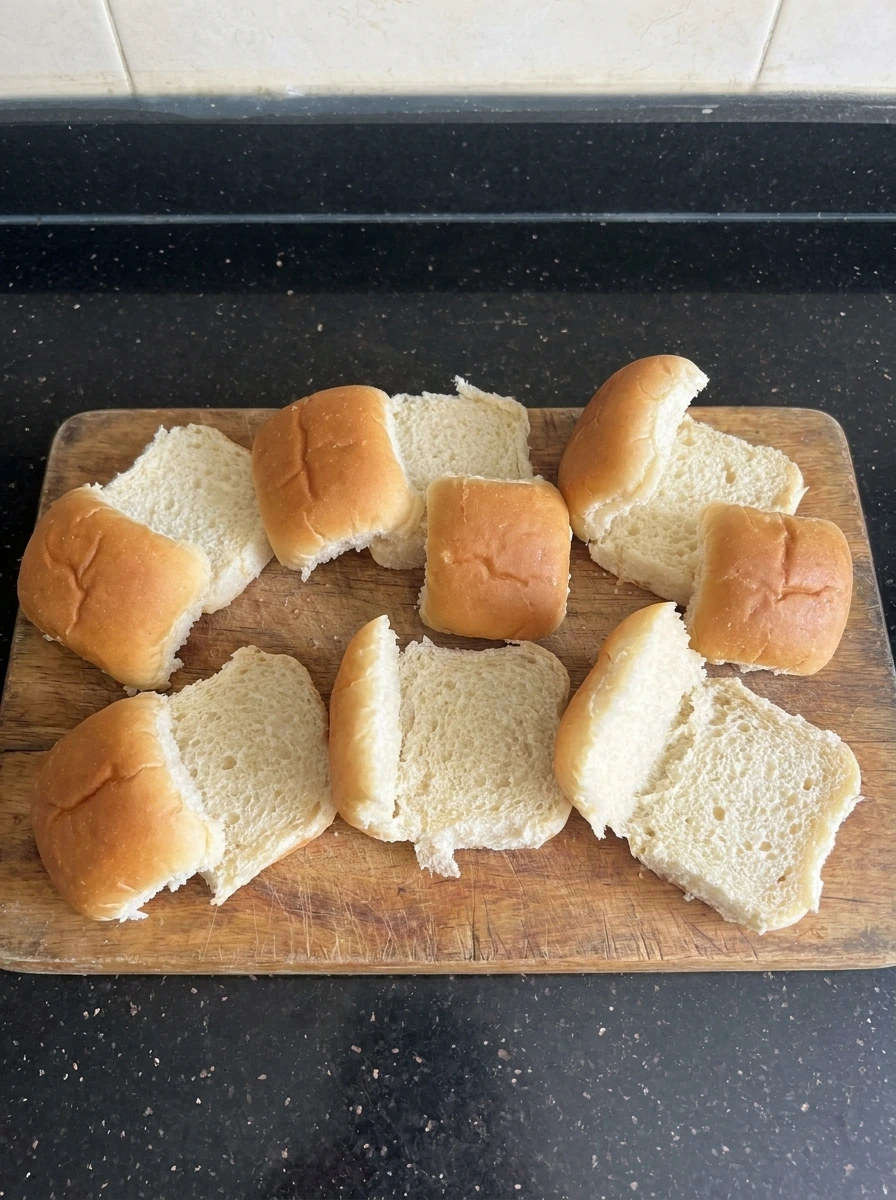
I slice the slider buns horizontally and keep them connected so the base stays intact and this creates a flat layer ready for filling. The buns open slightly uneven and soft edges show natural texture and the inside crumb becomes visible which prepares them for layering.
Tip: Keep buns connected to make assembly faster and easier to handle.
Step 2: Layer the cheese filling
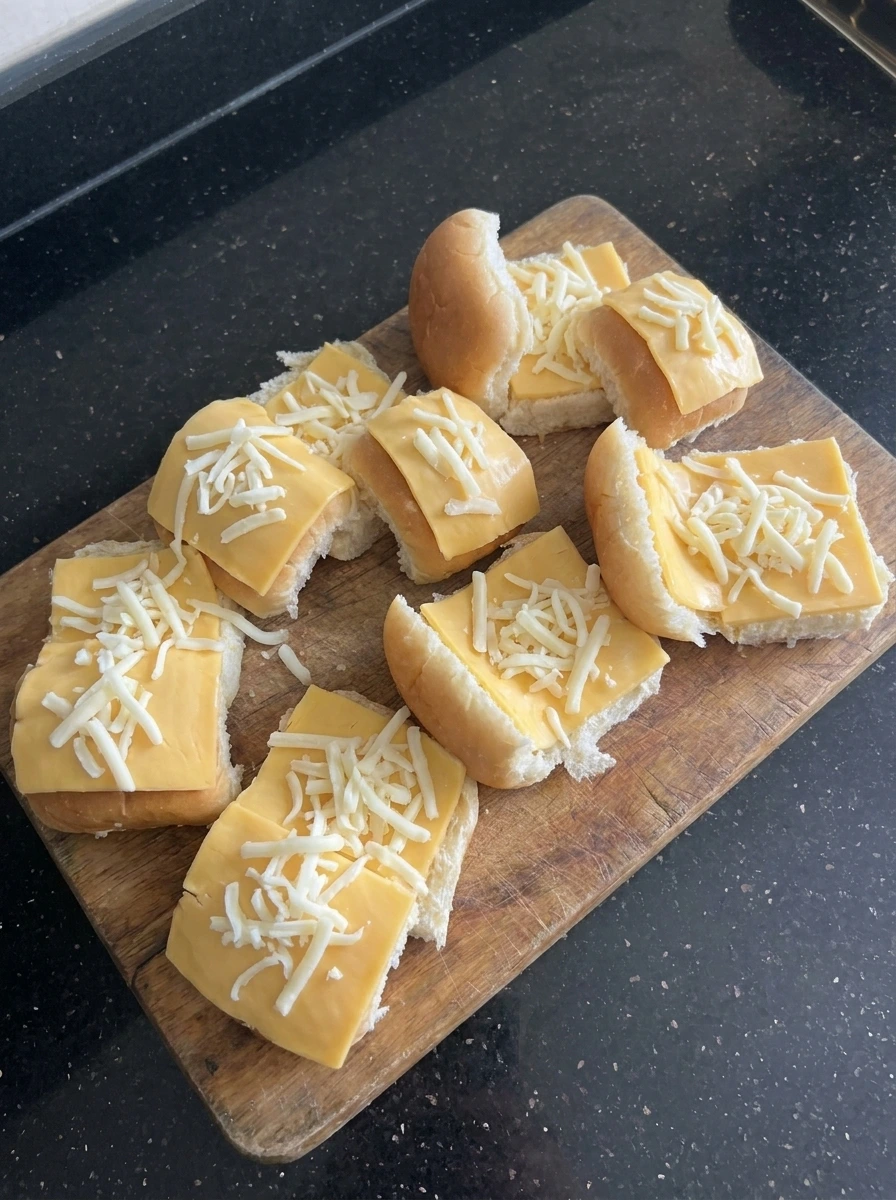
I layer cheddar slices across the bottom then scatter mozzarella on top and the cheeses overlap naturally and unevenly. The filling looks slightly messy and full and cheese pieces vary in size which creates a rich layered look before baking.
Tip: Mixing two cheeses gives better melt and flavor balance.
Step 3: Close and brush with butter
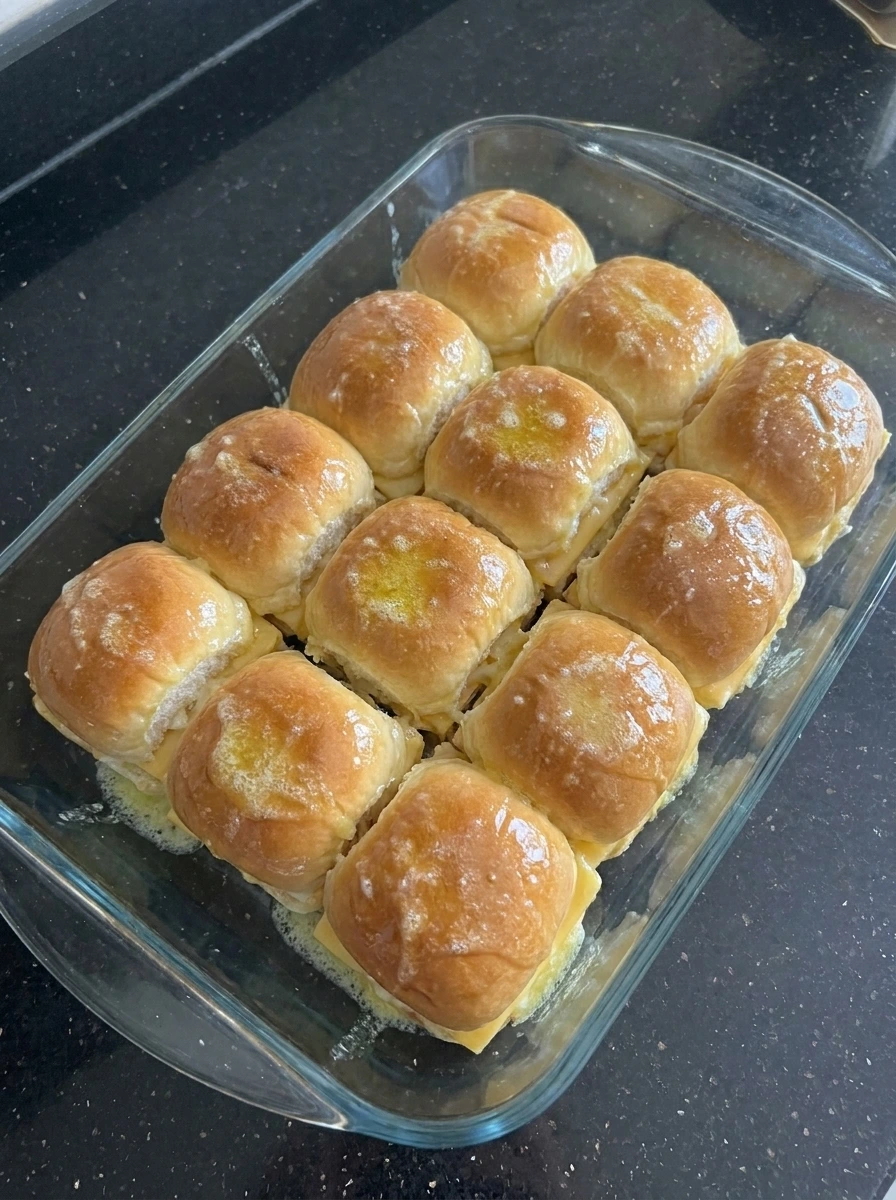
I place the top buns back on and brush melted butter mixed with garlic powder over the surface and the tops become glossy and slightly soaked. The butter spreads unevenly across the buns and some spots look richer than others which adds natural variation.
Tip: Do not oversoak the buns so they stay slightly firm.
Step 4: Bake until melted and golden

I bake the sliders and the cheese begins to melt and bubble while the tops turn golden and slightly crisp. Edges darken in spots and cheese pushes out from sides creating a gooey and rustic appearance with uneven browning.
Tip: Watch closely near the end to avoid over browning.
Step 5: Slice and garnish for serving
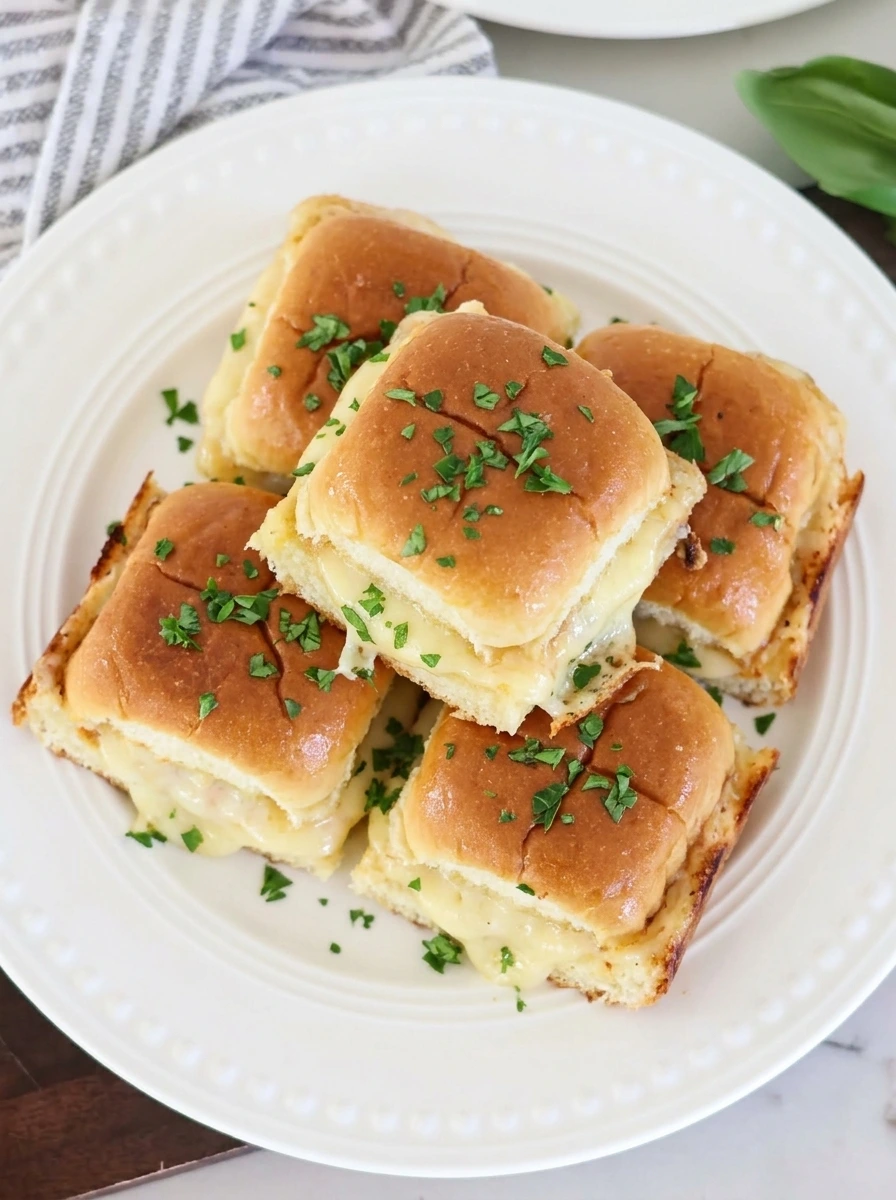
I cut the sliders into individual portions and sprinkle parsley on top and the pieces separate slightly showing melted cheese strands. Each slider looks slightly different with uneven edges and melted cheese stretching which creates a homemade final look.
Tip: Use a sharp knife to keep layers intact while cutting.
Pro Tips
- Use a mix of cheeses to create better melt and flavor depth and this gives both stretch and richness in every bite.
- Bake covered at first then uncover briefly to get a golden top without drying the bread too much.
- Do not overload cheese too much or it may spill excessively and burn on the edges during baking.
- Serve immediately for best texture because cheese firms up as it cools and loses its soft stretch.
Storage Instructions
Store leftover sliders in an airtight container in the fridge and they will stay fresh for up to three days. Reheat in the oven instead of microwave to keep the bread slightly crisp and avoid soggy texture. You can also freeze assembled uncooked sliders and bake directly from frozen with a slightly longer baking time.
Frequently Asked Questions
Yes you can use any melting cheese like gouda or provolone to change flavor while keeping a smooth texture.
You can assemble them ahead and refrigerate then bake just before serving for best freshness.
Bake uncovered at the end and avoid too much butter so the tops stay lightly crisp.
See You in the Kitchen
I hope you try these Mini Grilled Cheese Sliders soon!
They are a simple recipe that looks fun tastes amazing and makes every gathering feel cozy and special and if you want more snack ideas try our Pull-Apart Pigs in a Blanket or our Loaded Nachos Supreme for another crowd favorite.
Print
Mini Grilled Cheese Sliders
- Total Time: 35 minutes
- Yield: 4 servings
Description
Mini Grilled Cheese Sliders are an easy and quick and simple idea that brings the best comfort food into bite size form while staying surprisingly healthy when portioned right and they are perfect for weeknight dinner or meal prep or holiday trays or potluck spreads or brunch gatherings or party snacks and everyone loves the melty cheese and crispy edges in every small sandwich.
Ingredients
- 12 slider buns
- 12 slices cheddar cheese slices
- 1 cup shredded mozzarella cheese
- 4 tablespoons melted butter
- 1 teaspoon garlic powder
- 1 tablespoon chopped parsley
Instructions
- I slice the slider buns horizontally and keep them connected so the base stays intact and this creates a flat layer ready for filling. The buns open slightly uneven and soft edges show natural texture and the inside crumb becomes visible which prepares them for layering.
- I layer cheddar slices across the bottom then scatter mozzarella on top and the cheeses overlap naturally and unevenly. The filling looks slightly messy and full and cheese pieces vary in size which creates a rich layered look before baking.
- I place the top buns back on and brush melted butter mixed with garlic powder over the surface and the tops become glossy and slightly soaked. The butter spreads unevenly across the buns and some spots look richer than others which adds natural variation.
- I bake the sliders and the cheese begins to melt and bubble while the tops turn golden and slightly crisp. Edges darken in spots and cheese pushes out from sides creating a gooey and rustic appearance with uneven browning.
- I cut the sliders into individual portions and sprinkle parsley on top and the pieces separate slightly showing melted cheese strands. Each slider looks slightly different with uneven edges and melted cheese stretching which creates a homemade final look.
Notes
Pro Tips:
- Use a mix of cheeses to create better melt and flavor depth and this gives both stretch and richness in every bite.
- Bake covered at first then uncover briefly to get a golden top without drying the bread too much.
- Do not overload cheese too much or it may spill excessively and burn on the edges during baking.
- Serve immediately for best texture because cheese firms up as it cools and loses its soft stretch.
Storage: Store leftover sliders in an airtight container in the fridge and they will stay fresh for up to three days. Reheat in the oven instead of microwave to keep the bread slightly crisp and avoid soggy texture. You can also freeze assembled uncooked sliders and bake directly from frozen with a slightly longer baking time.
- Prep Time: 15 minutes
- Cook Time: 20 minutes
- Category: Appetizers
- Cuisine: American
Nutrition
- Serving Size: 3 sliders
- Calories: 320
- Sugar: 3g
- Sodium: 480mg
- Fat: 18g
- Carbohydrates: 26g
- Fiber: 1g
- Protein: 12g
- Cholesterol: 40mg