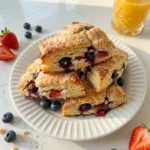

This creamy and colorful Easy Memorial Day Berry Cheesecake Bars comes together with smooth layers and fresh fruit that bring all the sweetness you want from a festive dessert in every bite! With simple ingredients and a quick bake this recipe fits perfectly into your summer plans and satisfies those sweet cravings with very little effort.
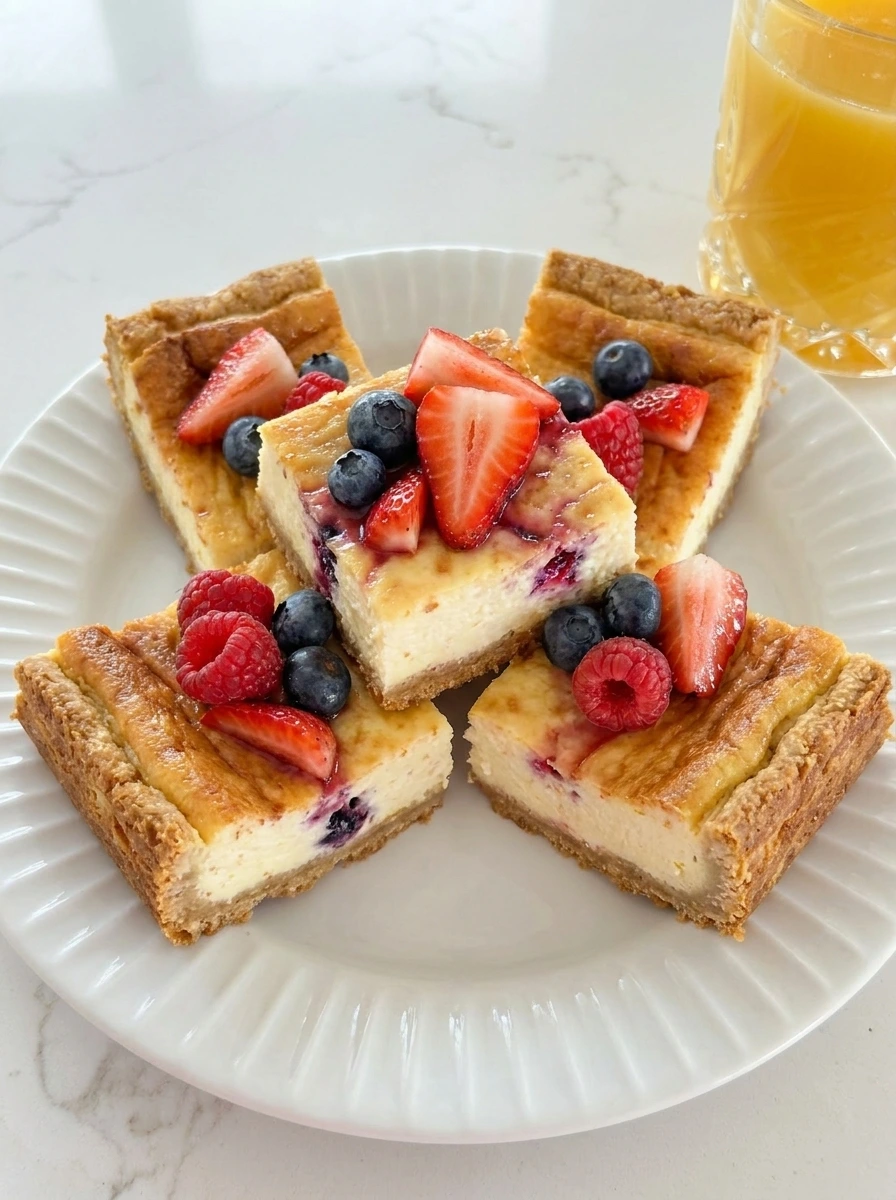
Like classic cheesecake desserts this Easy Memorial Day Berry Cheesecake Bars is perfectly portioned into squares and it layers buttery crust with rich filling and bright berries in a way that feels balanced and fun. Even though it looks impressive it is actually very quick and simple to prepare and if you are planning a full spread you can pair it with savory bites like Cowboy Caviar for a fresh contrast that everyone will enjoy.
And just like other easy party desserts this recipe does not require complicated steps or hard to find ingredients so you can focus on enjoying your time with family and friends. The mix of creamy texture and juicy berries creates a dessert that feels homemade and relaxed while still being perfect for any celebration.
Ingredients
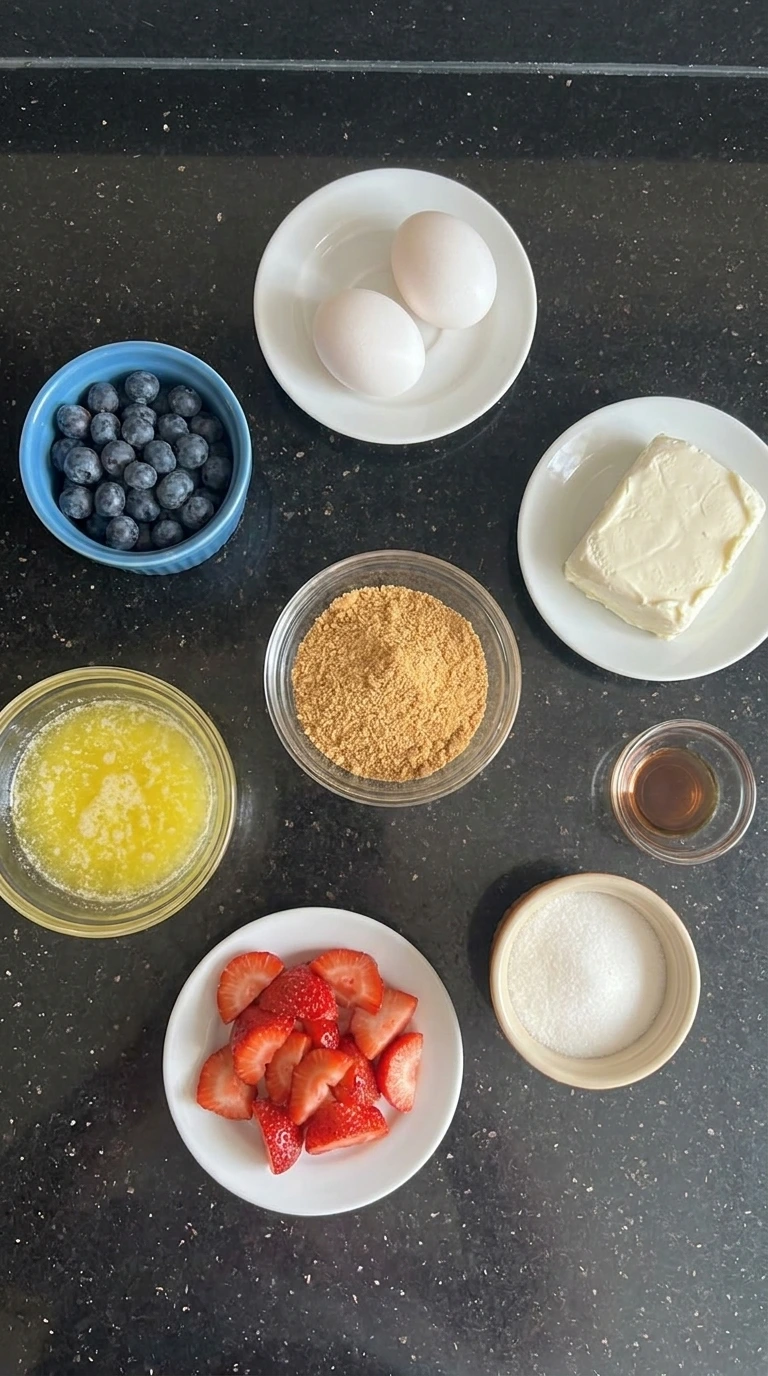
Here is what I use for this recipe and you can adjust nuts or spices based on preference:
- graham cracker crumbs: Provides the base crust and adds a slightly sweet crunchy foundation.
- melted butter: Binds the crust crumbs together and creates a firm base when baked.
- granulated sugar: Sweetens both crust and filling while balancing tanginess.
- cream cheese: Creates the rich creamy cheesecake layer and smooth texture.
- eggs: Helps the filling set and adds structure to the cheesecake.
- vanilla extract: Enhances overall flavor with a warm sweet aroma.
- strawberries: Adds fresh sweetness and bright red color to the topping.
- blueberries: Brings a juicy pop and deep color contrast for visual appeal.
Tools You’ll Need
- mixing bowl: Used to combine filling ingredients smoothly.
- baking dish: Holds the crust and filling during baking.
- spatula: Helps spread filling evenly across the crust.
Instructions
Step 1: Press the graham cracker crust
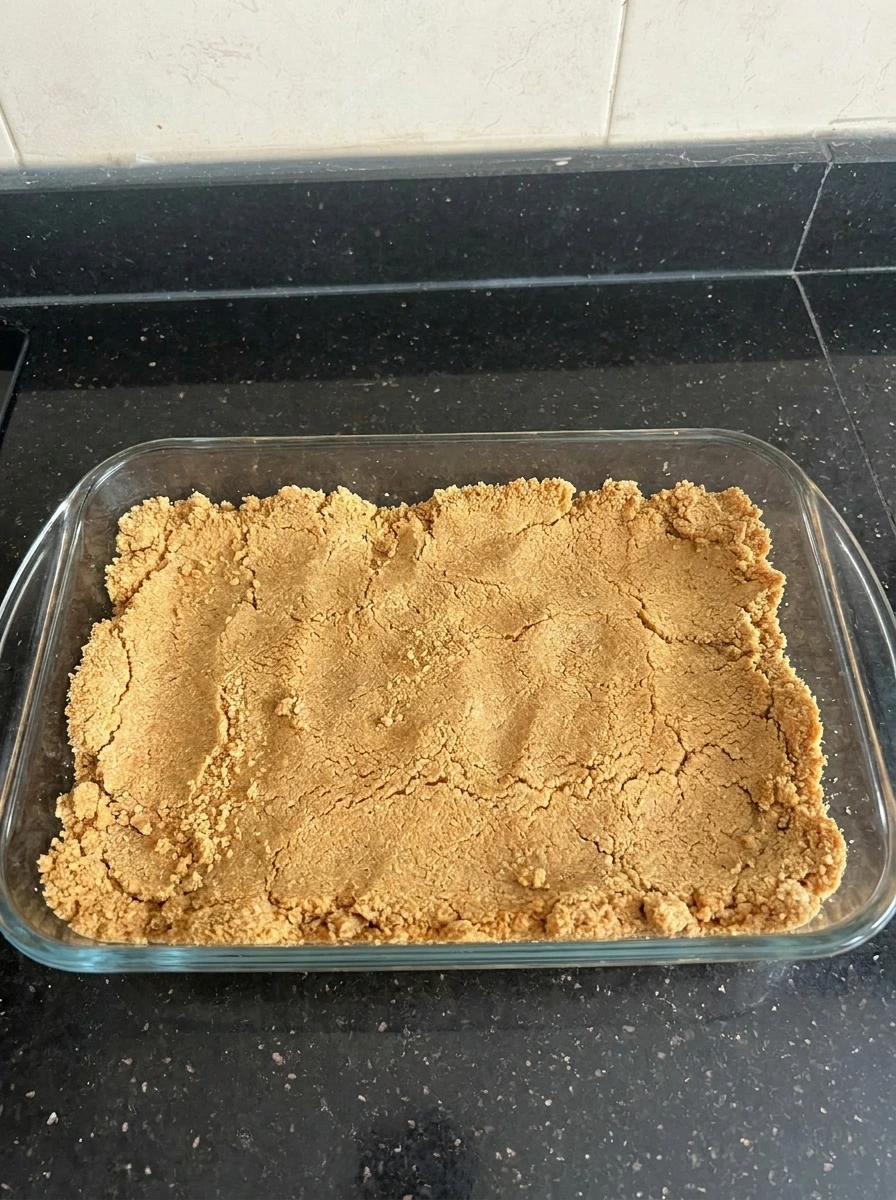
The crumbs combine with melted butter and sugar and form a slightly damp mixture that holds together when pressed and the texture changes from loose crumbs into a compact base. The mixture spreads unevenly as it is pressed down creating a rustic surface with small cracks and natural variations. Once pressed into the pan the crust becomes flat yet imperfect and it holds its shape while still showing uneven edges and crumb clusters.
Tip: Press gently and evenly so the crust holds together without becoming too dense.
Step 2: Mix the cheesecake filling
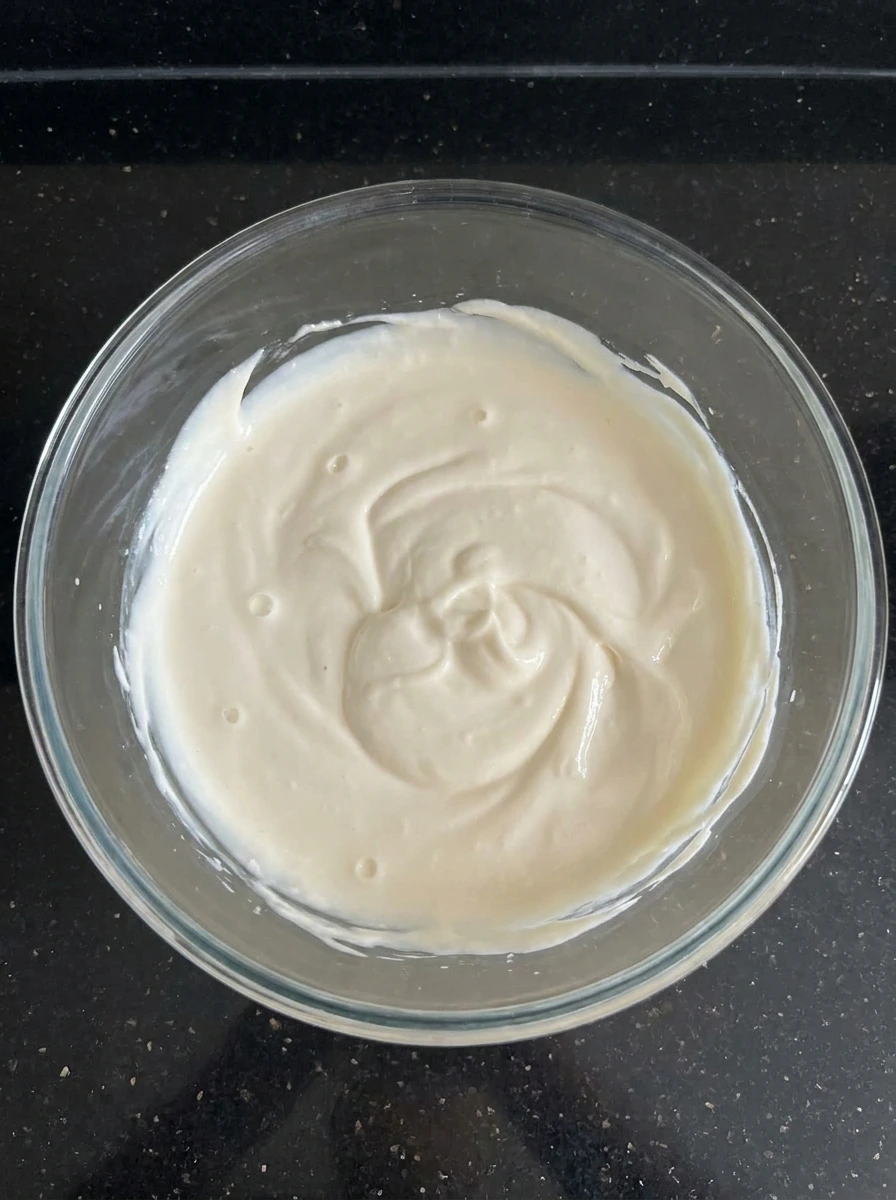
The cream cheese blends with sugar eggs and vanilla and transforms from thick blocks into a smooth creamy mixture and the color shifts to a pale uniform tone. The mixture becomes glossy and slightly fluid while still holding soft peaks. As the ingredients combine fully the filling loses lumps and becomes silky yet slightly thick with subtle air bubbles visible.
Tip: Mix until smooth but avoid overmixing to prevent excess air bubbles.
Step 3: Pour and spread the filling
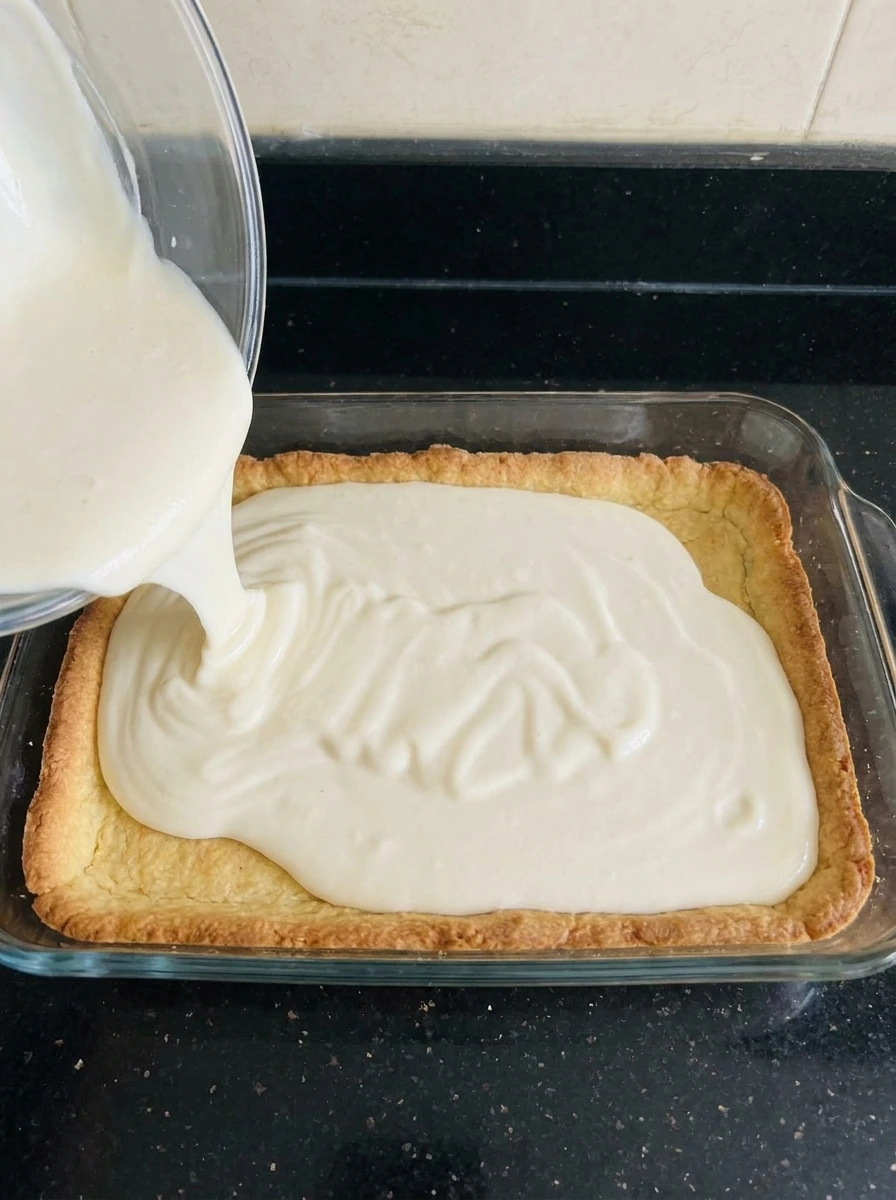
The creamy filling pours over the crust and slowly spreads outward covering the base while small uneven waves form on the surface. The mixture settles naturally with slight dips and thicker areas. The top becomes smooth yet imperfect with gentle swirls showing how it was spread across the crust.
Tip: Spread lightly to keep the texture airy and avoid flattening too much.
Step 4: Bake until set and slightly golden
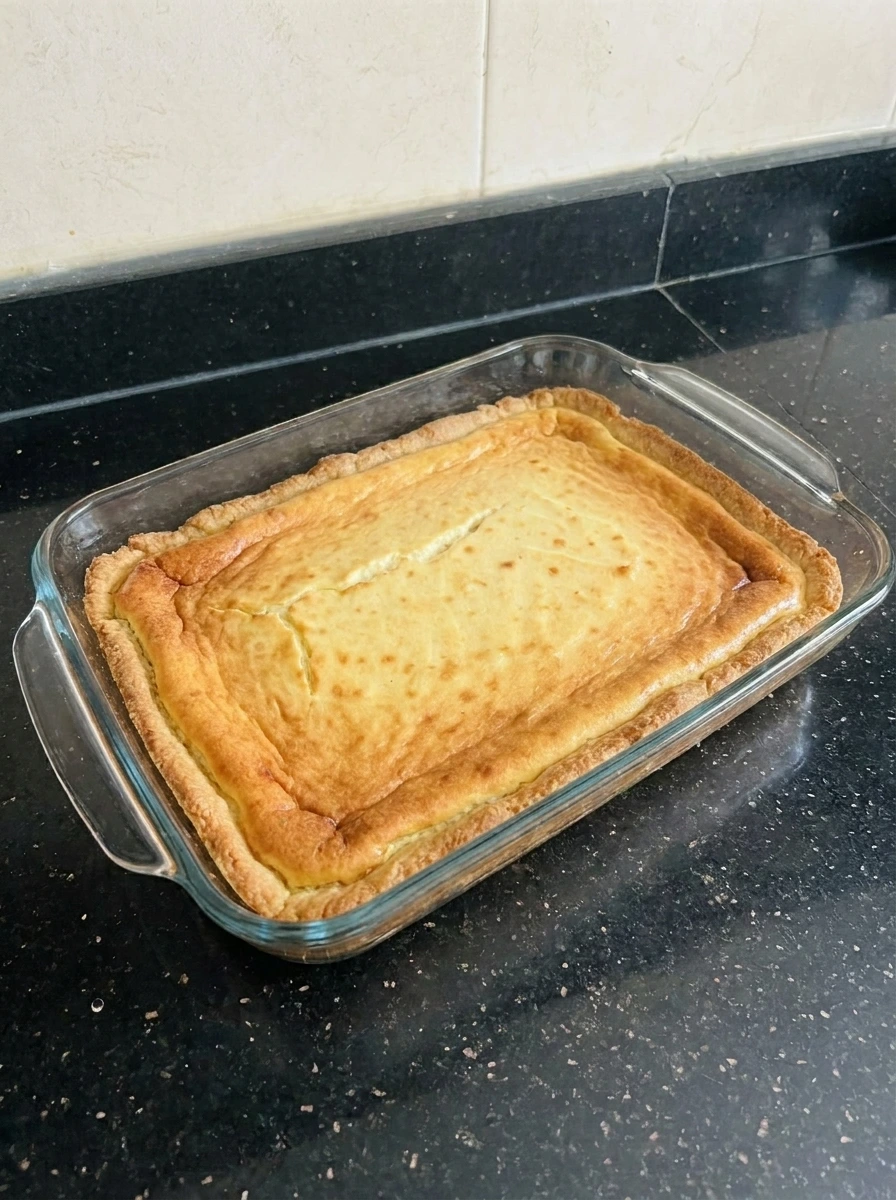
The filling transforms as it bakes and firms up while the surface develops a slight golden tint around the edges and a soft center. The texture shifts from liquid to structured with gentle cracks forming naturally. The crust underneath becomes firmer and darker creating contrast with the creamy layer above.
Tip: Remove when the center still has a slight jiggle to keep it creamy.
Step 5: Top with fresh berries and slice
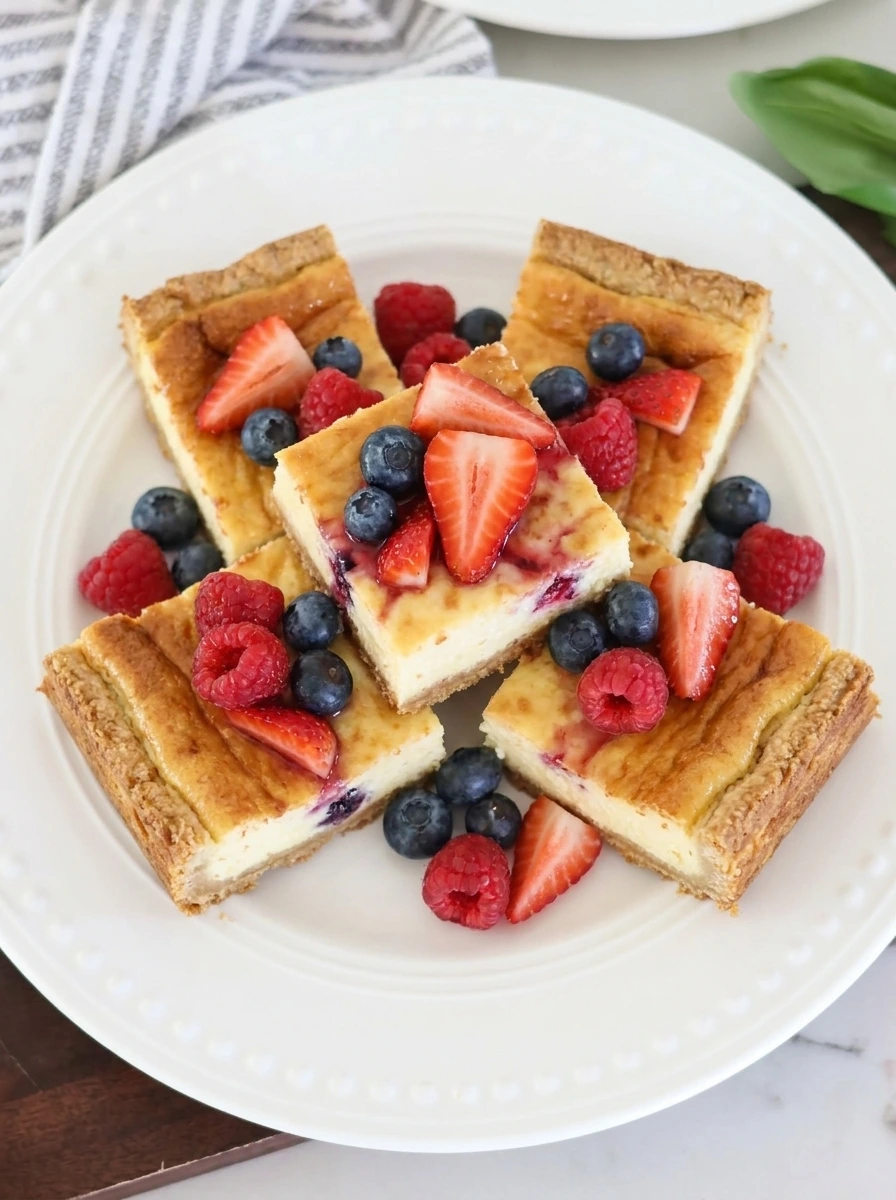
Fresh strawberries and blueberries scatter across the cooled surface creating a colorful uneven layer and the juices slightly stain the creamy top. The bars are cut into squares revealing clean layers with soft edges. Each piece shows the contrast of crust creamy filling and bright berries with slight smearing and natural imperfections.
Tip: Slice with a clean knife for defined layers while keeping a soft edge.
Pro Tips
- Use room temperature cream cheese so the filling blends smoothly and prevents lumps forming in the final texture.
- Allow the bars to cool completely before slicing so the layers stay defined and the texture remains creamy.
- Scatter berries loosely instead of placing them evenly to create a natural homemade look that feels relaxed and inviting.
- Chill the bars briefly before serving so the filling firms slightly and slices hold their shape better.
Storage Instructions
Store the cheesecake bars in an airtight container in the refrigerator where they will stay fresh for up to four days. Place parchment between layers if stacking to prevent sticking and maintain clean edges. For longer storage freeze individual slices and thaw in the fridge before serving for best texture. Keep the berries fresh by adding extra topping just before serving if desired for a brighter look. Avoid leaving the bars at room temperature for long periods especially in warm weather.
Frequently Asked Questions
Yes you can use frozen berries but thaw and drain them well to avoid excess moisture in the topping.
The edges should be set while the center still has a slight jiggle which firms up as it cools.
Yes these bars are perfect for making ahead and they taste even better after chilling for a few hours.
Yes you can swap graham crackers with cookie crumbs or even digestive biscuits for a different flavor base.
See You in the Kitchen
This Easy Memorial Day Berry Cheesecake Bars is a great way to satisfy your sweet dessert cravings without spending hours in the kitchen. I typically prepare it ahead of time so everything is ready when guests arrive and it always disappears quickly.
Even my kids love this one! If you want to build a full spread try Cowboy Crack Dip or Pigs in a Blanket for savory balance.
Print
Easy Memorial Day Berry Cheesecake Bars
- Total Time: 45 minutes
- Yield: 4 servings
Description
These easy Memorial Day Berry Cheesecake Bars are the best choice for quick and simple dessert ideas that feel both festive and healthy enough for sharing. With creamy layers and fresh berries they are perfect for a holiday or potluck or brunch or party and they also work great for meal prep or even a relaxed weeknight dinner treat when you want something sweet yet balanced.
Ingredients
- 1 1/2 cups graham cracker crumbs
- 1/2 cup melted butter
- 3/4 cup granulated sugar
- 16 oz cream cheese
- 2 eggs
- 1 tsp vanilla extract
- 1 cup sliced strawberries
- 1 cup blueberries
Instructions
- The crumbs combine with melted butter and sugar and form a slightly damp mixture that holds together when pressed and the texture changes from loose crumbs into a compact base. The mixture spreads unevenly as it is pressed down creating a rustic surface with small cracks and natural variations. Once pressed into the pan the crust becomes flat yet imperfect and it holds its shape while still showing uneven edges and crumb clusters.
- The cream cheese blends with sugar eggs and vanilla and transforms from thick blocks into a smooth creamy mixture and the color shifts to a pale uniform tone. The mixture becomes glossy and slightly fluid while still holding soft peaks. As the ingredients combine fully the filling loses lumps and becomes silky yet slightly thick with subtle air bubbles visible.
- The creamy filling pours over the crust and slowly spreads outward covering the base while small uneven waves form on the surface. The mixture settles naturally with slight dips and thicker areas. The top becomes smooth yet imperfect with gentle swirls showing how it was spread across the crust.
- The filling transforms as it bakes and firms up while the surface develops a slight golden tint around the edges and a soft center. The texture shifts from liquid to structured with gentle cracks forming naturally. The crust underneath becomes firmer and darker creating contrast with the creamy layer above.
- Fresh strawberries and blueberries scatter across the cooled surface creating a colorful uneven layer and the juices slightly stain the creamy top. The bars are cut into squares revealing clean layers with soft edges. Each piece shows the contrast of crust creamy filling and bright berries with slight smearing and natural imperfections.
Notes
Pro Tips:
- Use room temperature cream cheese so the filling blends smoothly and prevents lumps forming in the final texture.
- Allow the bars to cool completely before slicing so the layers stay defined and the texture remains creamy.
- Scatter berries loosely instead of placing them evenly to create a natural homemade look that feels relaxed and inviting.
- Chill the bars briefly before serving so the filling firms slightly and slices hold their shape better.
Storage: Store the cheesecake bars in an airtight container in the refrigerator where they will stay fresh for up to four days. Place parchment between layers if stacking to prevent sticking and maintain clean edges. For longer storage freeze individual slices and thaw in the fridge before serving for best texture. Keep the berries fresh by adding extra topping just before serving if desired for a brighter look. Avoid leaving the bars at room temperature for long periods especially in warm weather.
- Prep Time: 15 minutes
- Cook Time: 30 minutes
- Category: Desserts
- Cuisine: American
Nutrition
- Serving Size: 1 piece
- Calories: 320
- Sugar: 18g
- Sodium: 280mg
- Fat: 18g
- Carbohydrates: 32g
- Fiber: 2g
- Protein: 6g
- Cholesterol: 80mg