
This Creamy Huckleberry Cheesecake is a fun and easy berry dessert that has a buttery crust and a silky filling and a bright purple swirl and is perfect for those holiday dessert trays. In spring and summer and honestly whenever I find good berries all I want to do is bake.
I cannot get enough cobblers and muffins and bars and cheesecakes and all of it. If you love huckleberries too and want another cozy bake try our Old Fashioned Huckleberry Cobbler next.
But sometimes we just do not have as much time as we want with all of the errands and school nights and family dinners and last minute plans. So this Creamy Huckleberry Cheesecake is one of our favorite make ahead desserts to bake.
Ingredients
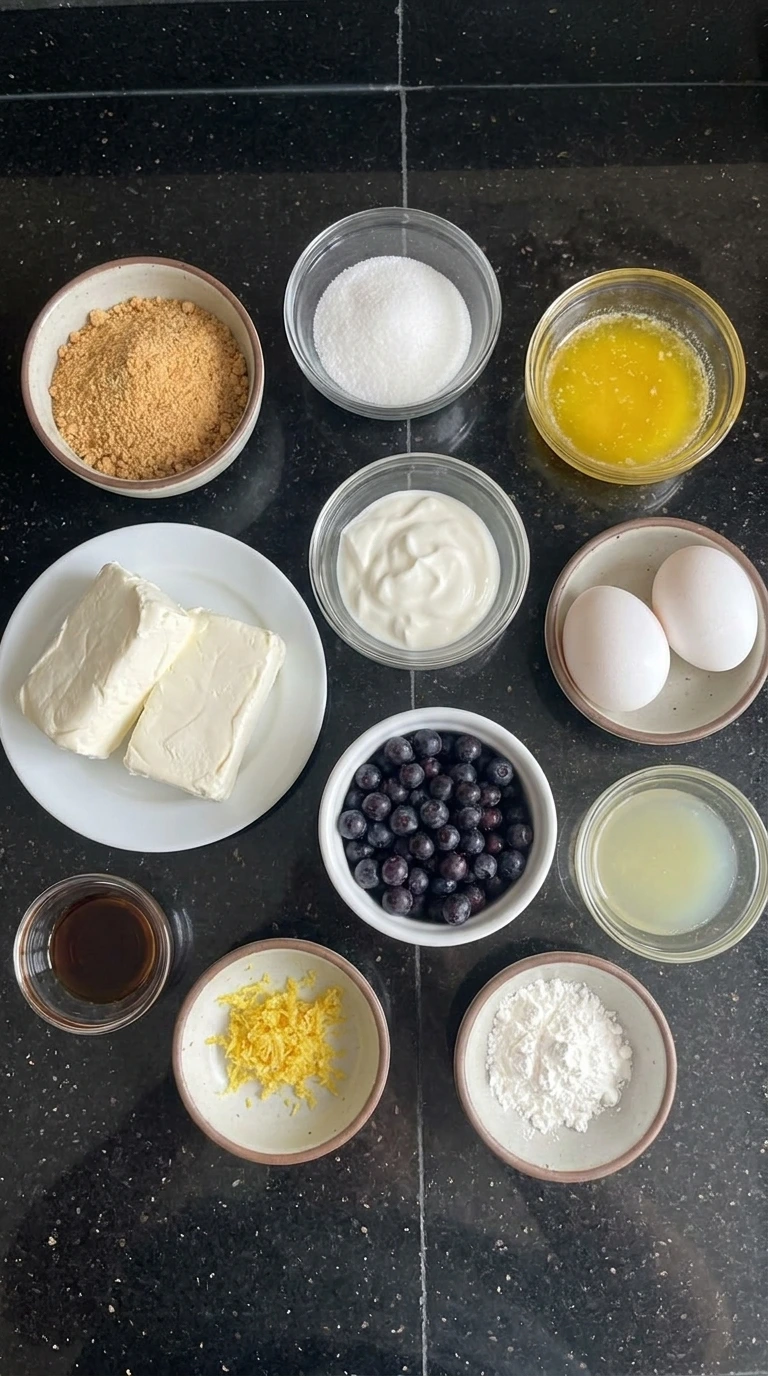
Here is what I use for this recipe and you can adjust nuts or spices based on preference:
- Graham cracker crumbs: Creates a sweet crumb base that holds the cheesecake filling in place.
- Granulated sugar: Sweetens the crust and balances the tangy cream cheese.
- Unsalted butter: Binds the crumbs into a firm sliceable crust.
- Cream cheese: Forms the rich creamy body of the cheesecake.
- Sour cream: Adds tang and keeps the filling smooth.
- Eggs: Set the cheesecake structure while keeping the texture soft.
- Vanilla extract: Adds warm bakery flavor to the filling.
- Lemon zest: Brightens the berry flavor without overpowering it.
- Huckleberries: Creates the fruity purple swirl and juicy topping.
- Lemon juice: Sharpens the berry sauce and keeps it lively.
- Cornstarch: Thickens the huckleberry sauce so it swirls cleanly.
Tools You’ll Need
- Cake pan: Holds the crust and filling while the cheesecake bakes into a sliceable shape.
- Mixing bowl: Combines the filling ingredients into a smooth creamy mixture.
- Saucepan: Cooks the huckleberries into a thick swirl sauce.
- Measuring cups and spoons: Keeps the crust and filling balanced with accurate amounts.
- White plate: Shows the final slice with visible layers and berry streaks.
Instructions
Step 1: Press the crumb crust
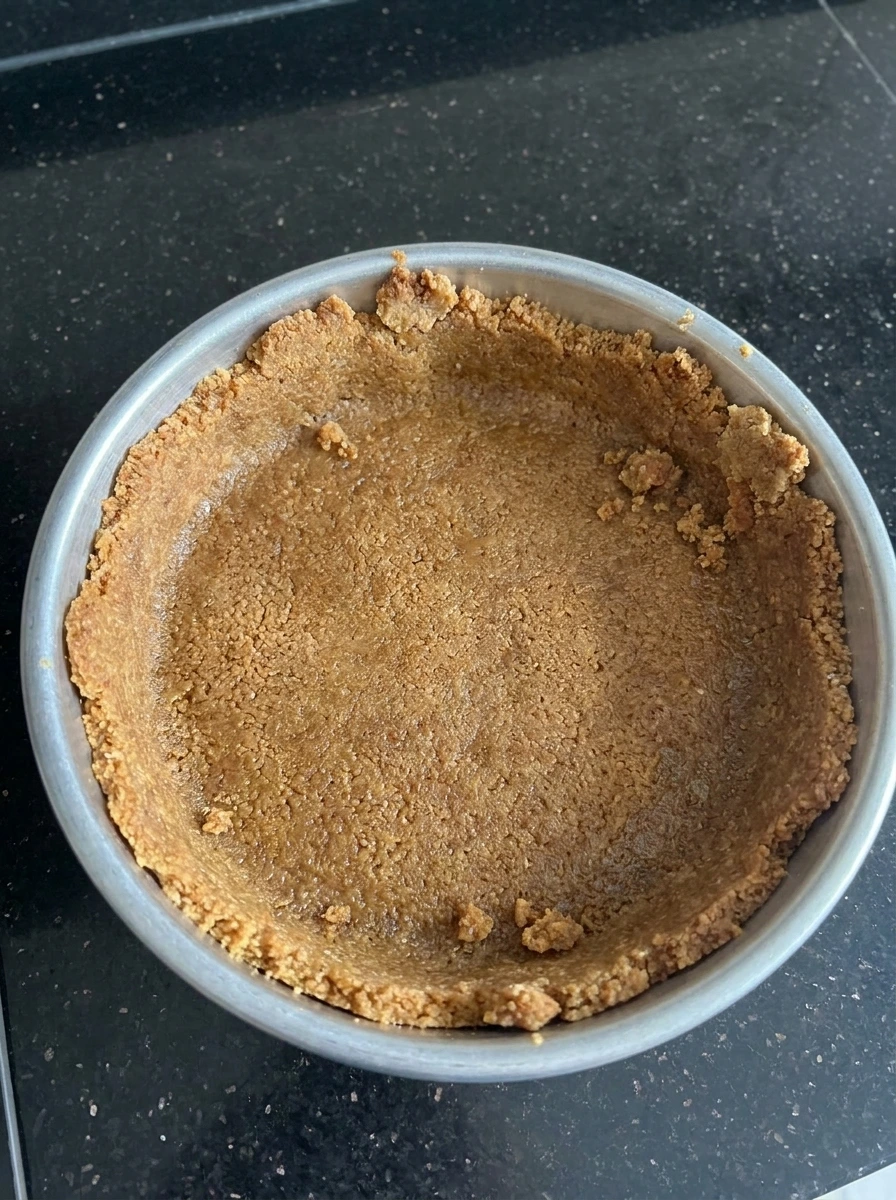
The graham cracker crumbs and sugar and melted butter come together into a damp sandy mixture. The crumbs are pressed into the cake pan with uneven edges and a slightly thicker rim so the base looks homemade.
Tip: Press the crust firmly around the edges so each slice holds together while still keeping a rustic crumb texture.
Step 2: Mix the creamy filling
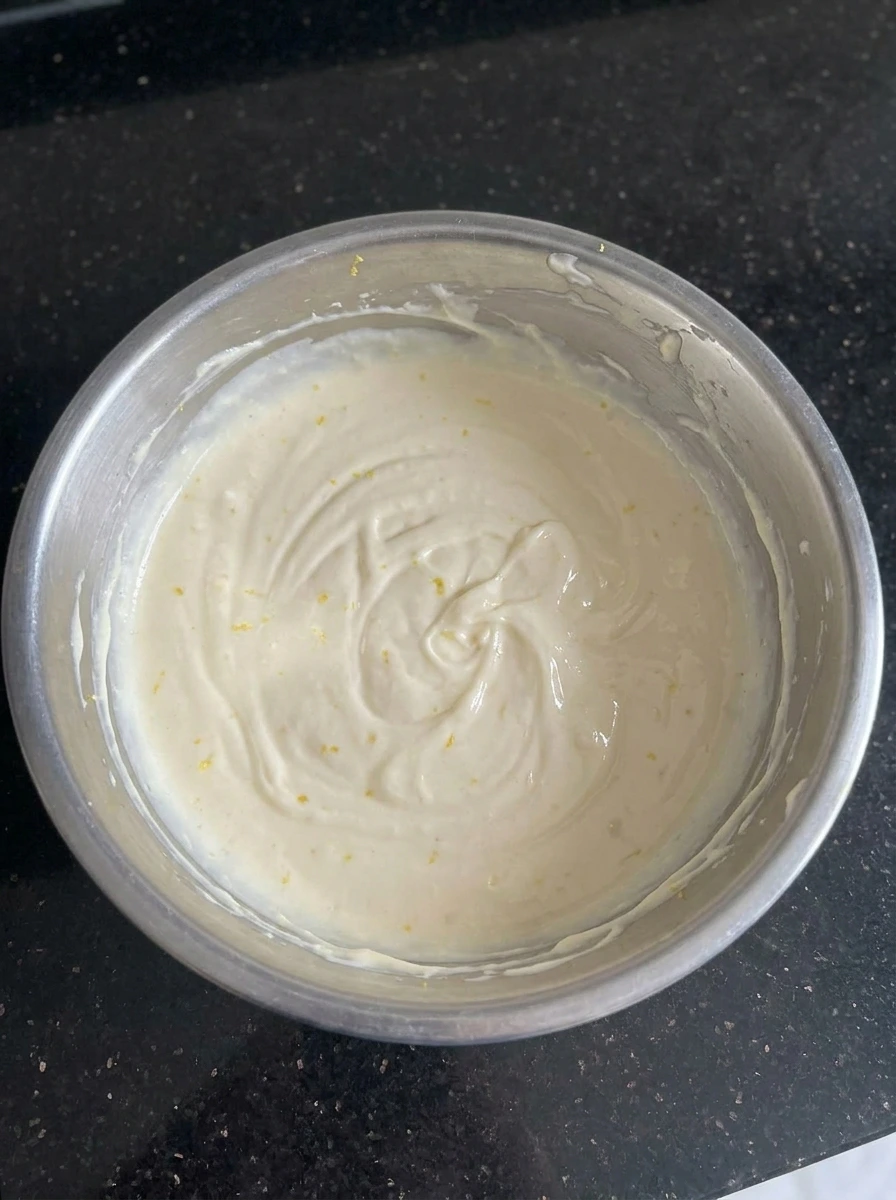
The softened cream cheese and sugar blend into a pale thick base with a few natural ridges. The sour cream and eggs and vanilla and lemon zest fold in and the filling turns glossy and smooth with soft swirls.
Tip: Use softened cream cheese so the filling blends smoothly and avoids large lumps in the baked cheesecake.
Step 3: Cook the huckleberry swirl
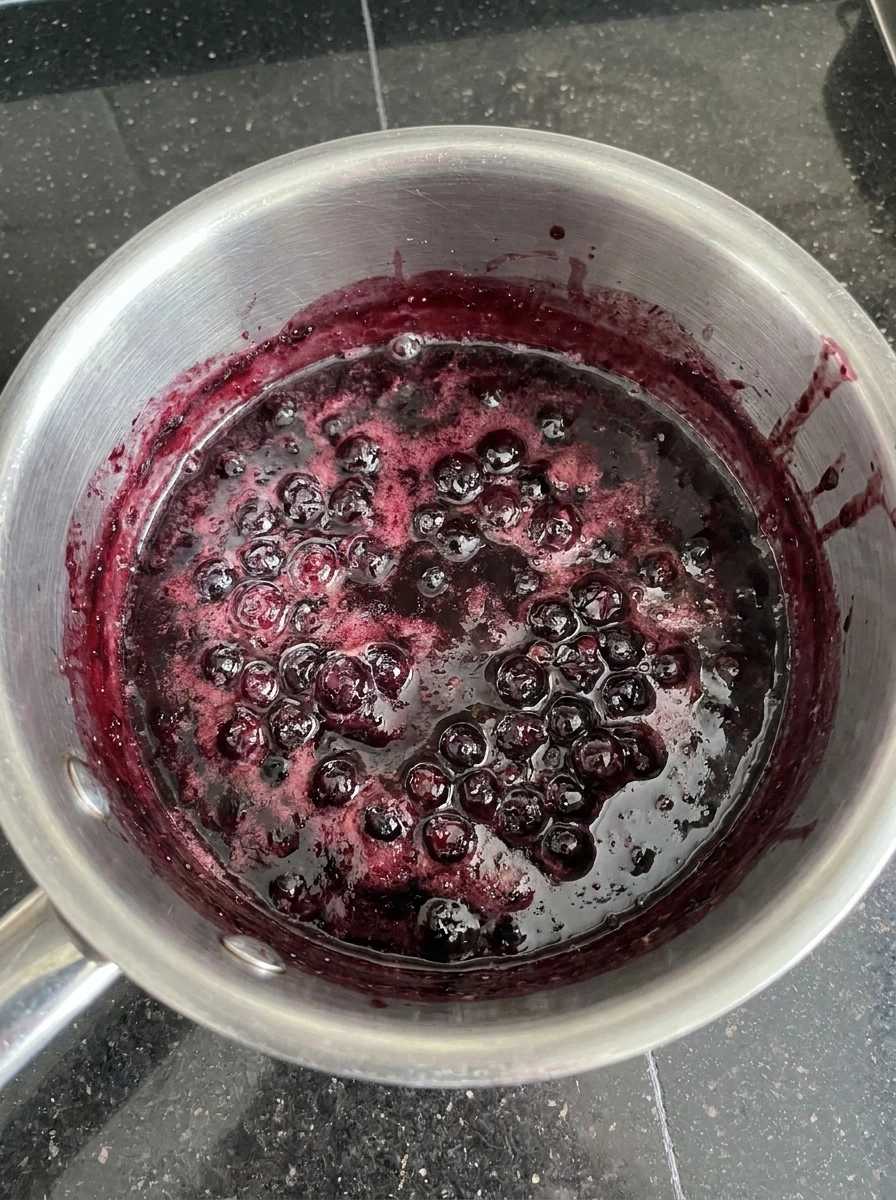
The huckleberries break down with lemon juice and sugar into a deep purple sauce. The cornstarch thickens the berries until the sauce looks jammy with small fruit skins and uneven glossy streaks.
Tip: Let the berry sauce thicken until it slowly drips from a spoon so the swirl stays visible after baking.
Step 4: Swirl the filling in the crust

The creamy filling is poured over the crust and spreads into a thick pale layer. The huckleberry sauce is spooned across the top and dragged into uneven purple ribbons that sink lightly into the filling.
Tip: Swirl gently so the purple ribbons stay bold instead of disappearing into the cheesecake filling.
Step 5: Bake until softly set
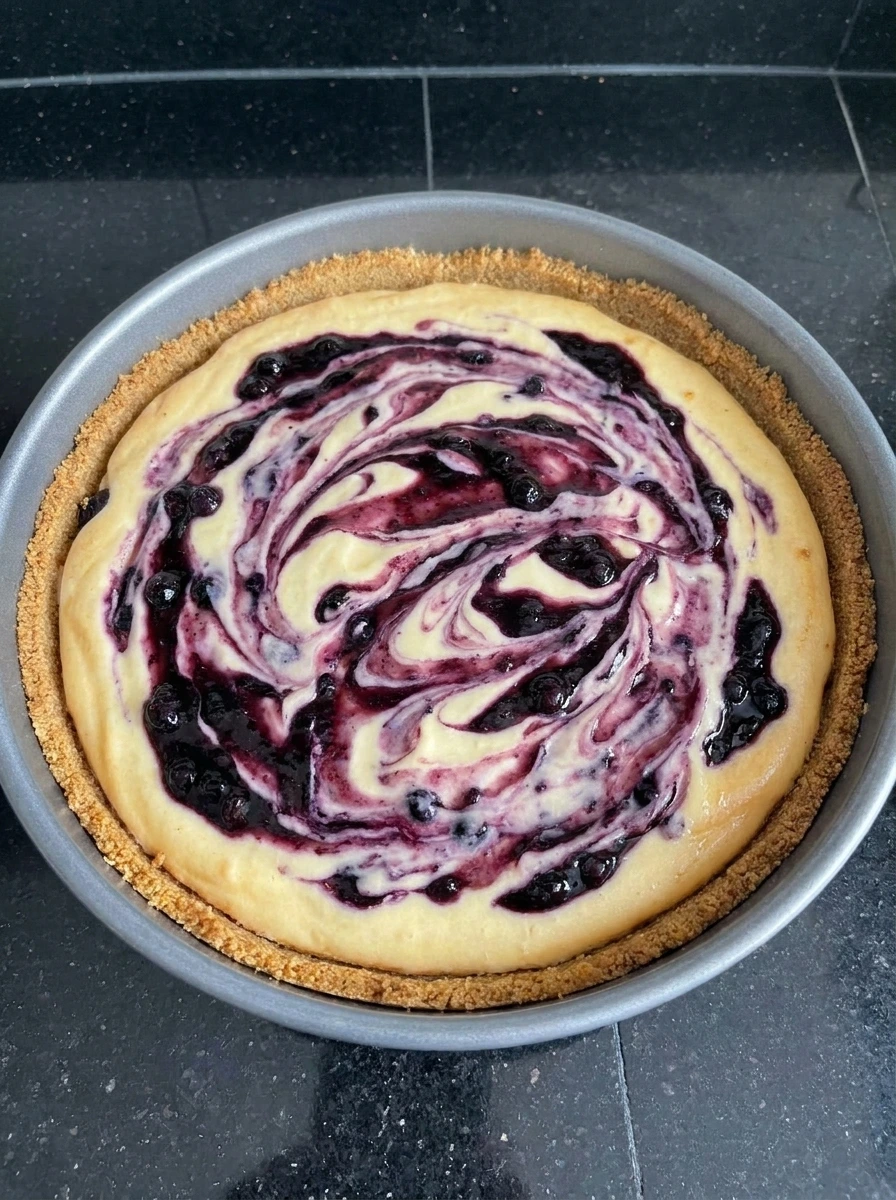
The cheesecake rises slightly and the surface turns satiny with tiny cracks near the edges. The purple swirl darkens in places and the crust looks more golden while the center stays gently soft.
Tip: Stop baking when the center still wobbles slightly because it will finish setting as it cools.
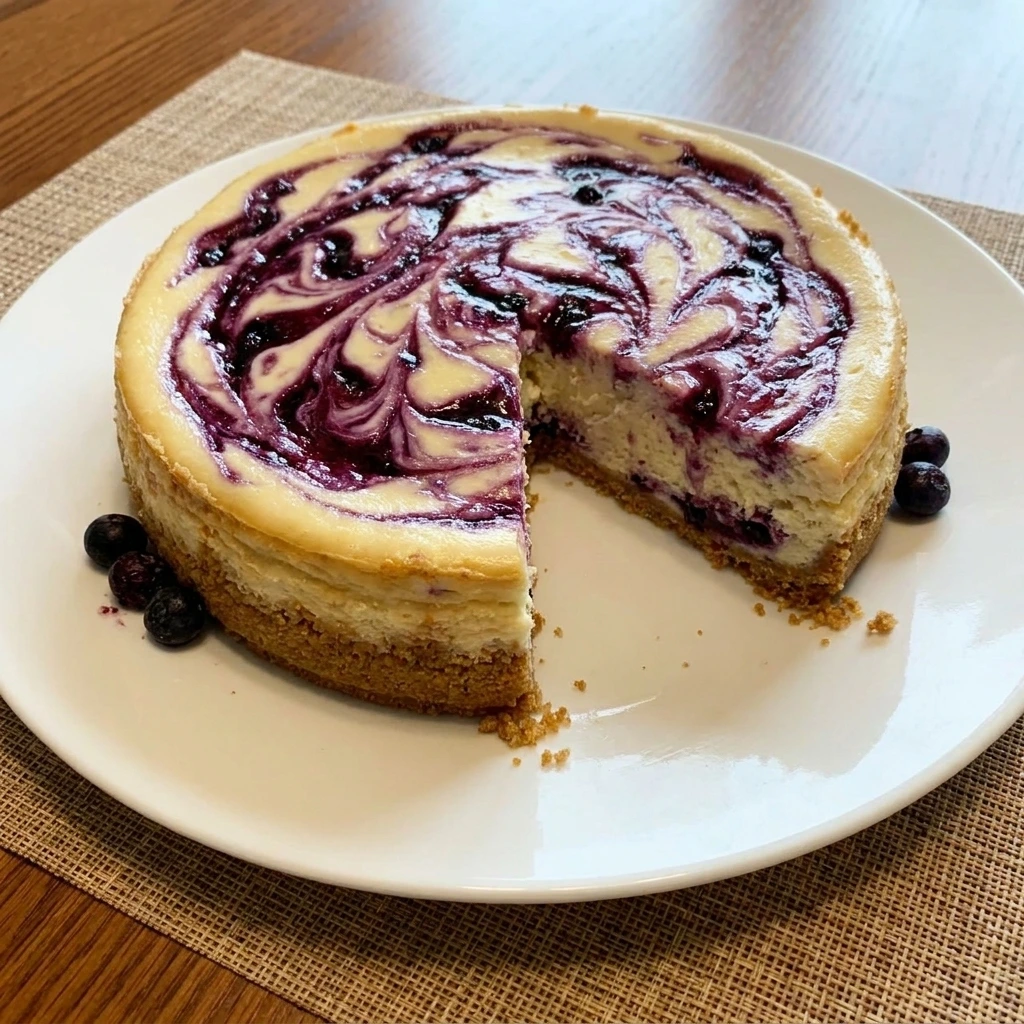
Step 6: Serve one chilled slice
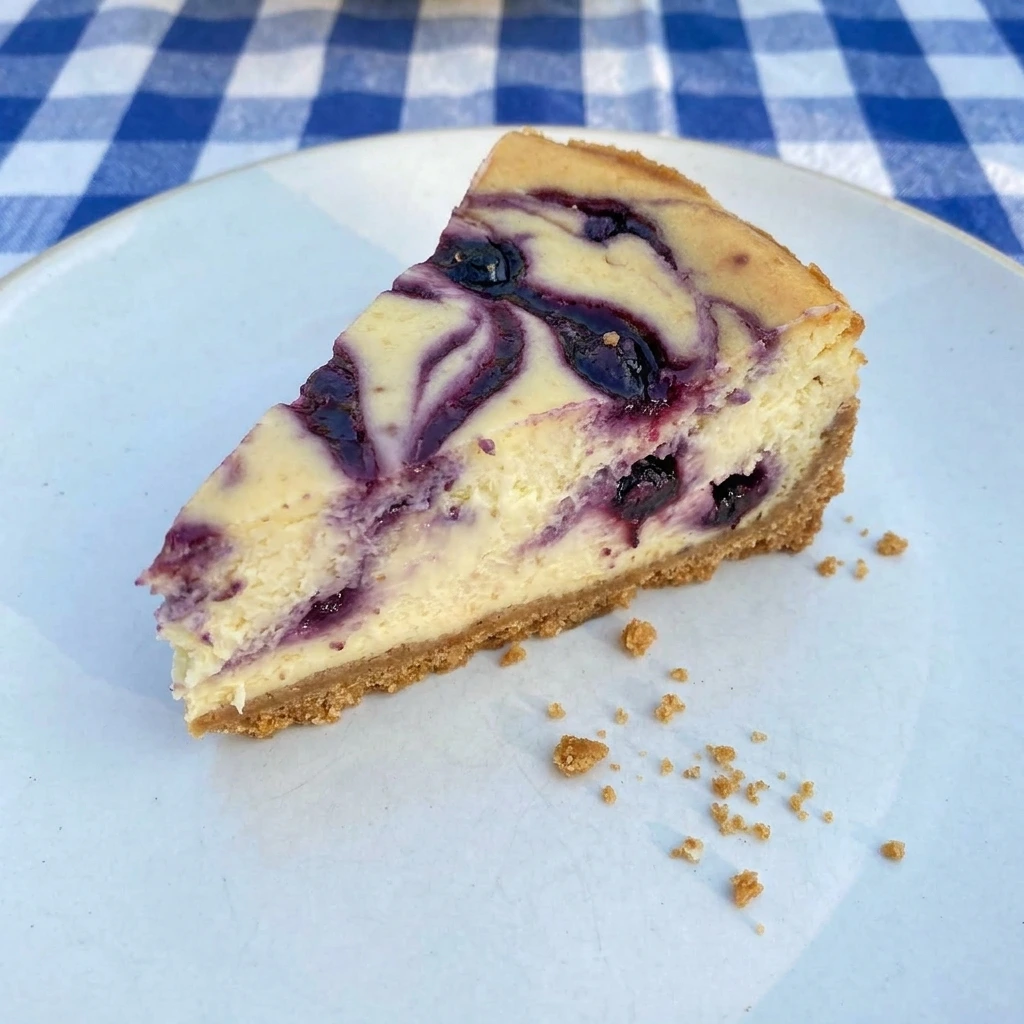
A single chilled slice is cut from the cheesecake and placed on a white plate. The inside shows a creamy pale layer with purple berry streaks and a crumbly base and slightly uneven edges.
Tip: Chill fully before slicing so the creamy layers stay clean while the edges still look naturally homemade.
Pro Tips
- Chill the cheesecake for several hours so the filling slices neatly and the berry swirl stays defined.
- Use fresh or frozen huckleberries and cook them until thick so the sauce does not make the filling watery.
- Do not overmix after adding eggs because too much air can cause larger cracks across the cheesecake top.
- Cut slices with a warm clean knife so the crust stays tidy and the creamy center looks smooth.
Storage Instructions
Store the cheesecake covered in the refrigerator once it is fully cooled. Keep slices in an airtight container so the filling stays creamy and the crust does not dry out. For the best texture enjoy it within 4 days. Freeze individual slices by wrapping them tightly and placing them in a freezer safe container.
Frequently Asked Questions
Yes it chills well overnight and tastes even creamier the next day.
Yes use frozen huckleberries without thawing and cook the sauce until thick.
Avoid overmixing eggs and stop baking when the center still has a soft wobble.
Yes small chilled slices are perfect for brunch and holiday dessert tables.
See You in the Kitchen
I hope you try this Creamy Huckleberry Cheesecake soon!
It is a simple recipe that looks beautiful and tastes incredible and makes every occasion a little more special especially with Wild Huckleberry Crumble Bars or Bakery Style Huckleberry Muffins nearby.
Do not forget to share your results or save this recipe for later it is one worth keeping.
Print
Creamy Huckleberry Cheesecake
- Total Time: 45 minutes
- Yield: 8 servings
Description
This Creamy Huckleberry Cheesecake is an easy dessert with a quick berry swirl and a simple buttery crust. It is one of the best ideas for brunch and holiday tables because it feels rich yet fresh. The creamy filling tastes balanced and not too heavy so it fits party platters and potluck menus. It is a healthy inspired treat when served in small slices with extra berries.
Ingredients
- 1 and 1 half cups Graham cracker crumbs
- 3 tablespoons for crust and 3 fourths cup for filling Granulated sugar
- 6 tablespoons melted Unsalted butter
- 16 ounces softened Cream cheese
- 1 half cup Sour cream
- 2 large Eggs
- 1 teaspoon Vanilla extract
- 1 teaspoon Lemon zest
- 1 cup fresh or frozen Huckleberries
- 1 tablespoon Lemon juice
- 1 teaspoon Cornstarch
Instructions
- The graham cracker crumbs and sugar and melted butter come together into a damp sandy mixture. The crumbs are pressed into the cake pan with uneven edges and a slightly thicker rim so the base looks homemade.
- The softened cream cheese and sugar blend into a pale thick base with a few natural ridges. The sour cream and eggs and vanilla and lemon zest fold in and the filling turns glossy and smooth with soft swirls.
- The huckleberries break down with lemon juice and sugar into a deep purple sauce. The cornstarch thickens the berries until the sauce looks jammy with small fruit skins and uneven glossy streaks.
- The creamy filling is poured over the crust and spreads into a thick pale layer. The huckleberry sauce is spooned across the top and dragged into uneven purple ribbons that sink lightly into the filling.
- The cheesecake rises slightly and the surface turns satiny with tiny cracks near the edges. The purple swirl darkens in places and the crust looks more golden while the center stays gently soft.
- A single chilled slice is cut from the cheesecake and placed on a white plate. The inside shows a creamy pale layer with purple berry streaks and a crumbly base and slightly uneven edges.
Notes
Pro Tips:
- Chill the cheesecake for several hours so the filling slices neatly and the berry swirl stays defined.
- Use fresh or frozen huckleberries and cook them until thick so the sauce does not make the filling watery.
- Do not overmix after adding eggs because too much air can cause larger cracks across the cheesecake top.
- Cut slices with a warm clean knife so the crust stays tidy and the creamy center looks smooth.
Storage: Store the cheesecake covered in the refrigerator once it is fully cooled. Keep slices in an airtight container so the filling stays creamy and the crust does not dry out. For the best texture enjoy it within 4 days. Freeze individual slices by wrapping them tightly and placing them in a freezer safe container.
- Prep Time: 15 minutes
- Cook Time: 30 minutes
- Category: Desserts
- Cuisine: American
Nutrition
- Serving Size: 1 slice
- Calories: 390
- Sugar: 25g
- Sodium: 270mg
- Fat: 27g
- Carbohydrates: 33g
- Fiber: 2g
- Protein: 7g
- Cholesterol: 115mg