


This Classic Fudge & Crunch Cake recipe is packed with chocolate flavor and so easy to make. It is a budget friendly dessert that you can make without complicated decorating! Make this rich and fudgy chocolate cake for your next celebration.

If you love chocolate desserts then you are going to love this Classic Fudge & Crunch Cake recipe. It is a decadent cake that is soft and fudgy and addictive. With a thick chocolate frosting like this you are going to want every single bite topped with plenty of crisp chocolate crunch.
If you are looking for other cozy sweet recipes like my fudge crunch cake then why not also try these Apple Crisp Cheesecake Cups. This dessert has a creamy center plus a crisp topping which makes it perfect when you want another easy homemade treat.
Ingredients

Here is what I use for this recipe and you can adjust nuts or spices based on preference:
- All purpose flour: Provides the main structure for the cake while keeping the crumb sturdy enough to support the fudge frosting.
- Unsweetened cocoa powder: Adds deep chocolate flavor plus dark color throughout the cake batter.
- Granulated sugar: Sweetens the cake while helping create a tender and moist crumb.
- Brown sugar: Adds moisture plus a subtle caramel depth that makes the chocolate flavor richer.
- Baking powder: Helps the chocolate batter rise evenly while baking.
- Baking soda: Works with the acidic buttermilk to create lift plus a soft cake texture.
- Salt: Balances the sweetness while sharpening the cocoa flavor.
- Large eggs: Bind the batter while adding richness plus structure to the finished cake.
- Buttermilk: Adds moisture plus gentle acidity for a tender chocolate crumb.
- Vegetable oil: Keeps the cake moist even after chilling and makes the crumb pleasantly soft.
- Vanilla extract: Rounds out the cocoa flavor while adding warm aromatic sweetness.
- Hot coffee: Deepens the chocolate flavor while loosening the batter into the proper pourable consistency.
- Semi sweet chocolate: Forms the rich chocolate base of the smooth fudge frosting.
- Heavy cream: Melts with the chocolate to create a thick glossy fudge frosting.
- Unsalted butter: Adds extra richness plus a smooth finish to the fudge frosting.
- Chocolate sandwich cookies: Create the irregular crunchy topping that contrasts with the soft cake and creamy frosting.
- Mini chocolate chips: Add extra chocolate flavor plus small crisp bites throughout the crunchy topping.
Tools You’ll Need
- Large mixing bowl: Provides enough space to combine the dry and wet ingredients into a smooth chocolate batter.
- Whisk: Combines the batter ingredients evenly while breaking apart dry cocoa and flour pockets.
- Two 8 inch cake pans: Create two evenly sized chocolate cake layers for stacking.
- Saucepan: Heats the cream and helps melt the chocolate plus butter into smooth fudge frosting.
- Offset spatula: Spreads the thick fudge frosting between the cake layers and over the outside.
- Cooling rack: Allows the baked cake layers to cool evenly before frosting.
- Cake serving plate: Supports the assembled cake while making slicing and serving easier.
Instructions
Step 1: Mix the chocolate cake batter
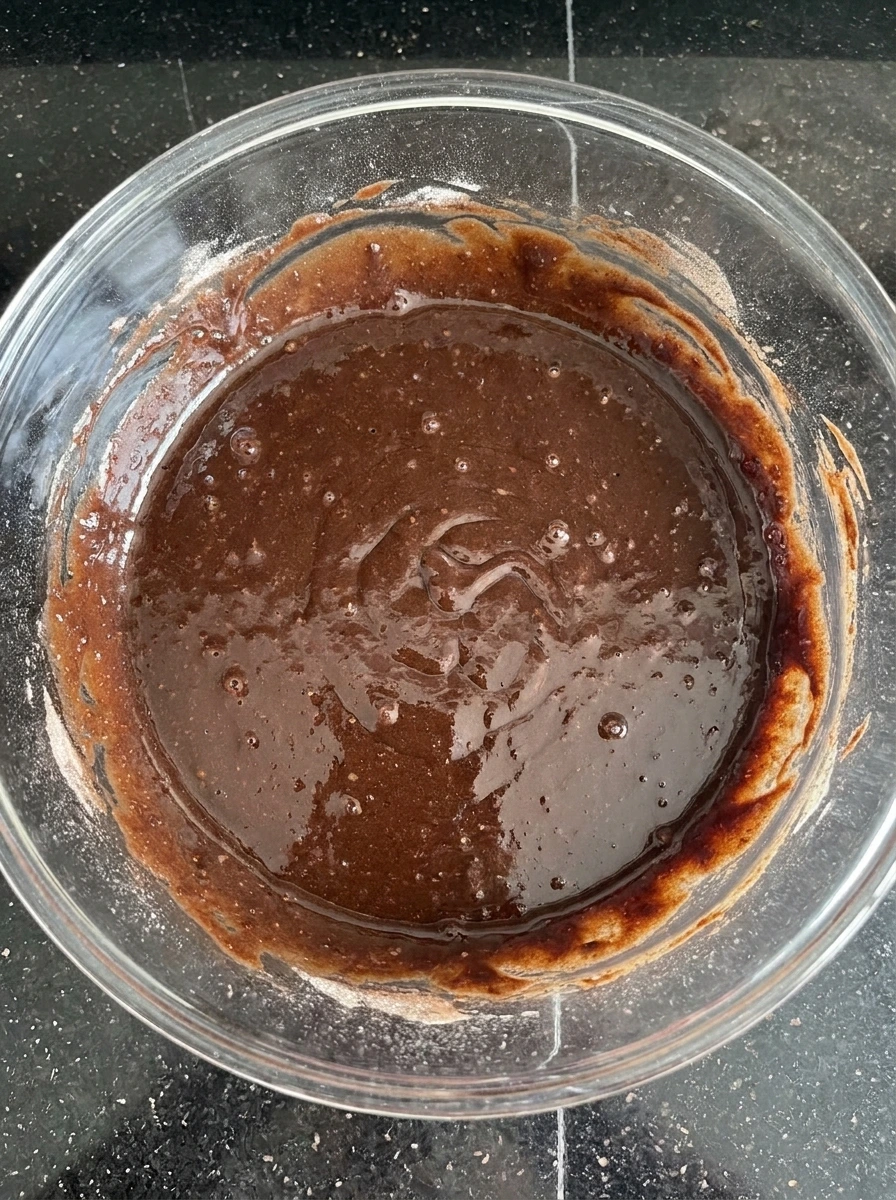
Combine the flour and cocoa and both sugars plus the leavening ingredients until the dry mixture becomes evenly chocolate colored. Add the eggs and buttermilk and oil plus vanilla and coffee then mix until the powdery ingredients transform into a dark glossy batter with a few natural bubbles and faint streaks remaining.
Tip: Mix only until the batter looks mostly smooth because excessive mixing can make the finished chocolate cake firmer instead of tender.
Step 2: Divide the batter between cake pans
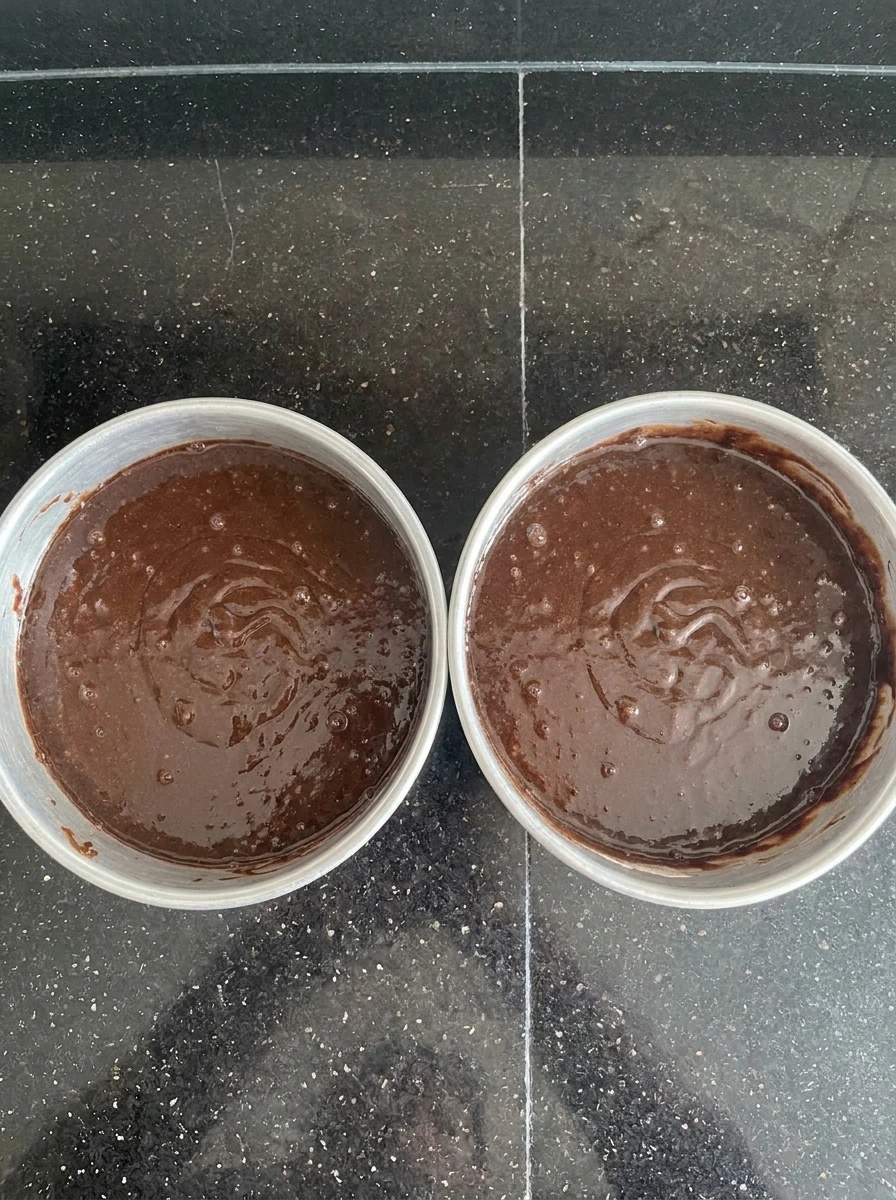
Pour the chocolate batter evenly between 2 cake pans so each pan holds one broad layer of dark batter. The batter should settle into uneven natural surfaces with small bubbles while the mixture spreads toward the edges and forms two matching cake layers ready for baking.
Tip: Divide the batter as evenly as possible so both layers finish baking at a similar rate while still keeping a natural homemade appearance.
Step 3: Bake the chocolate cake layers

Bake the 2 chocolate cake layers until the liquid batter rises and becomes fully structured with matte dark tops. The finished cakes should have slight doming plus a few tiny surface cracks and darker browned edges which create a clear change from the glossy raw batter.
Tip: Remove the cake layers once a tester shows only a few moist crumbs because overbaking can reduce the soft fudgy texture.
Step 4: Make the fudge frosting

Combine the semi sweet chocolate with hot cream and butter until the separate ingredients melt together into one dark chocolate mixture. Allow the mixture to thicken until it changes from thin melted chocolate into glossy spreadable fudge frosting with soft folds and uneven swirls.
Tip: Let the fudge mixture cool until it holds soft swirls because frosting the cake while it is too warm can cause the layers to slide.
Step 5: Layer and frost the cake

Place one cooled chocolate cake layer down then spread fudge frosting across the top before adding the second layer. Cover the stacked cake with the remaining frosting so the structure changes into a tall finished cake with uneven chocolate swirls plus naturally imperfect edges.
Tip: Use completely cooled cake layers so the fudge frosting stays thick and creates visible rustic swirls instead of melting into the crumb.
Step 6: Add the chocolate crunch topping

Crush exactly 12 chocolate sandwich cookies into irregular pieces then combine them with the mini chocolate chips. Scatter the crunchy mixture across the frosted cake so large crumbs and small pieces overlap unevenly while some chocolate crunch settles naturally around the sides.
Tip: Keep the cookies in mixed sizes because a combination of coarse chunks and smaller crumbs creates the best crunchy contrast.
Step 7: Slice and serve the cake

Cut one generous slice from the finished cake so the dark interior reveals two moist chocolate layers plus the thick fudge filling. Transfer the single slice to a white plate with irregular cookie crumbs and chocolate chips still clinging to the frosting while the cut edges remain soft and naturally imperfect.
Tip: Use a clean slicing motion for each serving so the cake layers remain visible while still preserving the rustic fudge and crunch texture.
Pro Tips
- Measure the cocoa and flour carefully because too much dry ingredient can turn a soft chocolate cake into a dense and crumbly one.
- Cool both cake layers completely before frosting so the thick fudge stays in place and keeps its glossy homemade swirls.
- Crush the chocolate cookies into mixed sizes so every slice gets both crisp crumbs and larger crunchy chocolate pieces.
- Chill the assembled cake briefly before slicing because the fudge firms slightly and makes the chocolate layers easier to reveal.
Storage Instructions
Store the finished Classic Fudge & Crunch Cake in a covered cake container so the chocolate layers stay moist and the fudge frosting does not absorb refrigerator odors. The cake can remain at cool room temperature for several hours when your kitchen is not warm. For longer storage keep it refrigerated for up to four days. The cookie topping gradually softens after refrigeration because it absorbs moisture from the fudge frosting. Add a small amount of freshly crushed cookie topping before serving if you want stronger crunch. Individual cake slices can also be wrapped securely and frozen for up to two months. Thaw them overnight in the refrigerator then allow them to soften slightly before serving.
Frequently Asked Questions
Yes you can bake the layers one day ahead then wrap them well and frost plus decorate them before serving.
Avoid overbaking the layers and keep the finished cake covered so the soft chocolate crumb retains its moisture.
Yes keep it covered in the refrigerator then let each slice soften slightly at room temperature before serving.
Crushed chocolate sandwich cookies plus mini chocolate chips create the irregular crisp topping and texture.
See You in the Kitchen
I hope you enjoy all the recipes I share with you including this delicious Classic Fudge & Crunch Cake recipe.
I hope you try it and enjoy it and rate it and share it with your friends and family plus try my Apple Cinnamon Bread or Apple Crisp Cheesecake Cups for another homemade treat!
Print
Classic Fudge & Crunch Cake
- Total Time: 55 minutes
- Yield: 10 servings
Description
This Classic Fudge & Crunch Cake is an easy chocolate dessert with soft cake layers plus rich fudge frosting and a crisp chocolate crunch finish. It is a quick and simple baking idea when you want the best homemade treat for a holiday or potluck or brunch or party. Serve modest slices with fruit for a more balanced and healthy dessert approach while still enjoying plenty of deep chocolate flavor and contrasting textures.
Ingredients
- 1 1/2 cups All purpose flour
- 1/2 cup Unsweetened cocoa powder
- 1 cup Granulated sugar
- 1/2 cup packed Brown sugar
- 1 teaspoon Baking powder
- 1 teaspoon Baking soda
- 1/2 teaspoon Salt
- 2 Large eggs
- 3/4 cup Buttermilk
- 1/2 cup Vegetable oil
- 2 teaspoons Vanilla extract
- 3/4 cup Hot coffee
- 8 ounces Semi sweet chocolate
- 1 cup Heavy cream
- 2 tablespoons Unsalted butter
- 12 cookies Chocolate sandwich cookies
- 1/3 cup Mini chocolate chips
Instructions
- Combine the flour and cocoa and both sugars plus the leavening ingredients until the dry mixture becomes evenly chocolate colored. Add the eggs and buttermilk and oil plus vanilla and coffee then mix until the powdery ingredients transform into a dark glossy batter with a few natural bubbles and faint streaks remaining.
- Pour the chocolate batter evenly between 2 cake pans so each pan holds one broad layer of dark batter. The batter should settle into uneven natural surfaces with small bubbles while the mixture spreads toward the edges and forms two matching cake layers ready for baking.
- Bake the 2 chocolate cake layers until the liquid batter rises and becomes fully structured with matte dark tops. The finished cakes should have slight doming plus a few tiny surface cracks and darker browned edges which create a clear change from the glossy raw batter.
- Combine the semi sweet chocolate with hot cream and butter until the separate ingredients melt together into one dark chocolate mixture. Allow the mixture to thicken until it changes from thin melted chocolate into glossy spreadable fudge frosting with soft folds and uneven swirls.
- Place one cooled chocolate cake layer down then spread fudge frosting across the top before adding the second layer. Cover the stacked cake with the remaining frosting so the structure changes into a tall finished cake with uneven chocolate swirls plus naturally imperfect edges.
- Crush exactly 12 chocolate sandwich cookies into irregular pieces then combine them with the mini chocolate chips. Scatter the crunchy mixture across the frosted cake so large crumbs and small pieces overlap unevenly while some chocolate crunch settles naturally around the sides.
- Cut one generous slice from the finished cake so the dark interior reveals two moist chocolate layers plus the thick fudge filling. Transfer the single slice to a white plate with irregular cookie crumbs and chocolate chips still clinging to the frosting while the cut edges remain soft and naturally imperfect.
Notes
Pro Tips:
- Measure the cocoa and flour carefully because too much dry ingredient can turn a soft chocolate cake into a dense and crumbly one.
- Cool both cake layers completely before frosting so the thick fudge stays in place and keeps its glossy homemade swirls.
- Crush the chocolate cookies into mixed sizes so every slice gets both crisp crumbs and larger crunchy chocolate pieces.
- Chill the assembled cake briefly before slicing because the fudge firms slightly and makes the chocolate layers easier to reveal.
Storage: Store the finished Classic Fudge & Crunch Cake in a covered cake container so the chocolate layers stay moist and the fudge frosting does not absorb refrigerator odors. The cake can remain at cool room temperature for several hours when your kitchen is not warm. For longer storage keep it refrigerated for up to four days. The cookie topping gradually softens after refrigeration because it absorbs moisture from the fudge frosting. Add a small amount of freshly crushed cookie topping before serving if you want stronger crunch. Individual cake slices can also be wrapped securely and frozen for up to two months. Thaw them overnight in the refrigerator then allow them to soften slightly before serving.
- Prep Time: 25 minutes
- Cook Time: 30 minutes
- Category: Desserts
- Cuisine: American
Nutrition
- Serving Size: 1 slice
- Calories: 548
- Sugar: 44g
- Sodium: 286mg
- Fat: 31g
- Carbohydrates: 66g
- Fiber: 4g
- Protein: 7g
- Cholesterol: 62mg