

If you have ever prepared festive treats at home then Easter Oreo Cookie Balls are a recipe that fits right into that tradition and offers a simple seasonal option for home kitchens.

In this article we share Easter Oreo Cookie Balls using an easy step by step approach that works well for beginners and experienced bakers alike.
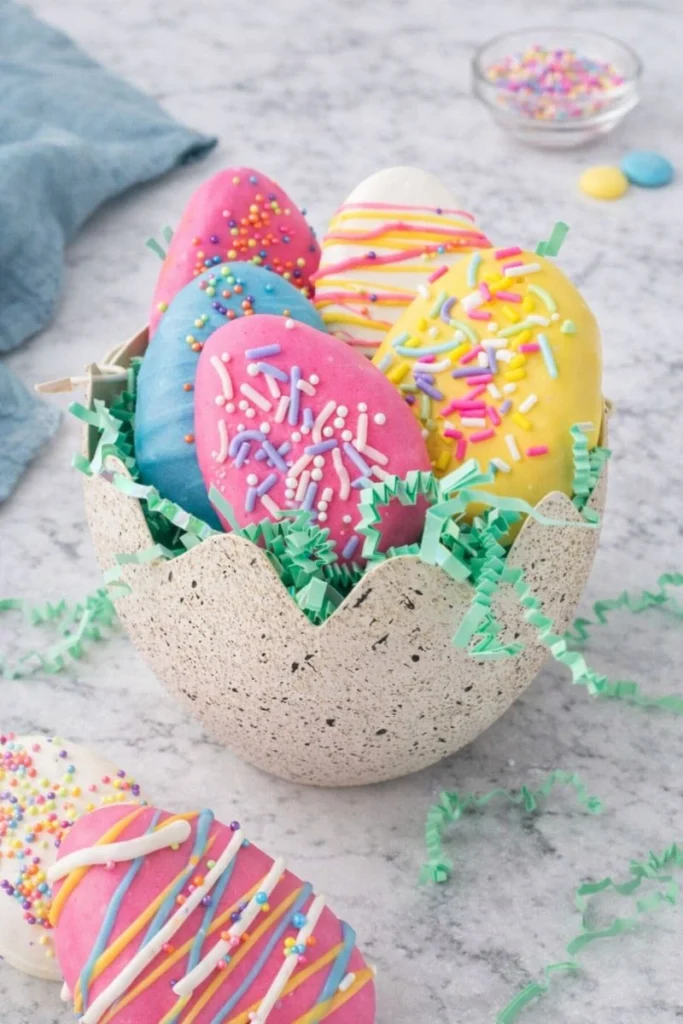
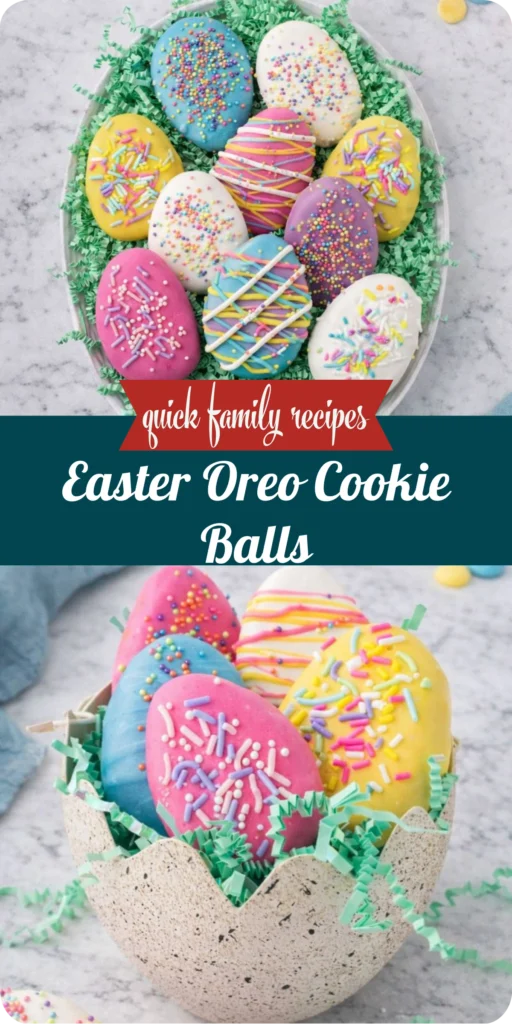
This classic no bake dessert brings together crushed cookies and a creamy center which is then shaped and decorated for a holiday themed finish.
This recipe works well for spring gatherings or casual celebrations and it is designed to help you create a colorful dessert that looks impressive without complicated techniques.
Ingredients
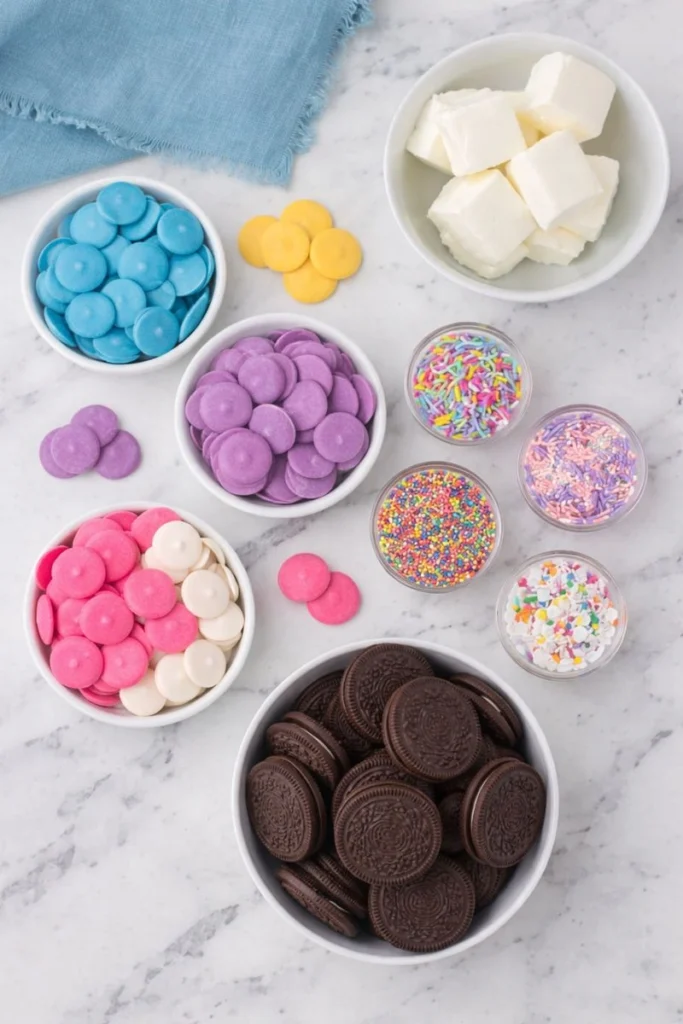
Here’s what I use for this recipe and each ingredient plays a clear role in the final result.
- Oreo cookies: These form the base of the recipe and provide a rich chocolate flavor and firm texture when crushed.
- Cream cheese: This binds the cookie crumbs together and adds a smooth creamy consistency.
- White candy melts: These create the outer coating and allow for bright pastel coloring.
- Food coloring: This helps achieve the classic Easter shades for a festive look.
- Sprinkles: These add texture and visual appeal while reinforcing the holiday theme.
Tools You’ll Need
- Food processor: This is used to finely crush the cookies into even crumbs.
- Mixing bowl: This allows the cookie crumbs and cream cheese to be combined smoothly.
- Hand mixer or spatula: This helps blend the mixture evenly without overworking it.
- Baking sheet: This holds the shaped cookie balls while they chill and set.
- Parchment paper: This prevents sticking and keeps cleanup easy.
- Cookie scoop: This ensures uniform size for consistent results.
- Microwave safe bowls: These are needed to melt and color the candy coating.
Instructions
Step 1 Prepare the Oreo mixture
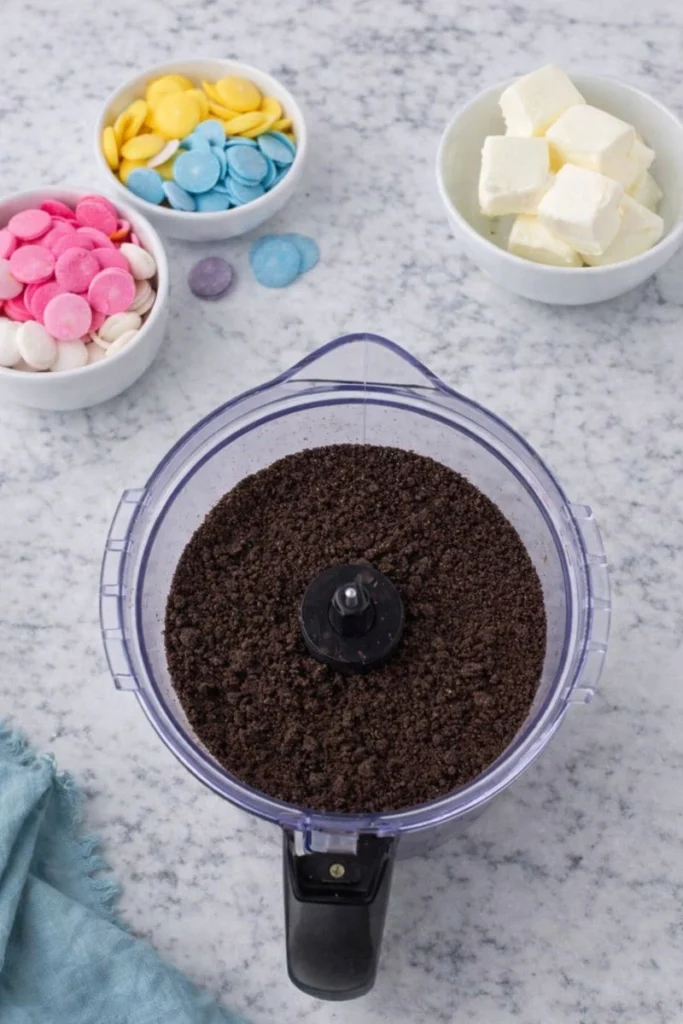
I start by placing the Oreo cookies into my food processor and pulsing them until they turn into fine crumbs. I make sure there are no large chunks because a smooth crumb helps the mixture hold together evenly.
Step 2 Combine with cream cheese
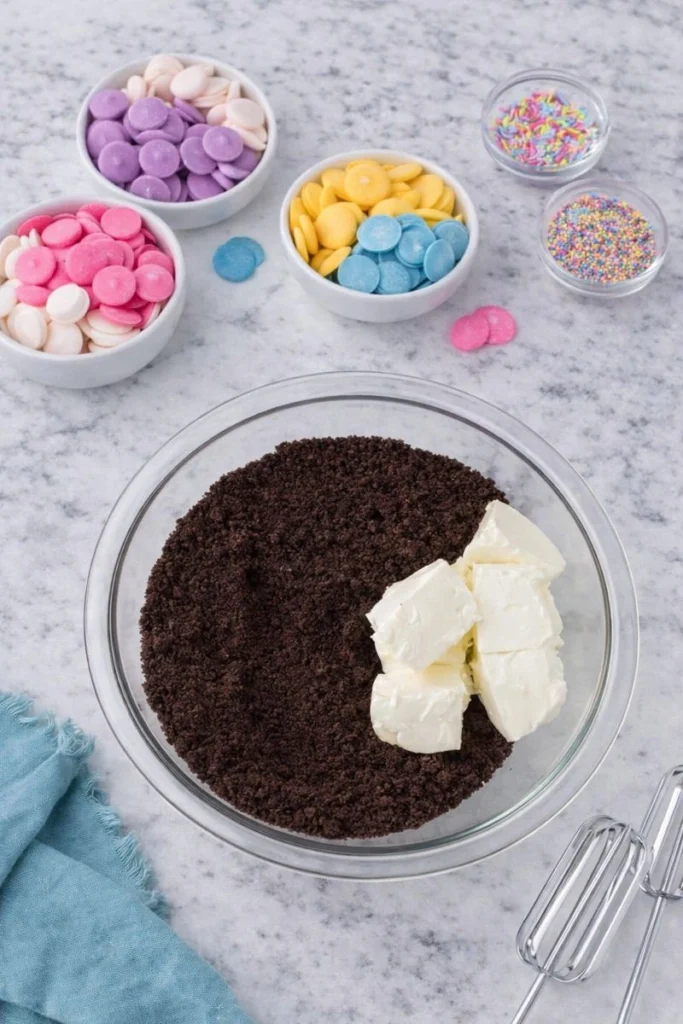
I transfer the crumbs to a mixing bowl and add softened cream cheese. I mix everything together until it forms a thick dough that sticks together when pressed. Then i usually scrape down the sides to ensure nothing is left unmixed.
Step 3 Shape the cookie balls
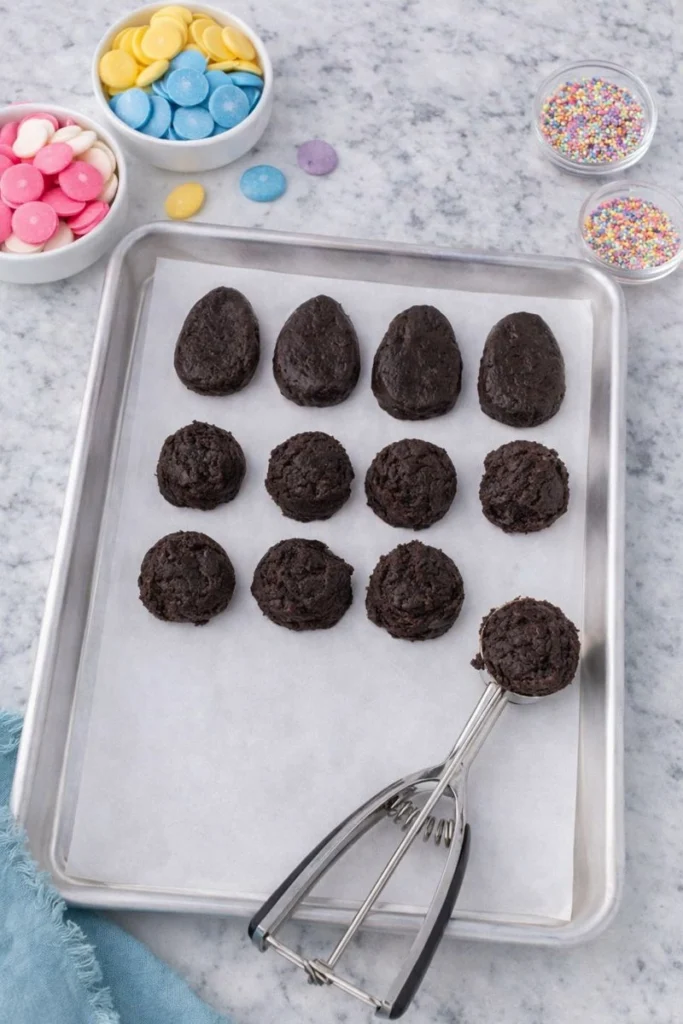
I use a cookie scoop to portion the mixture and then roll each portion between my hands. I gently shape some into egg like forms to match the Easter theme and place them on a parchment lined baking sheet.
Step 4 Chill the shaped balls
I place the baking sheet in the refrigerator and let the cookie balls chill. This step firms them up and makes dipping much easier later on.
Step 5 Melt and color the coating
I melt the white candy melts in microwave safe bowls using short intervals. I stir frequently and then add food coloring to create soft pastel shades that suit the holiday.
Step 6 Dip and decorate

I dip each chilled cookie ball into the melted coating and gently tap off excess. I place them back on parchment and immediately add sprinkles before the coating sets.
Step 7 Set and finish
I let the coated Easter Oreo Cookie Balls set at room temperature or return them briefly to the refrigerator until the coating is firm and ready to serve.
Tips
From my experience chilling the mixture properly makes a big difference when shaping and dipping. I also like working with one color of coating at a time to keep the colors clean and bright. If the coating thickens I gently rewarm it rather than adding liquid which can affect texture.
Ways to Serve
I like serving these Easter Oreo Cookie Balls arranged in a decorative bowl lined with green paper grass for a festive look. They also work well packaged in clear treat bags for gifts or placed on a dessert platter alongside other spring themed sweets. Their small size makes them easy to enjoy during parties or family gatherings.
Storage Instructions
I store these cookie balls in an airtight container in the refrigerator to keep them fresh. They hold their texture well for several days and can also be frozen for longer storage. When freezing I separate layers with parchment paper to prevent sticking.
Frequently Asked Questions
Can Easter Oreo Cookie Balls be made ahead of time?
Yes I often prepare them a few days in advance and store them chilled until serving.
Do Easter Oreo Cookie Balls need to be refrigerated?
I recommend refrigeration because of the cream cheese filling which helps maintain safety and texture.
Can I use different colors for Easter Oreo Cookie Balls?
Absolutely I like experimenting with pastel shades or matching them to party themes.
How long do Easter Oreo Cookie Balls last?
When stored properly they stay fresh for up to five days in the refrigerator.
See You in the Kitchen
I hope you enjoy making these Easter Oreo Cookie Balls as much as I do and that they add a fun homemade touch to your celebration. If you try them be sure to save the recipe and share your results with friends or family.
Happy Cooking!
Print
Easter Oreo Cookie Balls
- Total Time: 1 hour
- Yield: 24 cookie balls
- Diet: Vegetarian
Description
Looking for the best Easter Oreo Cookie Balls recipe? This easy and quick no bake dessert is a simple and fun idea for spring celebrations. Made with crushed cookies and creamy filling these treats are perfect for Easter parties family gatherings baby showers or holiday dessert tables. They are easy to customize with colors and sprinkles making them one of the best healthy looking festive dessert ideas to prepare ahead and share with guests.
Ingredients
- 36 Oreo cookies
- 8 oz cream cheese softened
- 12 oz white candy melts
- Food coloring as needed
- Sprinkles for decorating
Instructions
- Crush Oreo cookies in a food processor until fine crumbs form and transfer to a bowl.
- Add 8 oz softened cream cheese and mix until a smooth dough forms making sure all crumbs are fully combined.
- Scoop about 1 tablespoon of mixture and roll into egg shapes then place on a parchment lined baking sheet.
- Chill the shaped balls in the refrigerator for 30 minutes to firm up and make dipping easier.
- Melt white candy melts in microwave safe bowls in 20 second intervals stirring between each.
- Add food coloring to melted coating and mix until desired pastel shades are achieved.
- Dip each chilled Oreo ball into coating tap off excess and place back on parchment.
- Immediately decorate with sprinkles and allow coating to set completely before serving.
Notes
- Chill the mixture well to keep shapes intact.
- Work with one color coating at a time.
- Reheat coating gently if it thickens.
- Prep Time: 30 minutes
- Cook Time: 0 minutes
- Category: Dessert
- Method: No Bake
- Cuisine: American
Nutrition
- Serving Size: 1 cookie ball
- Calories: 180
- Sugar: 14g
- Sodium: 95mg
- Fat: 10g
- Saturated Fat: 6g
- Unsaturated Fat: 3g
- Trans Fat: 0g
- Carbohydrates: 20g
- Fiber: 1g
- Protein: 2g
- Cholesterol: 15mg