

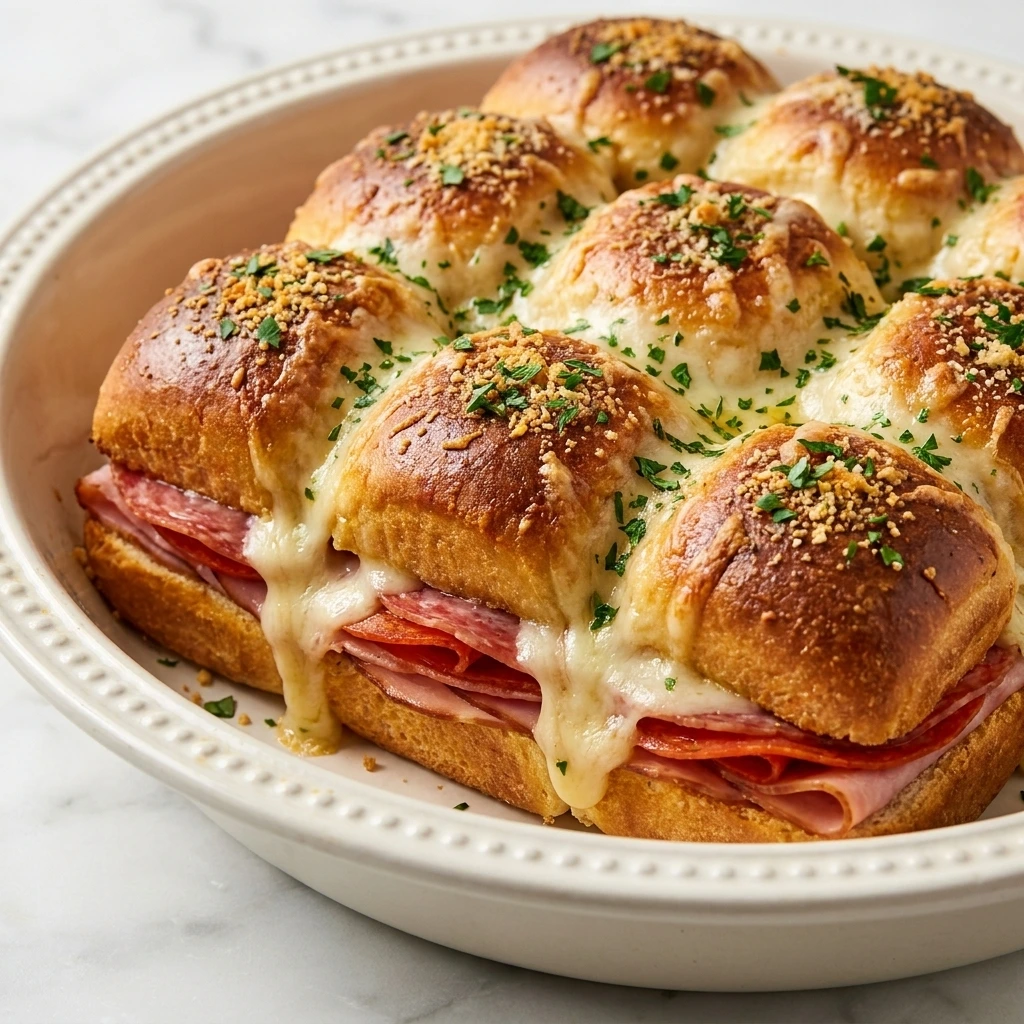
Perry’s Steakhouse serves one of the best Pork Chop I have ever tasted and meanwhile these Hot Italian Sub Sliders bring that same warm and satisfying feeling with soft bread and juicy layers of Italian meats and melted cheese and flavorful seasonings.
Today I will show how I make my Hot Italian Sub Sliders at home easily just with some easy to find ingredients. Just To know that my Hot Italian Sub Sliders turned out so cheesy and so crispy almost like the restaurant version and meanwhile I really love this recipe for quick family dinners and casual gatherings.
Also I tried the same layering method with turkey and roast beef and the result was even better and therefore I will leave some tasty other variations below you can try using the same ingredients and same cooking process. If you enjoy baked sandwich recipes and cozy party food then you should also try our Mini Grilled Cheese Sliders for another warm and cheesy idea. Usually Hot Italian Sub Sliders are served during weekend lunches and game day parties and honestly they are so incredible.
I recommend anyone to enjoy them fresh from the oven and meanwhile if you cannot order them from a sandwich shop then you can easily make this homemade version with simple ingredients and rich flavor.
Ingredients
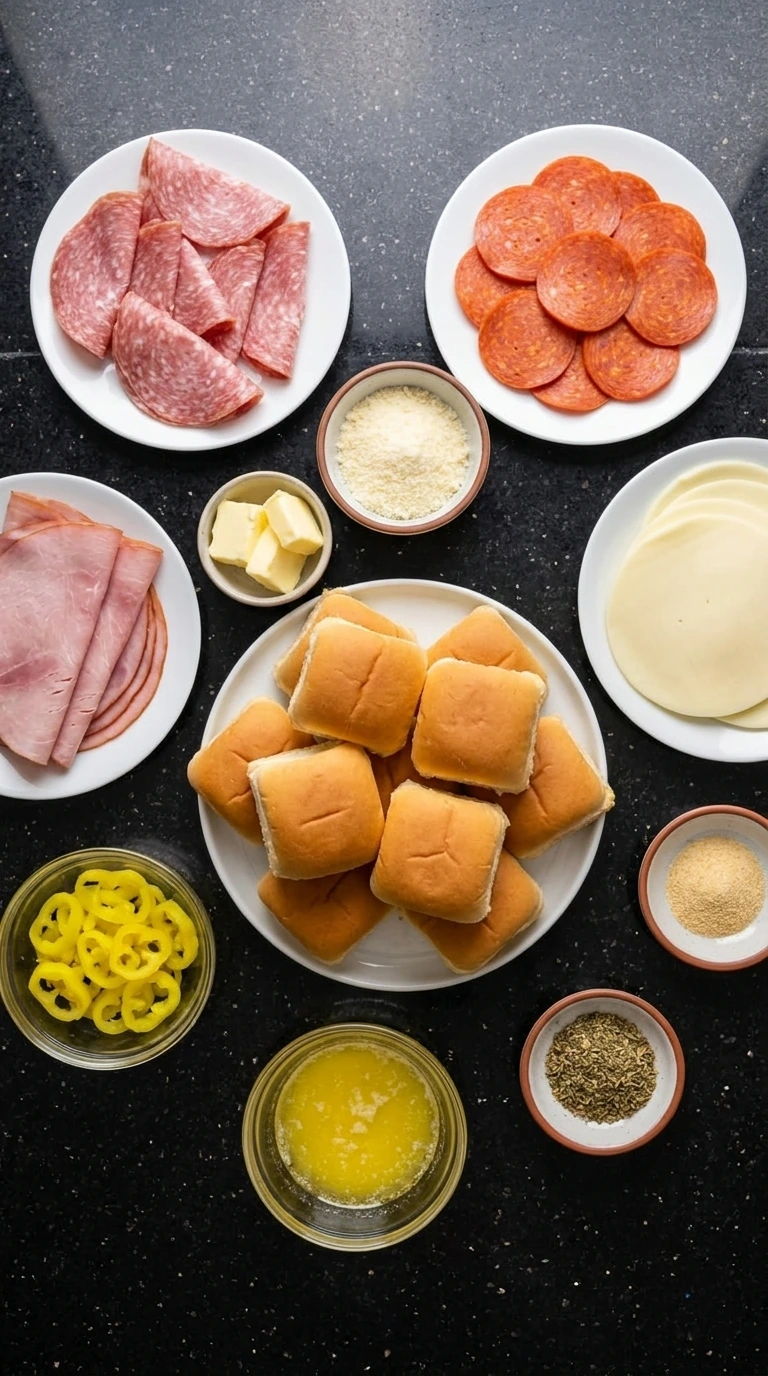
Here is what I use for this recipe and you can adjust nuts or spices based on preference:
- Slider rolls: Soft bread base that holds the layers together while becoming lightly crisp during baking.
- Sliced salami: Adds savory Italian flavor and slightly crisp edges after baking.
- Sliced pepperoni: Provides spicy smoky flavor and rich texture throughout the sliders.
- Sliced ham: Balances the stronger meats with tender salty layers.
- Provolone cheese: Creates gooey melted layers that bind the sandwiches together.
- Banana pepper rings: Adds tangy flavor and light crunch inside the sliders.
- Unsalted butter: Brushes over the rolls to create golden browned tops.
- Italian seasoning: Adds herby flavor to the buttery topping.
- Garlic powder: Enhances the savory baked flavor of the sliders.
- Parmesan cheese: Adds salty cheesy flavor on top of the baked rolls.
Tools You’ll Need
- Bread knife: Slices the slider rolls evenly while keeping the tops attached.
- Ceramic baking dish: Holds the assembled sliders while baking them evenly.
- Small bowl: Mixes the butter and seasonings for the topping.
- Pastry brush: Spreads the seasoned butter mixture over the rolls.
Instructions
Step 1: Slice the slider rolls
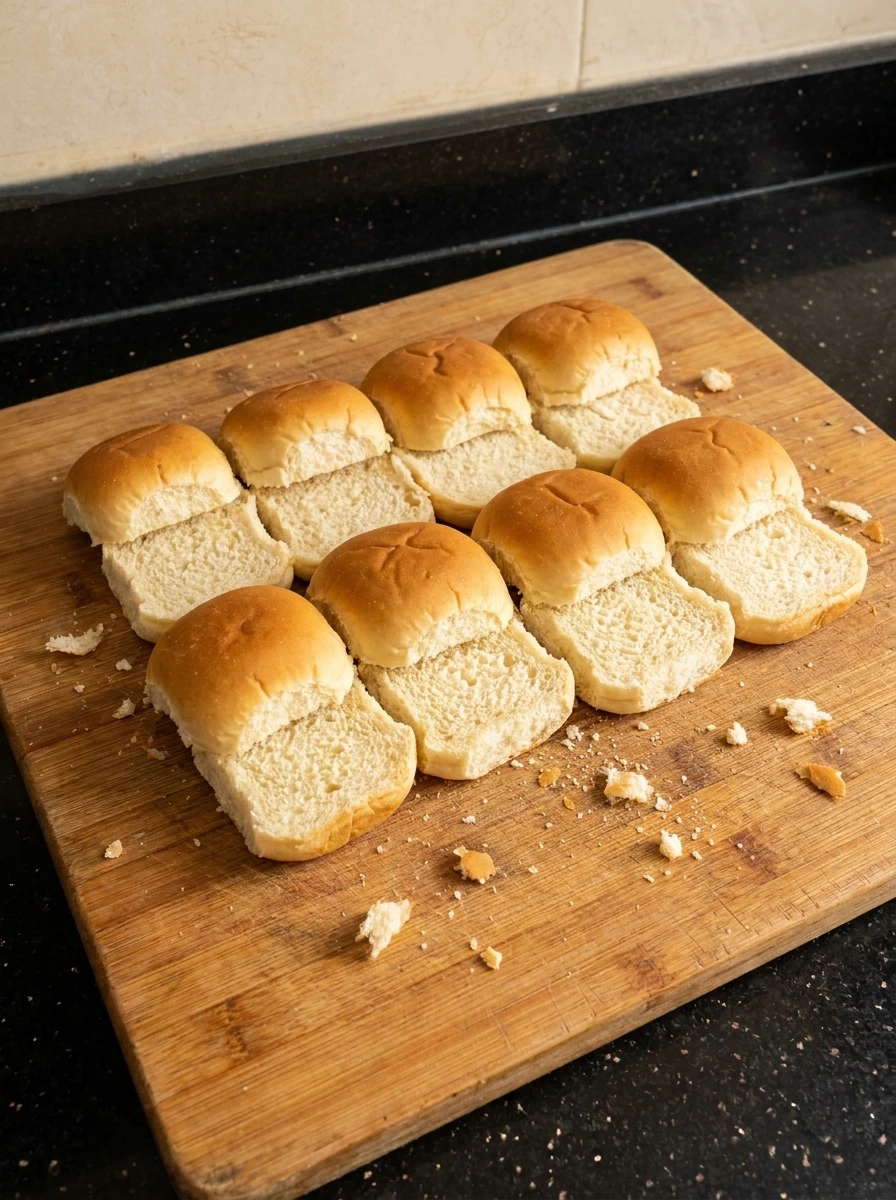
Carefully slice the slider rolls through the middle and meanwhile keep the tops attached together for easier layering. The bread looks soft and fluffy and the inside texture becomes visible after cutting. Place the bottom half of the rolls closely together and meanwhile slightly separate some edges for a natural homemade look. The sliced bread now creates a ready base for the meat and cheese layers.
Tip: Keep the rolls connected while slicing so the sliders bake evenly and hold together better after serving.
Step 2: Layer the meats and cheese
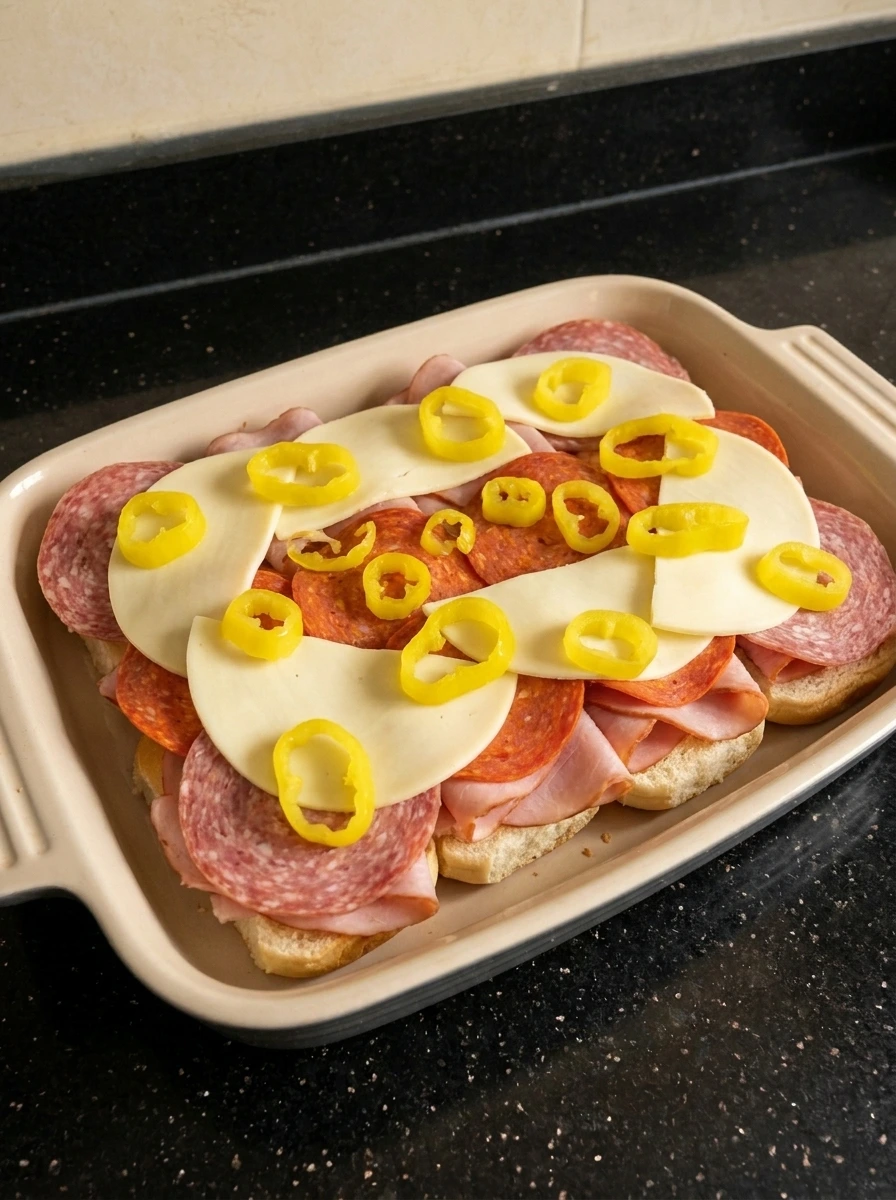
Fold the salami and ham across the bottom layer and meanwhile loosely scatter the pepperoni slices so the layers look natural and uneven. Add provolone cheese slices over the meats while leaving some edges exposed. Scatter banana pepper rings unevenly between the cheese layers and meanwhile allow some peppers to overlap naturally. The sandwich filling now looks colorful and stacked with visible layers.
Tip: Fold deli meats instead of laying them flat so the sliders keep more texture and flavor in every bite.
Step 3: Brush the seasoned butter topping
Place the top half of the rolls over the filling and meanwhile gently press down so the sandwiches stay compact. Melted butter mixed with Italian seasoning and garlic powder is brushed unevenly across the tops. Sprinkle parmesan cheese over the buttery rolls and meanwhile allow some herbs and cheese to gather more heavily in random spots. The tops now appear glossy and richly seasoned.
Tip: Brush the butter mixture all the way to the edges so every roll browns evenly during baking.
Step 4: Bake until the cheese melts

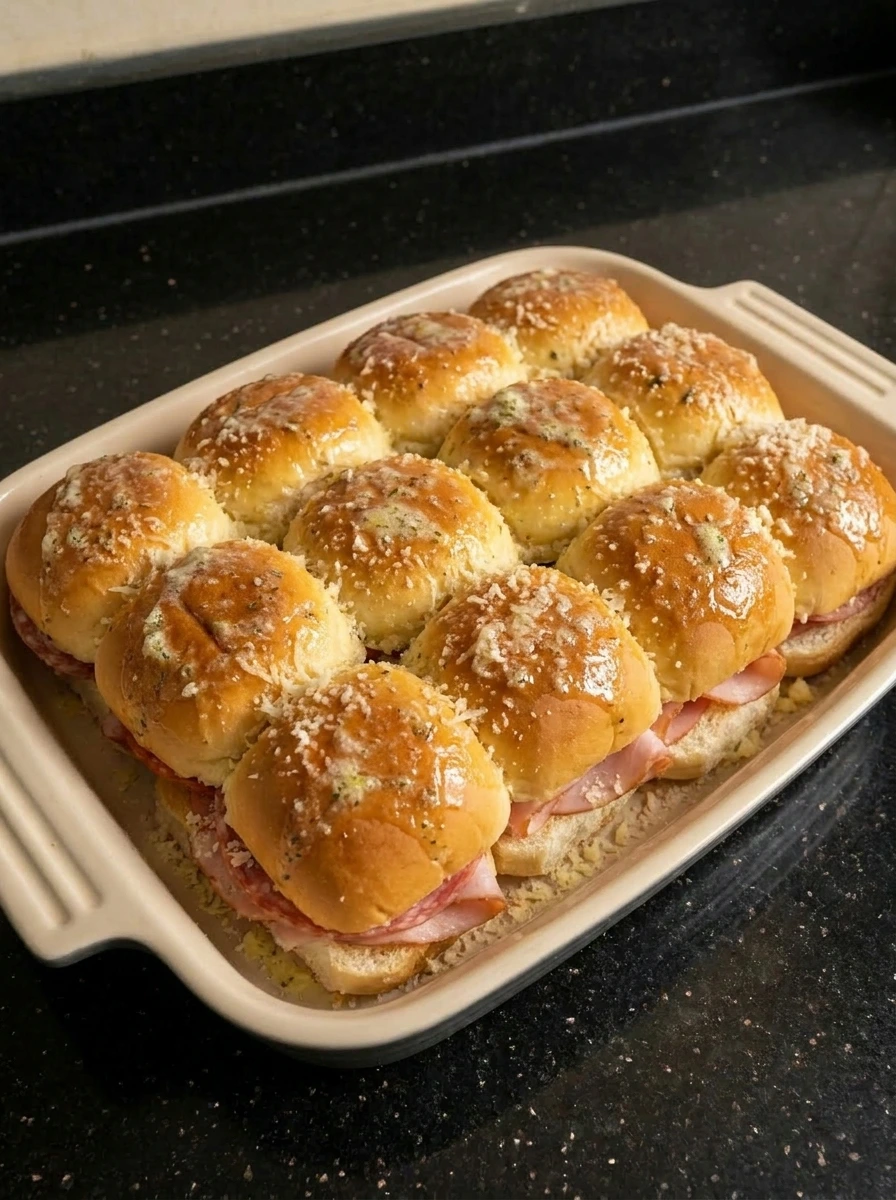
Bake the sliders until the tops become golden brown and meanwhile the provolone cheese melts between the meat layers. Some cheese bubbles along the edges and creates crispy melted spots. The rolls look slightly crisp on top while the inside remains soft and warm. The meats curl slightly and meanwhile the banana peppers soften into the melted layers.
Tip: Do not overbake the sliders because the bread can dry out instead of staying soft and cheesy.
Step 5: Serve the sliders warm

Separate the sliders gently and meanwhile allow melted cheese strands to stretch naturally between the sandwiches. Place a few sliders onto a serving plate with visible layers of meats and softened peppers. The tops look buttery and crisp while the inside remains gooey and savory. The final sliders appear homemade with uneven melted cheese and naturally layered fillings.
Tip: Serve the sliders immediately while the cheese is still hot and stretchy for the best texture.
Pro Tips
- Layer the provolone between the meats instead of only on top so the cheese melts evenly through every slider.
- Allow some deli meat edges to fold naturally because the uneven texture creates crisp flavorful bites after baking.
- Use freshly grated parmesan on top because it melts better and creates a richer golden crust during baking.
- Let the baked sliders rest for two minutes before separating so the melted cheese settles without sliding apart.
Storage Instructions
Store leftover Hot Italian Sub Sliders in an airtight container in the refrigerator for up to three days and meanwhile keep them tightly covered to prevent the bread from drying out. Reheat the sliders in the oven instead of the microwave and meanwhile this helps the tops stay lightly crisp while the cheese melts again. If you plan to make these sliders for meal prep then keep the butter topping separate until baking time and meanwhile this prevents soggy bread. You can also freeze fully baked sliders individually and meanwhile wrap them tightly before storing for longer freshness.
Frequently Asked Questions
Yes and meanwhile you can assemble the sliders several hours early and bake them fresh before serving.
Provolone melts smoothly and meanwhile mozzarella also works well for a softer cheesy texture.
Yes and meanwhile reheating them in the oven keeps the bread crisp and the cheese nicely melted.
Absolutely and meanwhile they stay warm easily and feed several people during casual gatherings.
See You in the Kitchen
These Hot Italian Sub Sliders are a great way to satisfy your cheesy sandwich cravings without ordering takeout from a deli.
I typically serve these sliders with chips or salad at the same time I bake them and therefore all of my party food is ready together.
Even my family loves this one and meanwhile if you want another fun appetizer then try our Pizza Dip and Pigs in a Blanket for your next gathering.
Print
Hot Italian Sub Sliders
- Total Time: 45 minutes
- Yield: 4 servings
Description
These Hot Italian Sub Sliders are the best easy and quick party sandwiches for busy nights and casual gatherings while also giving you simple ideas for a healthy weeknight dinner or game day party tray. Soft slider rolls are layered with savory Italian meats and gooey melted cheese and then baked until golden and warm. This simple recipe comes together fast and delivers rich flavor with crispy tops and cheesy layers everyone loves.
Ingredients
- 12 rolls Slider rolls
- 8 slices Sliced salami
- 16 slices Sliced pepperoni
- 8 slices Sliced ham
- 8 slices Provolone cheese
- 1/3 cup Banana pepper rings
- 4 tablespoons Unsalted butter
- 1 teaspoon Italian seasoning
- 1/2 teaspoon Garlic powder
- 2 tablespoons Parmesan cheese
Instructions
- Carefully slice the slider rolls through the middle and meanwhile keep the tops attached together for easier layering. The bread looks soft and fluffy and the inside texture becomes visible after cutting. Place the bottom half of the rolls closely together and meanwhile slightly separate some edges for a natural homemade look. The sliced bread now creates a ready base for the meat and cheese layers.
- Fold the salami and ham across the bottom layer and meanwhile loosely scatter the pepperoni slices so the layers look natural and uneven. Add provolone cheese slices over the meats while leaving some edges exposed. Scatter banana pepper rings unevenly between the cheese layers and meanwhile allow some peppers to overlap naturally. The sandwich filling now looks colorful and stacked with visible layers.
- Place the top half of the rolls over the filling and meanwhile gently press down so the sandwiches stay compact. Melted butter mixed with Italian seasoning and garlic powder is brushed unevenly across the tops. Sprinkle parmesan cheese over the buttery rolls and meanwhile allow some herbs and cheese to gather more heavily in random spots. The tops now appear glossy and richly seasoned.
- Bake the sliders until the tops become golden brown and meanwhile the provolone cheese melts between the meat layers. Some cheese bubbles along the edges and creates crispy melted spots. The rolls look slightly crisp on top while the inside remains soft and warm. The meats curl slightly and meanwhile the banana peppers soften into the melted layers.
- Separate the sliders gently and meanwhile allow melted cheese strands to stretch naturally between the sandwiches. Place a few sliders onto a serving plate with visible layers of meats and softened peppers. The tops look buttery and crisp while the inside remains gooey and savory. The final sliders appear homemade with uneven melted cheese and naturally layered fillings.
Notes
Pro Tips:
- Layer the provolone between the meats instead of only on top so the cheese melts evenly through every slider.
- Allow some deli meat edges to fold naturally because the uneven texture creates crisp flavorful bites after baking.
- Use freshly grated parmesan on top because it melts better and creates a richer golden crust during baking.
- Let the baked sliders rest for two minutes before separating so the melted cheese settles without sliding apart.
Storage: Store leftover Hot Italian Sub Sliders in an airtight container in the refrigerator for up to three days and meanwhile keep them tightly covered to prevent the bread from drying out. Reheat the sliders in the oven instead of the microwave and meanwhile this helps the tops stay lightly crisp while the cheese melts again. If you plan to make these sliders for meal prep then keep the butter topping separate until baking time and meanwhile this prevents soggy bread. You can also freeze fully baked sliders individually and meanwhile wrap them tightly before storing for longer freshness.
- Prep Time: 15 minutes
- Cook Time: 30 minutes
- Category: Appetizers
- Cuisine: Italian-American
Nutrition
- Serving Size: 3 sliders
- Calories: 520
- Sugar: 5g
- Sodium: 1280mg
- Fat: 29g
- Carbohydrates: 35g
- Fiber: 2g
- Protein: 27g
- Cholesterol: 65mg