
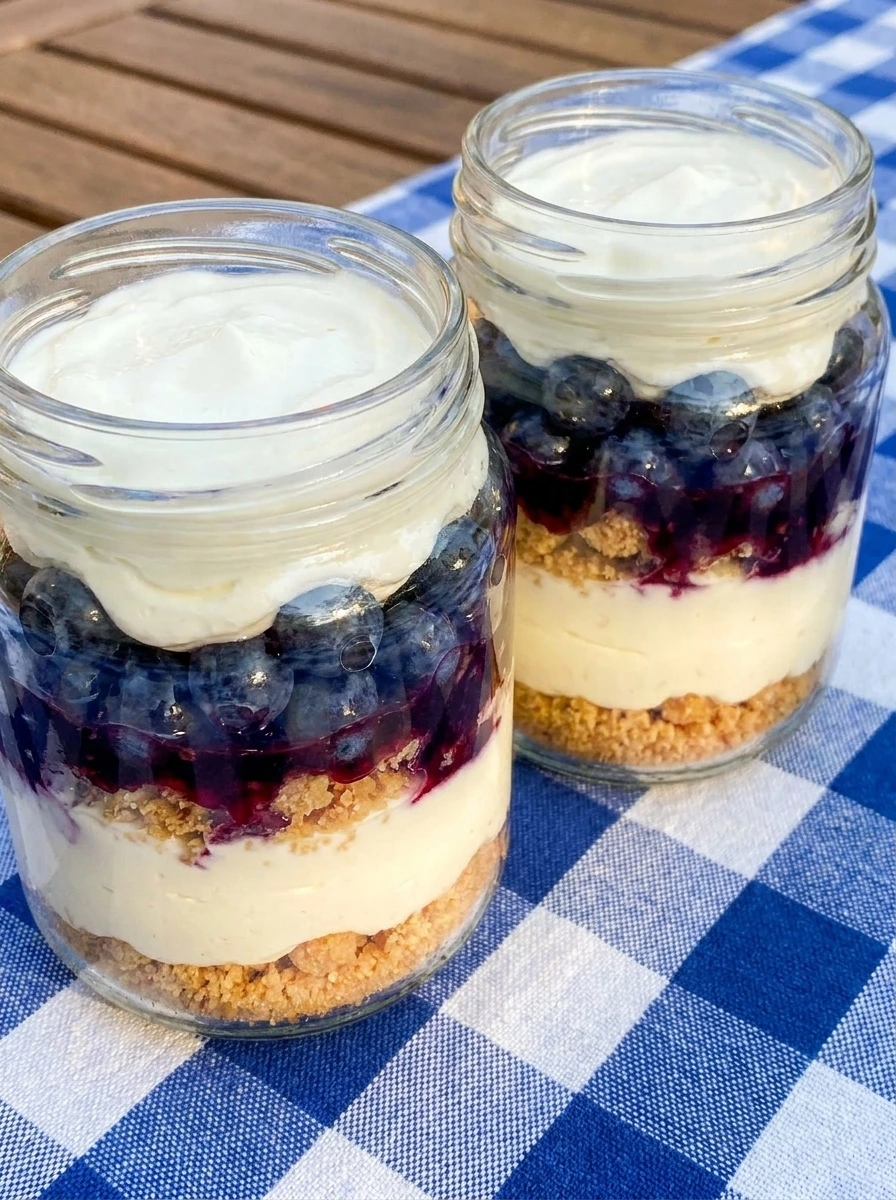
I honestly havent really shared many no bake desserts in my blog but this No-Bake Red White and Blue Cheesecake Jars recipe was one I had to share. This recipe is inspired by festive summer treats and is easy to prepare and make and it’s a super tasty dessert packed full of creamy flavor and is quite refreshing and filling.
If you love quick party desserts then you should also try our Boursin Bruschetta Dip for a savory balance at your table. When people think about layered cheesecake jars they might assume they are complicated to assemble but trust me on this when it’s done the right way it creates beautiful colorful layers that taste rich and smooth and very satisfying.
This recipe is super tasty and quick to make and I recommend this dessert for those who want to enjoy a festive treat without turning on the oven.
Ingredients
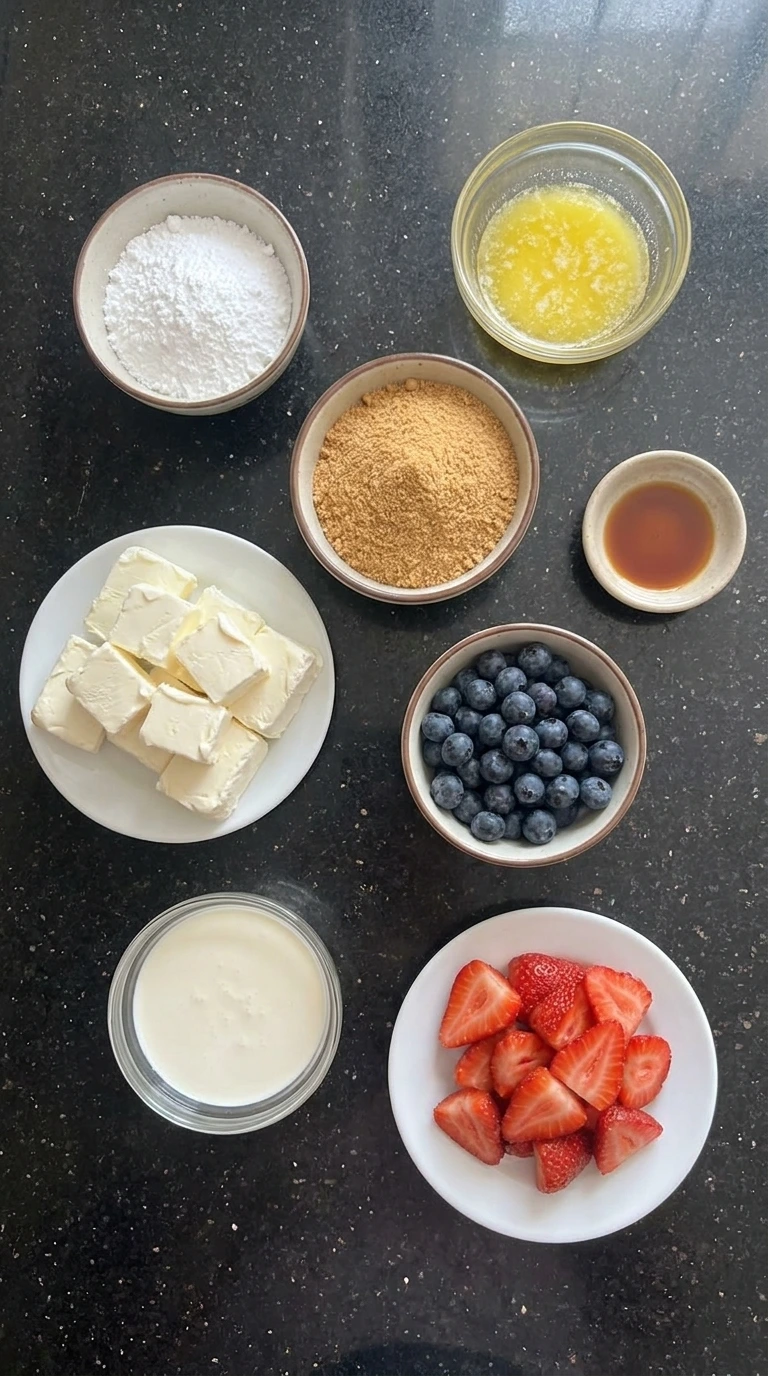
Here is what I use for this recipe and you can adjust nuts or spices based on preference:
- graham cracker crumbs: forms the crunchy base layer that contrasts with the creamy filling.
- melted butter: binds the crumbs together to create a cohesive base texture.
- cream cheese: provides the rich and smooth cheesecake filling structure.
- powdered sugar: sweetens the filling while keeping it silky and lump free.
- vanilla extract: enhances the flavor with a warm aromatic note.
- heavy whipping cream: adds lightness and helps create a fluffy whipped texture.
- fresh strawberries: adds natural sweetness and vibrant red color for layering.
- fresh blueberries: provides a juicy burst of flavor and deep blue color contrast.
Tools You’ll Need
- mixing bowl: used to combine crumbs and mix filling.
- hand mixer: whips the cheesecake mixture to a fluffy texture.
- serving jars: holds and displays layered dessert.
Instructions
Step 1: Combine crumbs and butter
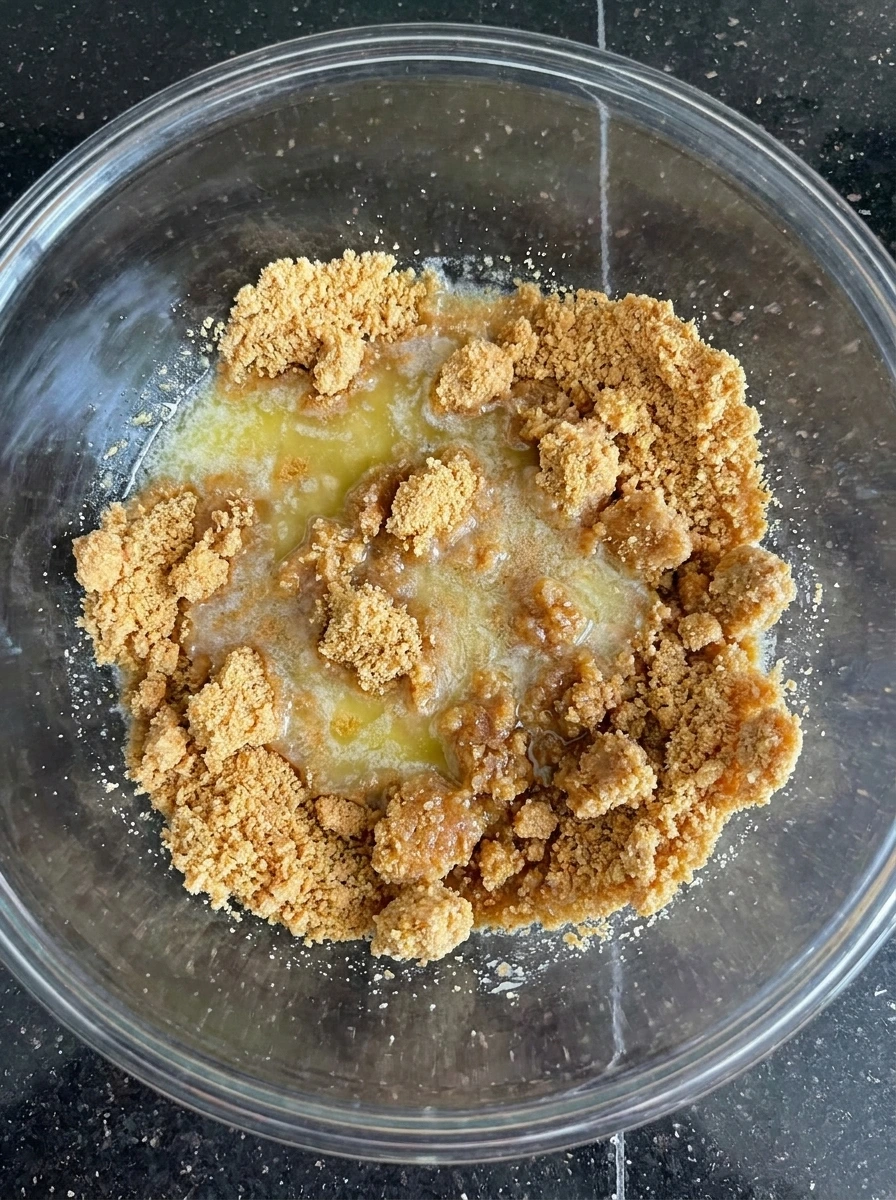
In a mixing bowl the graham cracker crumbs are poured together with melted butter and then stirred until the mixture looks slightly darker and evenly coated and starts clumping together. The texture changes from dry crumbs into a moist sandy mixture that holds together loosely and shows small uneven clusters forming throughout.
Tip: Mix just until crumbs hold shape when pressed so the base stays crisp not greasy.
Step 2: Whip cheesecake filling
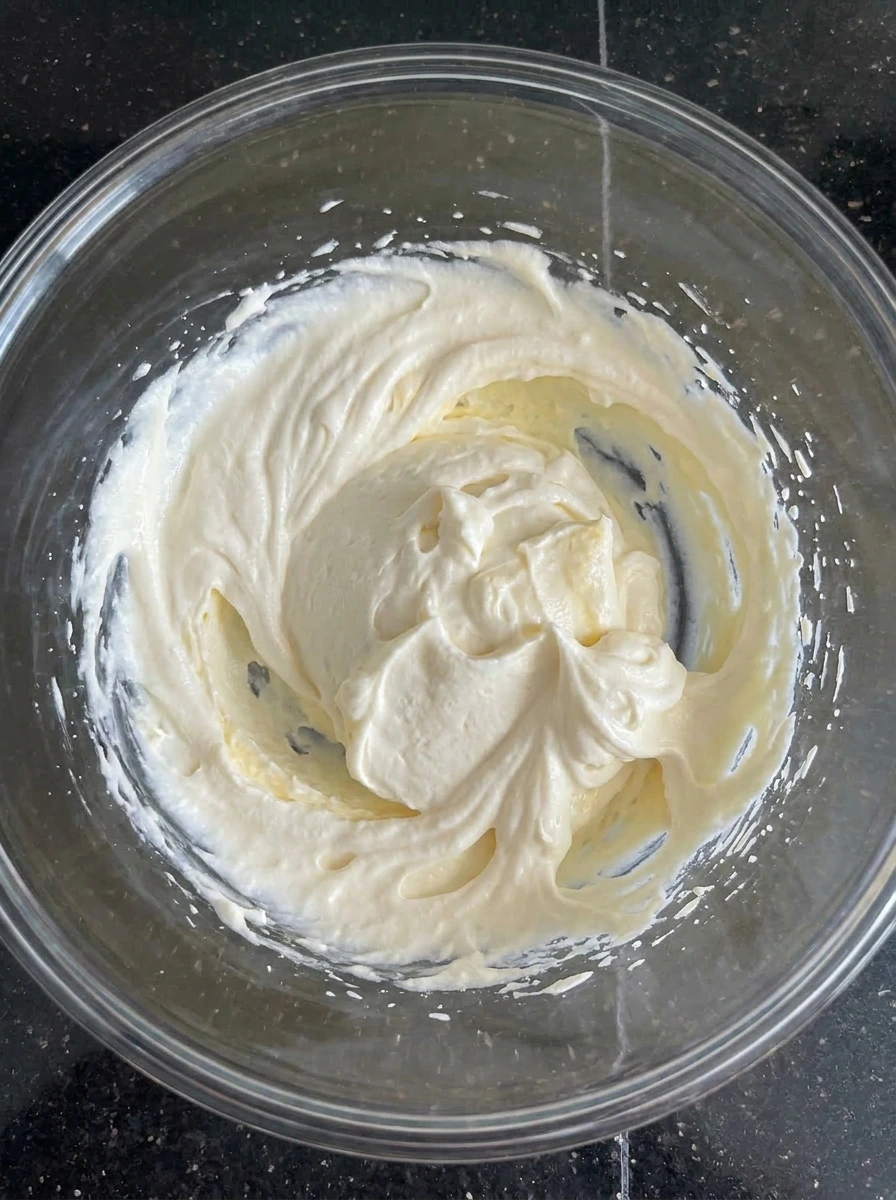
The cream cheese powdered sugar and vanilla are blended until smooth and creamy and then heavy cream is added and whipped into the mixture until it becomes light fluffy and slightly airy. The mixture visibly transforms from dense and thick into a smooth fluffy filling with soft peaks and a lighter color.
Tip: Whip until soft peaks form for a light airy texture that holds layers well.
Step 3: Layer crumbs and cream
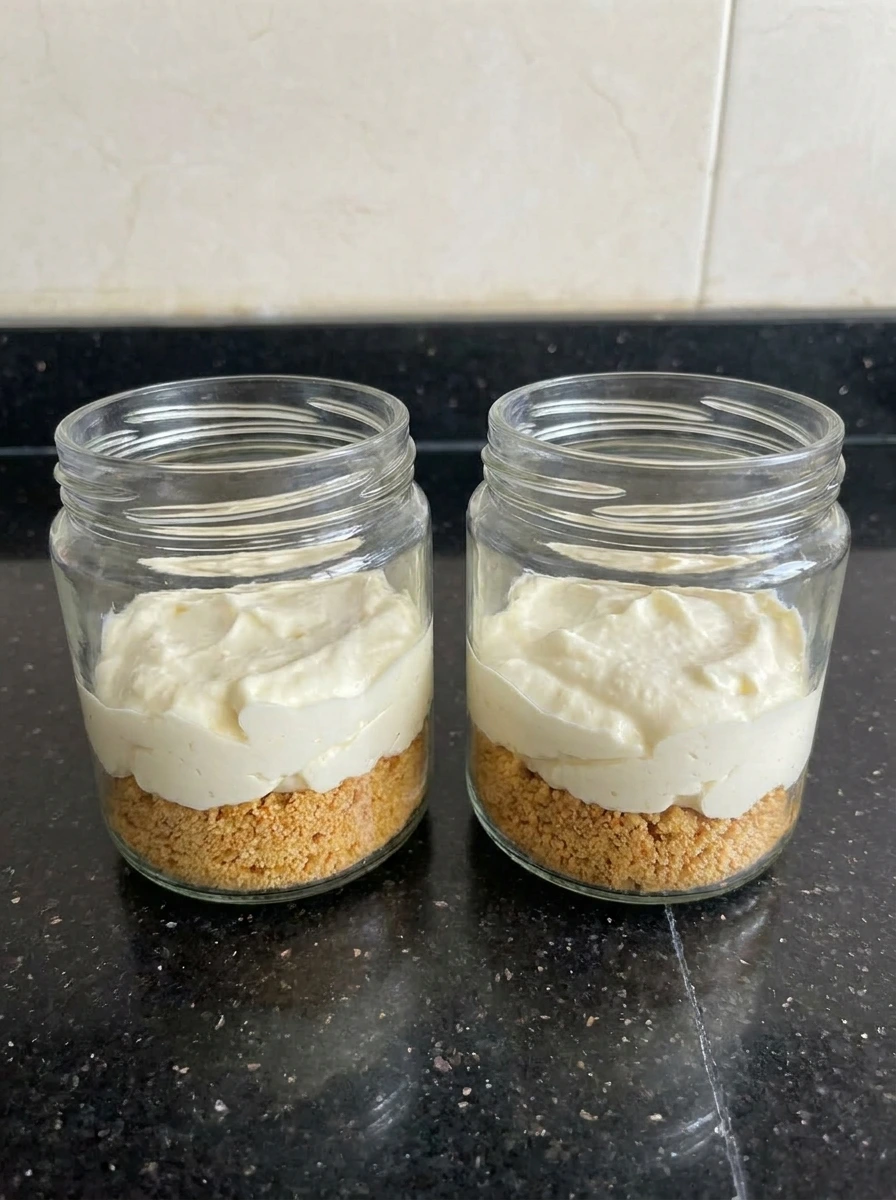
The crumb mixture is spooned into jars forming a loose base layer and then the cheesecake filling is added on top creating visible contrast between the crumb and cream layers. The structure changes as distinct layers appear with uneven edges and slightly mixed areas where crumbs meet the cream.
Tip: Press crumbs lightly not firmly so layers stay defined and not compacted.
Step 4: Add strawberries layer
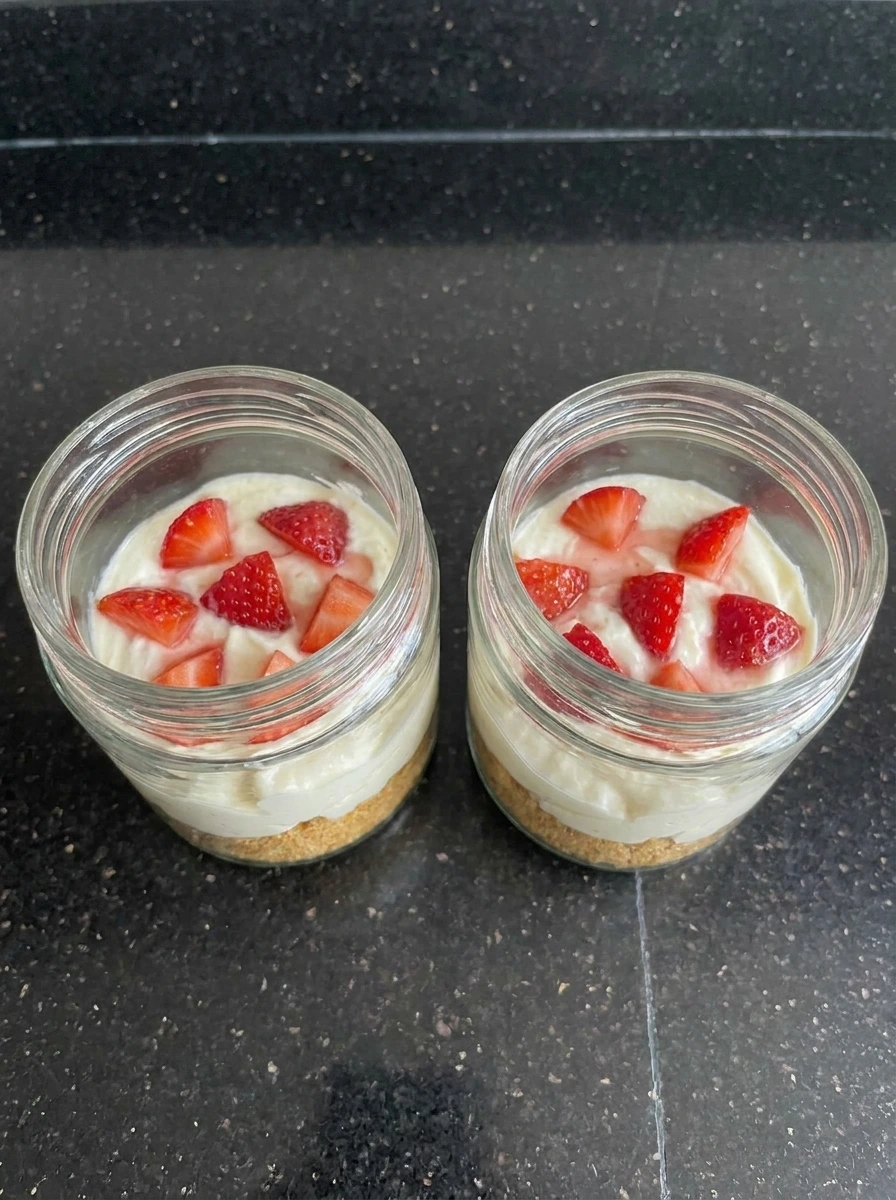
Sliced strawberries are scattered over the cream layer adding bright red color and slight juice that blends into the cream creating a marbled effect in spots. The visual changes with the addition of fruit and slight moisture softening parts of the cream layer.
Tip: Use ripe strawberries for best sweetness and color contrast.
Step 5: Finish with blueberries and final cream
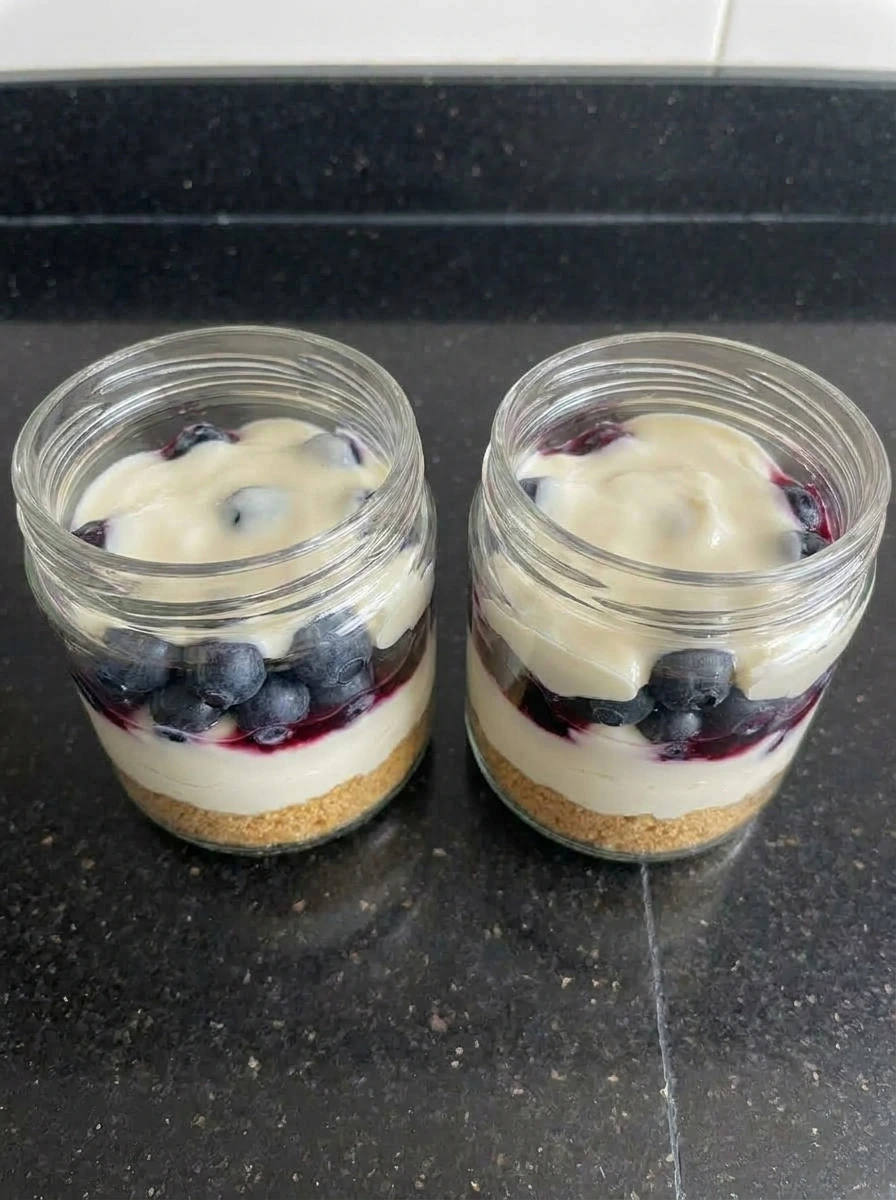
Blueberries are added on top followed by another spoonful of cheesecake filling creating a layered red white and blue effect with slight overlaps and irregular distribution. The jars now look fuller and more structured with multiple layers and visible color contrast and soft blending between layers.
Tip: Do not overfill so layers remain visible and neat but still casual.
Pro Tips
- Chill jars for at least one hour so layers firm up and flavors blend together for a better texture and richer taste.
- Use slightly crushed berries for a natural juice release that enhances color and adds subtle sweetness between layers.
- Do not overmix the cream filling since over whipping can make it dense instead of light and airy.
- Layer unevenly and casually for a homemade look that feels natural and visually appealing without perfect symmetry.
Storage Instructions
Store the cheesecake jars in the refrigerator in airtight containers to keep the layers fresh and firm. Keep them chilled at all times since the cream filling softens quickly at room temperature. If transporting place them in a cooler to maintain structure and prevent melting. Avoid freezing as the texture may become grainy once thawed.
Frequently Asked Questions
Yes these jars can be made a day ahead and stored chilled which helps flavors blend better.
Yes but thaw and drain them first to avoid excess moisture making layers too soft.
You can use crushed cookies or biscuits for a slightly different flavor and texture.
They stay fresh for up to three days when sealed properly and kept chilled.
See You in the Kitchen
I hope you enjoy all the recipes I share with you including this delicious No-Bake Red White and Blue Cheesecake Jars recipe.
I hope you try it enjoy it rate it and share it with your friends and family!
Print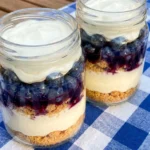
No-Bake Red White and Blue Cheesecake Jars
- Total Time: 20 minutes
- Yield: 6 servings
Description
These easy no-bake red white and blue cheesecake jars are the best dessert ideas for a quick and simple treat that feels festive and healthy. Perfect for holiday gatherings and summer party spreads or even brunch and potluck events these layered jars combine creamy filling and fresh fruit for a colorful finish everyone will love.
Ingredients
- 1 1/2 cups graham cracker crumbs
- 6 tablespoons melted butter
- 16 ounces cream cheese
- 3/4 cup powdered sugar
- 1 teaspoon vanilla extract
- 1 cup heavy whipping cream
- 1 cup sliced fresh strawberries
- 1 cup fresh blueberries
Instructions
- In a mixing bowl the graham cracker crumbs are poured together with melted butter and then stirred until the mixture looks slightly darker and evenly coated and starts clumping together. The texture changes from dry crumbs into a moist sandy mixture that holds together loosely and shows small uneven clusters forming throughout.
- The cream cheese powdered sugar and vanilla are blended until smooth and creamy and then heavy cream is added and whipped into the mixture until it becomes light fluffy and slightly airy. The mixture visibly transforms from dense and thick into a smooth fluffy filling with soft peaks and a lighter color.
- The crumb mixture is spooned into jars forming a loose base layer and then the cheesecake filling is added on top creating visible contrast between the crumb and cream layers. The structure changes as distinct layers appear with uneven edges and slightly mixed areas where crumbs meet the cream.
- Sliced strawberries are scattered over the cream layer adding bright red color and slight juice that blends into the cream creating a marbled effect in spots. The visual changes with the addition of fruit and slight moisture softening parts of the cream layer.
- Blueberries are added on top followed by another spoonful of cheesecake filling creating a layered red white and blue effect with slight overlaps and irregular distribution. The jars now look fuller and more structured with multiple layers and visible color contrast and soft blending between layers.
Notes
Pro Tips:
- Chill jars for at least one hour so layers firm up and flavors blend together for a better texture and richer taste.
- Use slightly crushed berries for a natural juice release that enhances color and adds subtle sweetness between layers.
- Do not overmix the cream filling since over whipping can make it dense instead of light and airy.
- Layer unevenly and casually for a homemade look that feels natural and visually appealing without perfect symmetry.
Storage: Store the cheesecake jars in the refrigerator in airtight containers to keep the layers fresh and firm. Keep them chilled at all times since the cream filling softens quickly at room temperature. If transporting place them in a cooler to maintain structure and prevent melting. Avoid freezing as the texture may become grainy once thawed.
- Prep Time: 20 minutes
- Cook Time: 0 minute
- Category: Desserts
- Cuisine: American
Nutrition
- Serving Size: 1 jar
- Calories: 320
- Sugar: 22g
- Sodium: 180mg
- Fat: 20g
- Carbohydrates: 30g
- Fiber: 2g
- Protein: 4g
- Cholesterol: 60mg