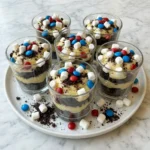

Today I’m diving into Chocolate Mousse Cups because I love starting dessert projects that feel fun and creative while still being incredibly easy to pull off. I’m guiding you through each step so you can enjoy something elegant without stressing over complicated techniques and since the recipe itself is simple it becomes a perfect treat for beginners.
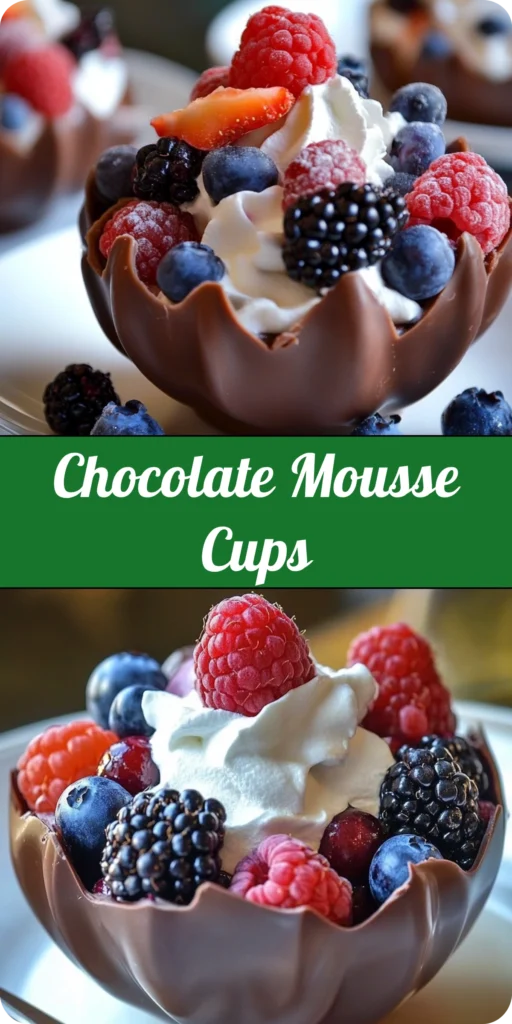
I like how these chocolate cups create a playful twist and they always impress guests even though the process is surprisingly approachable. As soon as I learned how to shape chocolate using balloons I knew I had to share it because it’s such a delightful way to elevate a classic mousse dessert.
When I first realized how silky homemade chocolate mousse can be I immediately stopped buying packaged versions and started whipping it up at home. I appreciate how the texture turns out airy yet rich and the flavor stays deep without feeling heavy. Every time I make a new batch I’m reminded that just a few basic ingredients turn into something special and satisfying.
I also enjoy how customizable this dessert is because sometimes I fill the cups with berries while other times I add nuts or whipped cream. I’m showing you a technique that always works for me and I think once you try it you’ll want to make these mousse cups over and over. Let’s get started and create something beautiful together.
Ingredients
Here’s what I use for this recipe and feel free to make substitutions based on what you prefer.
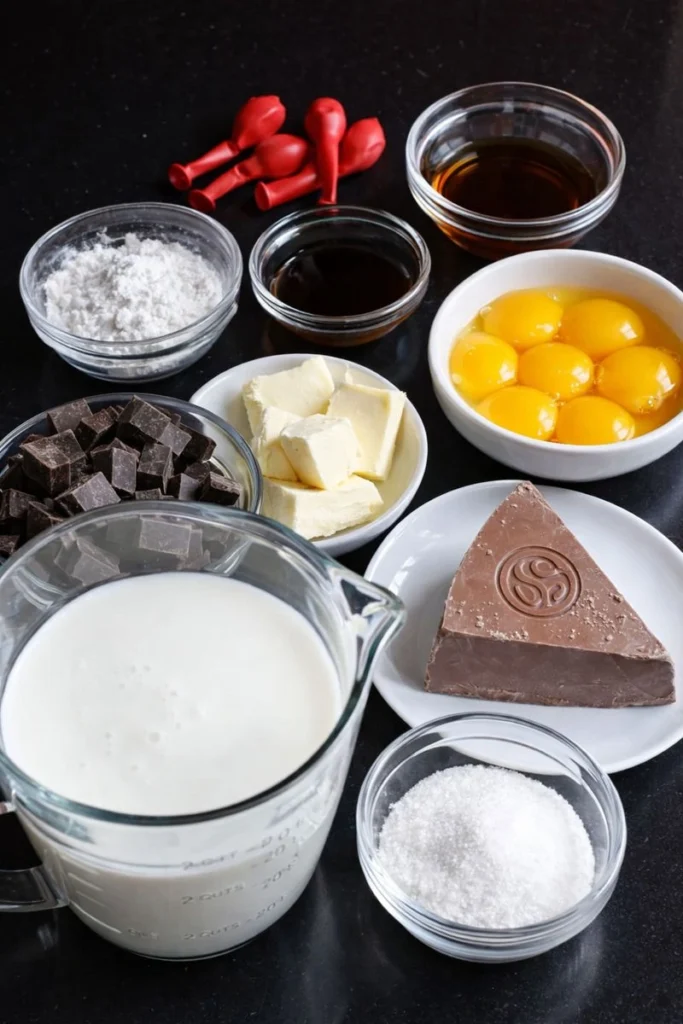
- Chocolate – This forms the edible cups and gives structure and a rich cocoa flavor.
- Heavy cream – Helps create that luscious whipped mousse texture.
- Eggs – Add richness and help stabilize the mousse.
- Sugar – Sweetens the mousse without overpowering the chocolate.
- Vanilla extract – Adds warmth and depth to the mousse flavor.
- Fresh berries – Perfect for topping and adding brightness.
- Whipped cream – Enhances the presentation and adds lightness.
Tools You’ll Need
- Mixing bowls – I use these to separate wet and dry steps and keep the mousse smooth.
- Whisk – Helps me aerate the cream and blend ingredients evenly.
- Heatproof bowl – Essential for melting chocolate safely.
- Small balloons – These form the molds for the chocolate cups.
- Baking sheet with parchment – I place my dipped balloons here to set the chocolate.
- Refrigerator space – Needed to chill and set both the cups and the mousse.
- Spoon or piping bag – Helps me neatly fill the chocolate cups.
Instructions
Step 1: Prepare the Balloons
I start by washing and drying the balloons then inflating them to the size of a small bowl. I tie them securely so they hold their shape.
Step 2: Melt the Chocolate

I melt the chocolate in a heatproof bowl over simmering water while whisking gently until everything becomes smooth and glossy.
Step 3: Dip the Balloons
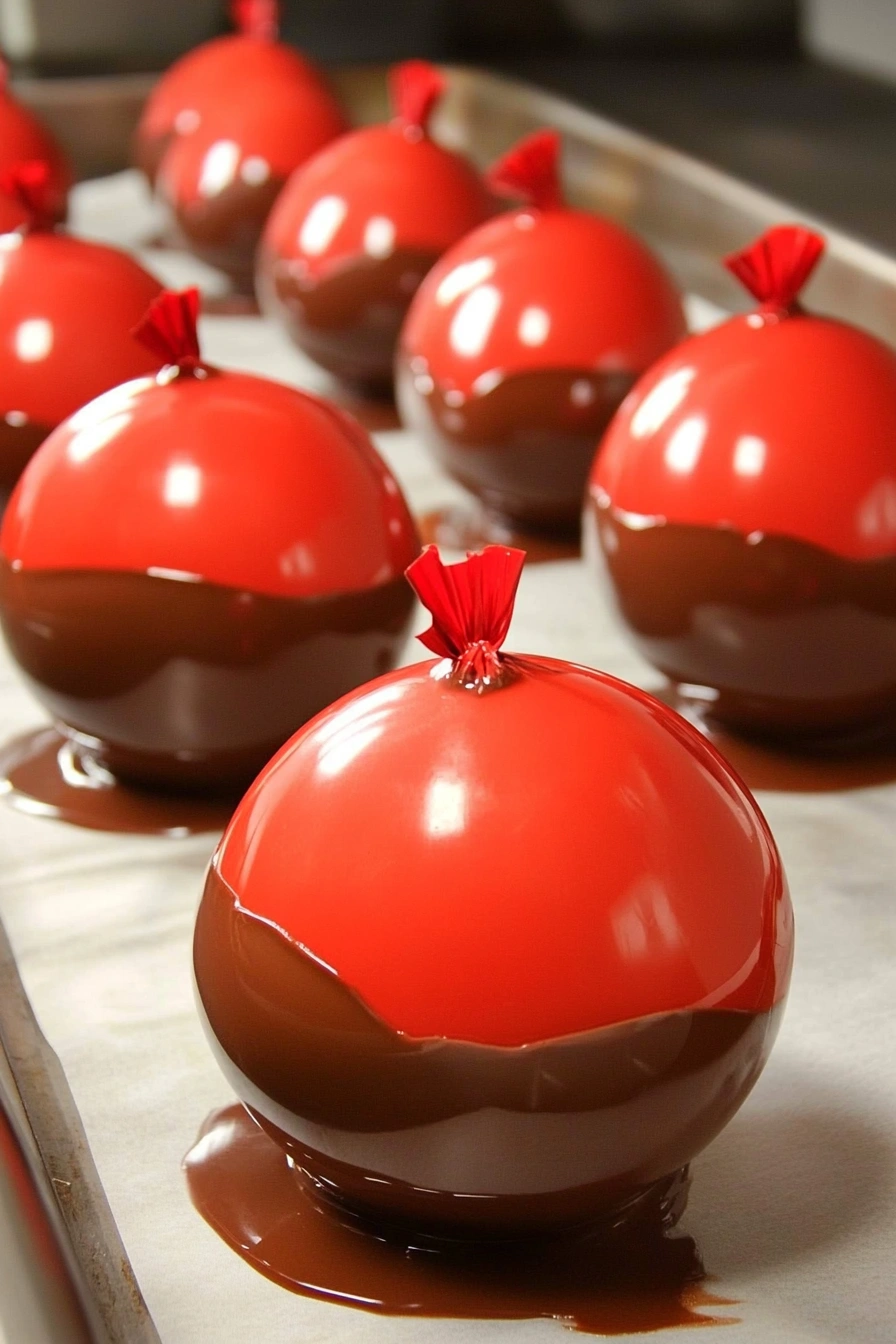
I dip each balloon halfway into the melted chocolate then gently rotate it to coat evenly. I place them onto a parchment-lined baking sheet and refrigerate them until firm.
Step 4: Make the Mousse
I whisk the heavy cream until it forms soft peaks. In another bowl I whisk the eggs with sugar over gentle heat until slightly thickened then I fold in melted chocolate and finish by folding in the whipped cream to create a light mousse.
Step 5: Remove Balloons
Once the chocolate cups are firm I carefully pop each balloon and peel it away from the chocolate. I take my time here to avoid cracks.
Step 6: Fill the Cups
I spoon or pipe the mousse into each chocolate cup and chill them again until the mousse sets nicely.
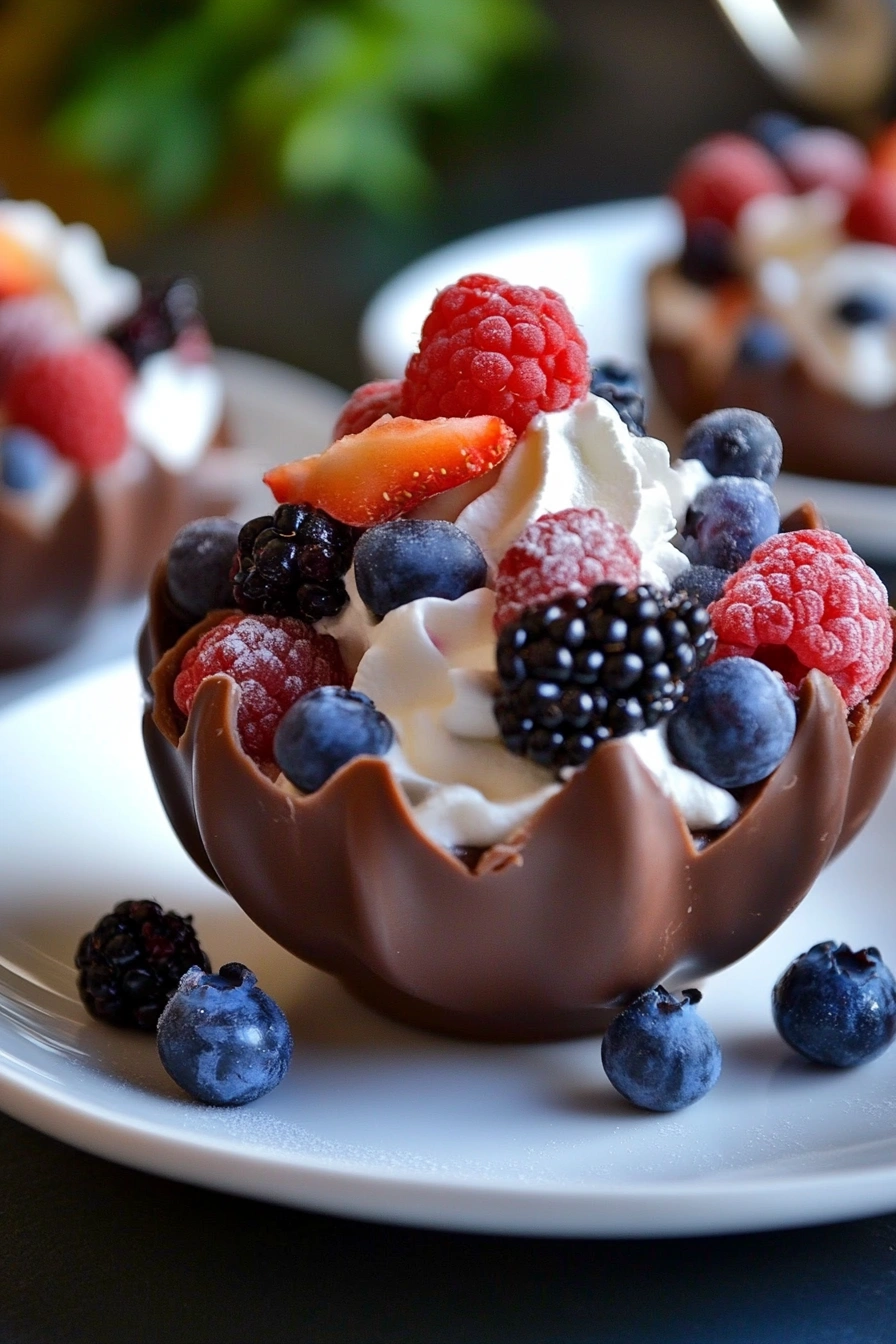
Step 7: Add Toppings
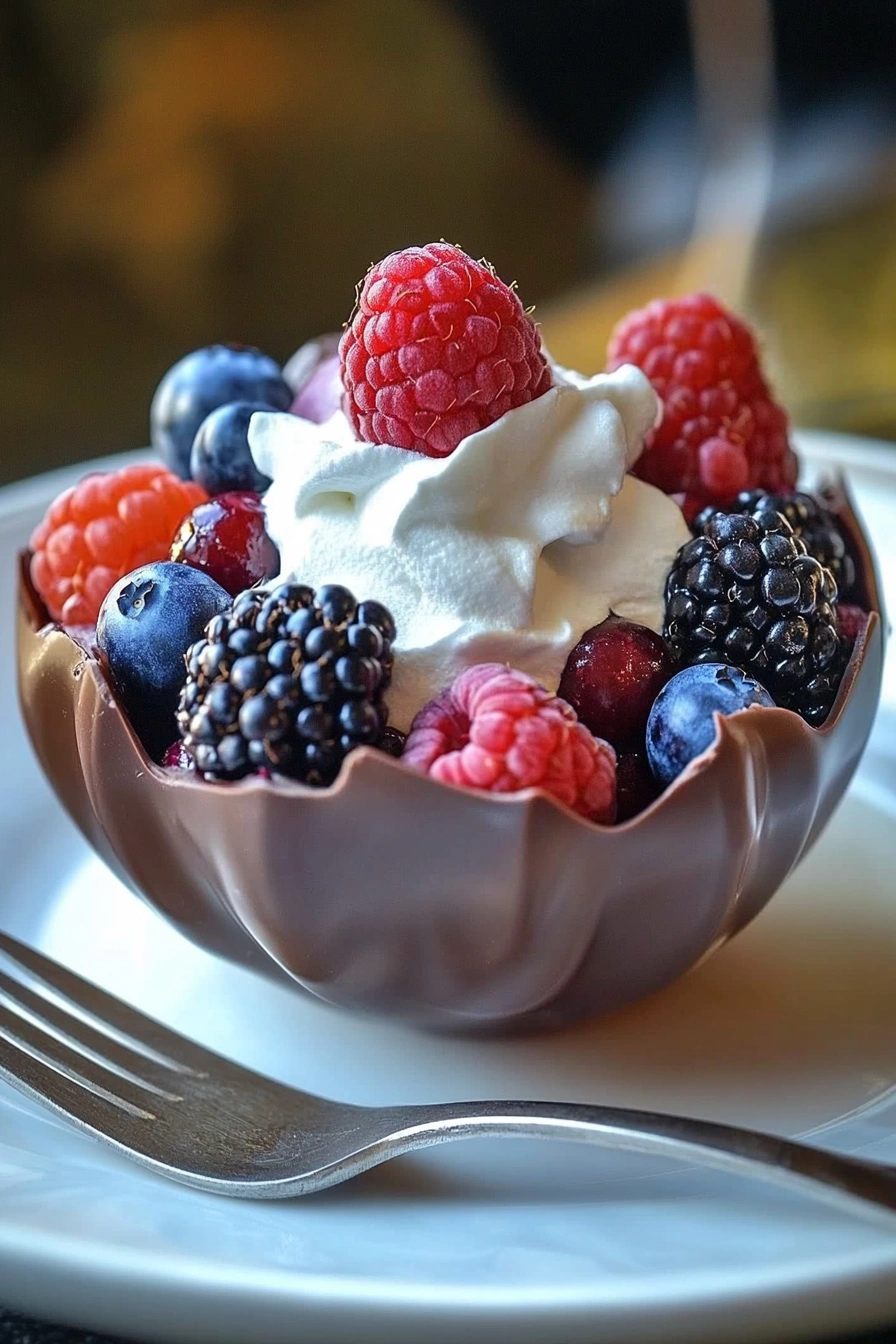
Right before serving I add fresh berries and a swirl of whipped cream.
Tips
I like to add a pinch of espresso powder to the chocolate to deepen its flavor without making it taste like coffee. Sometimes I chill the balloons a few minutes before dipping them because it makes the chocolate cling more evenly. If you prefer crispier cups you can add a second layer of chocolate before setting them.
Ways to Serve
You can serve these Chocolate Mousse Cups as a show-stopping dessert for dinner parties or keep them as a sweet treat for family nights because they look polished yet remain incredibly simple to serve. I often place them on small plates with a dusting of powdered sugar or drizzle a little berry coulis around the edges for extra elegance. They also work beautifully on dessert boards especially when paired with cookies or additional fresh fruit.
Storage Instructions
I store the filled cups in the refrigerator for up to two days and keep them covered to prevent the mousse from absorbing fridge odors. If I want to prepare ahead I make the chocolate cups a day early and fill them just before serving. I avoid freezing them because the mousse texture can separate.
Frequently Asked Questions
How do I keep my Chocolate Mousse Cups from cracking?
Let the chocolate set fully and peel the balloon slowly to prevent breakage.
Can I use dark chocolate instead of milk chocolate for the cups?
Yes, dark chocolate works beautifully and gives a more intense flavor.
Do Chocolate Mousse Cups hold up at room temperature?
Only briefly because the chocolate can soften so I keep them chilled until serving.
See You in the Kitchen
I hope you feel inspired to try these Chocolate Mousse Cups because they’re charming delicious and surprisingly easy to make. I can’t wait to hear how yours turn out so don’t forget to save the recipe and share your results with me.
Happy Cooking!
Print
Chocolate Mousse Cups
- Total Time: 35 minutes plus chilling
- Yield: 6 cups
- Diet: Vegetarian
Description
This easy chocolate mousse cups recipe is one of the best quick dessert ideas perfect for parties and healthy-inspired celebrations. These simple chocolate cups are fun to make and deliver a rich airy mousse that feels elegant yet approachable. Great for birthdays holidays family gatherings or when you just want a quick homemade treat!
Ingredients
- 2 cups melted chocolate
- 1 1/2 cups heavy cream
- 3 eggs
- 1/3 cup sugar
- 1 teaspoon vanilla extract
- Fresh berries
- Whipped cream
Instructions
- Wash dry and inflate balloons to small bowl size.
- Melt chocolate in a heatproof bowl until smooth.
- Dip balloons into chocolate and place on parchment to chill.
- Whip heavy cream to soft peaks.
- Whisk eggs with sugar over gentle heat then fold in melted chocolate and whipped cream.
- Pop and peel balloons from set chocolate cups.
- Fill cups with mousse and chill.
- Top with berries and whipped cream before serving.
Notes
- Chill balloons before dipping for an even coating.
- Add espresso powder for richer chocolate flavor.
- Double coat the chocolate for sturdier cups.
- Prep Time: 25 minutes
- Cook Time: 10 minutes
- Category: Dessert
- Method: No Bake
- Cuisine: American
Nutrition
- Serving Size: 1 cup
- Calories: 380
- Sugar: 24g
- Sodium: 40mg
- Fat: 28g
- Saturated Fat: 17g
- Unsaturated Fat: 9g
- Trans Fat: 0g
- Carbohydrates: 30g
- Fiber: 3g
- Protein: 6g
- Cholesterol: 115mg